The Perfect 15-Minute Full Body Workout for Busy People

No Gym? No Problem! Try this 15-Minute Full Body Workout at Home

Introduction

Are you looking for a quick, yet effective full-body workout that you can do in just 15 minutes? Look no further! This workout plan is designed to target your entire body muscles, and all you need are some hand weights. Let’s dive in!

The Workout Plan

Here are ten basic exercises that make up our 15-minute full body workout:

  1. Burpees: Start with 3 sets of 10 reps. To make it more challenging, try doing burpees with a push-up or a jump at the end.
  2. Squats: Grab your hand weights and do 3 sets of 12 reps. To progress, increase the weight or try squat jumps.
  3. Step-ups: Use a chair or bench to perform 3 sets of 10 reps per leg. Make it harder by adding a knee lift at the top.
  4. Squat press: With your hand weights, do 3 sets of 12 reps. Increase the weight for more challenge.
  5. Squat-curl-press: Holding your hand weights, perform 3 sets of 12 reps each. Try adding a shoulder press at the top for progression.
  6. Single arm hinge and swing: Start with 3 sets of 10 reps per arm. To make it more challenging, try doing it with a heavier weight.
  7. Deadlift row: Use your hand weights to perform 3 sets of 12 reps. Make it harder by adding a row at the top.
  8. Side squat to overhead press: Do 3 sets of 10 reps per side. Increase the weight for more challenge.
  9. Single arm clean and press: Start with 3 sets of 10 reps per arm. To progress, increase the weight or try doing it with both arms.
  10. Plank: Aim for holding the plank for 30 seconds to one minute. To make it more challenging, try lifting one leg or one arm off the ground.

Remember to maintain proper form throughout to prevent injuries and maximize results.

Exercise Instructions

Here are the simple instructions for each exercise:

  1. Burpees:
    • Start standing with feet hip-width apart.
    • Squat down and plant hands firmly on the ground.
    • Jump feet back into a plank position, forming a straight line from head to heels.
    • With control and an engaged core, drop knees, hips, and chest to the floor.
    • Press back up to plank.
    • Jump feet back up to hands.
  2. Squats:
    • Stand tall with your hands by your sides, feet shoulder-width apart, and toes pointed forward.
    • Keeping your back flat and core braced, push your hips back, bend your knees, and lower your body until your thighs are parallel to the floor.
  3. Step-ups:
    • Face a step, box, or bench.
    • Interlace your fingers and place your hands behind your head.
    • Pull your elbows back in line with the back of your head.
    • Place an arch in your lower back.
    • Step up with your right leg.
    • Lift your left leg up until your knee is hip height, making a ninety-degree bend at the knee and hip.
  4. Squat press:
    • Stand with feet shoulder-width apart and hold a pair of dumbbells at shoulder height.
    • Lower into a squat position by pushing hips back and bending knees to lower the body as far as possible without losing the natural arch of the lower back.
    • Push heels into the ground to stand up out of the squat position while pressing weights overhead.
  5. Squat-curl-press:
    • Stand with feet shoulder-width apart and hold a pair of dumbbells at arm’s length by sides, palms facing forward.
    • Lower into a squat position by pushing hips back and bending knees to lower the body as far as possible without losing the natural arch of the lower back.
    • Push heels into the ground to stand up out of the squat position while curling weights to shoulders.
    • Press weights overhead.
  6. Single arm hinge and swing:
    • Stand with feet hip-width apart and hold a dumbbell in one hand in front of thigh.
    • Hinge at hips to lower torso until it’s almost parallel to floor while letting dumbbell hang at arm’s length from shoulders.
    • Bend knees slightly and brace core.
    • Swing dumbbell between legs while keeping core engaged.
  7. Deadlift row:
    • Stand with feet hip-width apart and hold a pair of dumbbells at arm’s length in front thighs, palms facing body.
    • Hinge at hips to lower torso until it’s almost parallel to floor while letting dumbbells hang at arm’s length from shoulders.
    • Bend knees slightly and brace core.
    • Pull dumbbells to sides of torso by squeezing shoulder blades together.
  8. Side squat to overhead press:
    • Stand with feet hip-width apart and hold a pair of dumbbells at shoulder height, elbows bent and palms facing each other.
    • Take a big step to side with right foot and lower into a squat by pushing hips back and bending knees.
    • Push off right foot to return to start while pressing weights overhead.
  9. Single arm clean and press:
    • Stand with feet hip-width apart and hold a dumbbell in one hand in front of thigh.
    • Bend at hips and knees while letting dumbbell hang at arm’s length from shoulders.
    • Pull dumbbell straight up close to body until it reaches chest level while quickly dipping body underneath it by bending knees.
  10. Plank:
    • Start on all fours with forearms flat on the ground, elbows under shoulders, legs extended behind you, and feet together so that body forms a straight line from head to heels.

Remember to always maintain proper form during these exercises to prevent injury. If you’re new to these exercises or have any health concerns, it’s a good idea to talk to a fitness professional or healthcare provider before trying them out. Enjoy your workout! 😊

Making Your Exercises More Challenging

To make these exercises more challenging, you can increase the number of sets or reps, add more weight, or decrease rest time between sets. You can also try different variations of these exercises.

Progressing Your Workout

Progression is key to continuous improvement and avoiding plateaus. You can progress by increasing the intensity (more weight, more reps), increasing the frequency (more workout days), or trying more advanced exercise variations.

Weekly Workout Schedule

A good weekly schedule could be:

  • Monday: Full Body Workout
  • Tuesday: Rest
  • Wednesday: Full Body Workout
  • Thursday: Rest
  • Friday: Full Body Workout
  • Saturday: Rest
  • Sunday: Rest

Remember, rest is crucial for muscle recovery and growth!

Conclusion

This 15-minute full body workout is perfect for those with busy schedules. With just a pair of hand weights and a little determination, you can effectively work your entire body muscles in no time.

Remember, consistency is key! Stick with it, and you’ll see results you want.
​The Best Fat-Burning Cardio Exercises for Women


Your life is busy, whether you work at a paid job or stay at home with kids. You have chores to do and errands to run, while somehow finding time to nurture relationships with partner, family, and friends. It’s hard to find the time to exercise! When you can squeeze in a workout, you want activities that burn fat, can be done pretty quickly, and don’t require tons of equipment or preparation. The best choice for all these needs? Aerobic activities that get your heart pumping and your metabolism jumping. Some you can do at home. No gym membership or equipment required.

Here are some great exercises to try:

Running

Running isn’t for everyone, but it’s a fantastic way to burn calories quickly if you can do it safely (check with your doctor first). You can do it just about anywhere or even inside on a treadmill, and you only need a sports bra and a good pair of running shoes to get started. Try mixing up jogging with bursts of faster running for maximum results.

Walking

Walking at any speed, even just a stroll, is healthier than sitting around. However, to get an effective workout in a short time, you need to keep a good pace. If you feel a bit breathless but can still speak comfortably, you are in a good zone. It doesn’t burn as many calories as running, but it is easier on your feet and joints. You can wear a weighted vested to make this more challenging.

Aerobics

Do you remember your mom doing Jane Fonda or Denise Austin workouts? Aerobics has been popular for decades, and for good reason — it works! It’s fun and energizing to do, and you can burn a lot of calories in a short time, especially if you make large, exaggerated movements. Jane and Denise are still creating new workout videos, and there are tons of other options, including low-impact workouts and even “chair aerobics” designed for seniors.

Dancing

Dance crosses over to aerobics with workouts like Zumba or Jazzercize, but there are lots of other ways to get your groove on and burn off some fat while you do it. You can take a dance class to learn to waltz or tango, or hit a club for a girl’s night out. But the easiest way to do it is to just crank up some favorite tunes and go to town in your living room. You can combine it with housecleaning chores, or squeeze in 5-minute bursts during tv commercials.

Bicycling

If you have a safe outdoor area for bike riding, it’s a perfect way to get in an aerobic workout and enjoy some fresh air. But you can also use a stationary bike at home or in the gym, or to maximize your calorie burn, try a spinning class.

Jumping Jacks

You remember these from gym class back in the day. Jumping jacks burn calories, get your whole body revved up, and best of all, don’t take long and can happen anywhere. Do a set of 50-100 when you wake up in the morning, or during commercials while watching television. Move quickly with big arm and leg movements for the best effect.

Rebounding

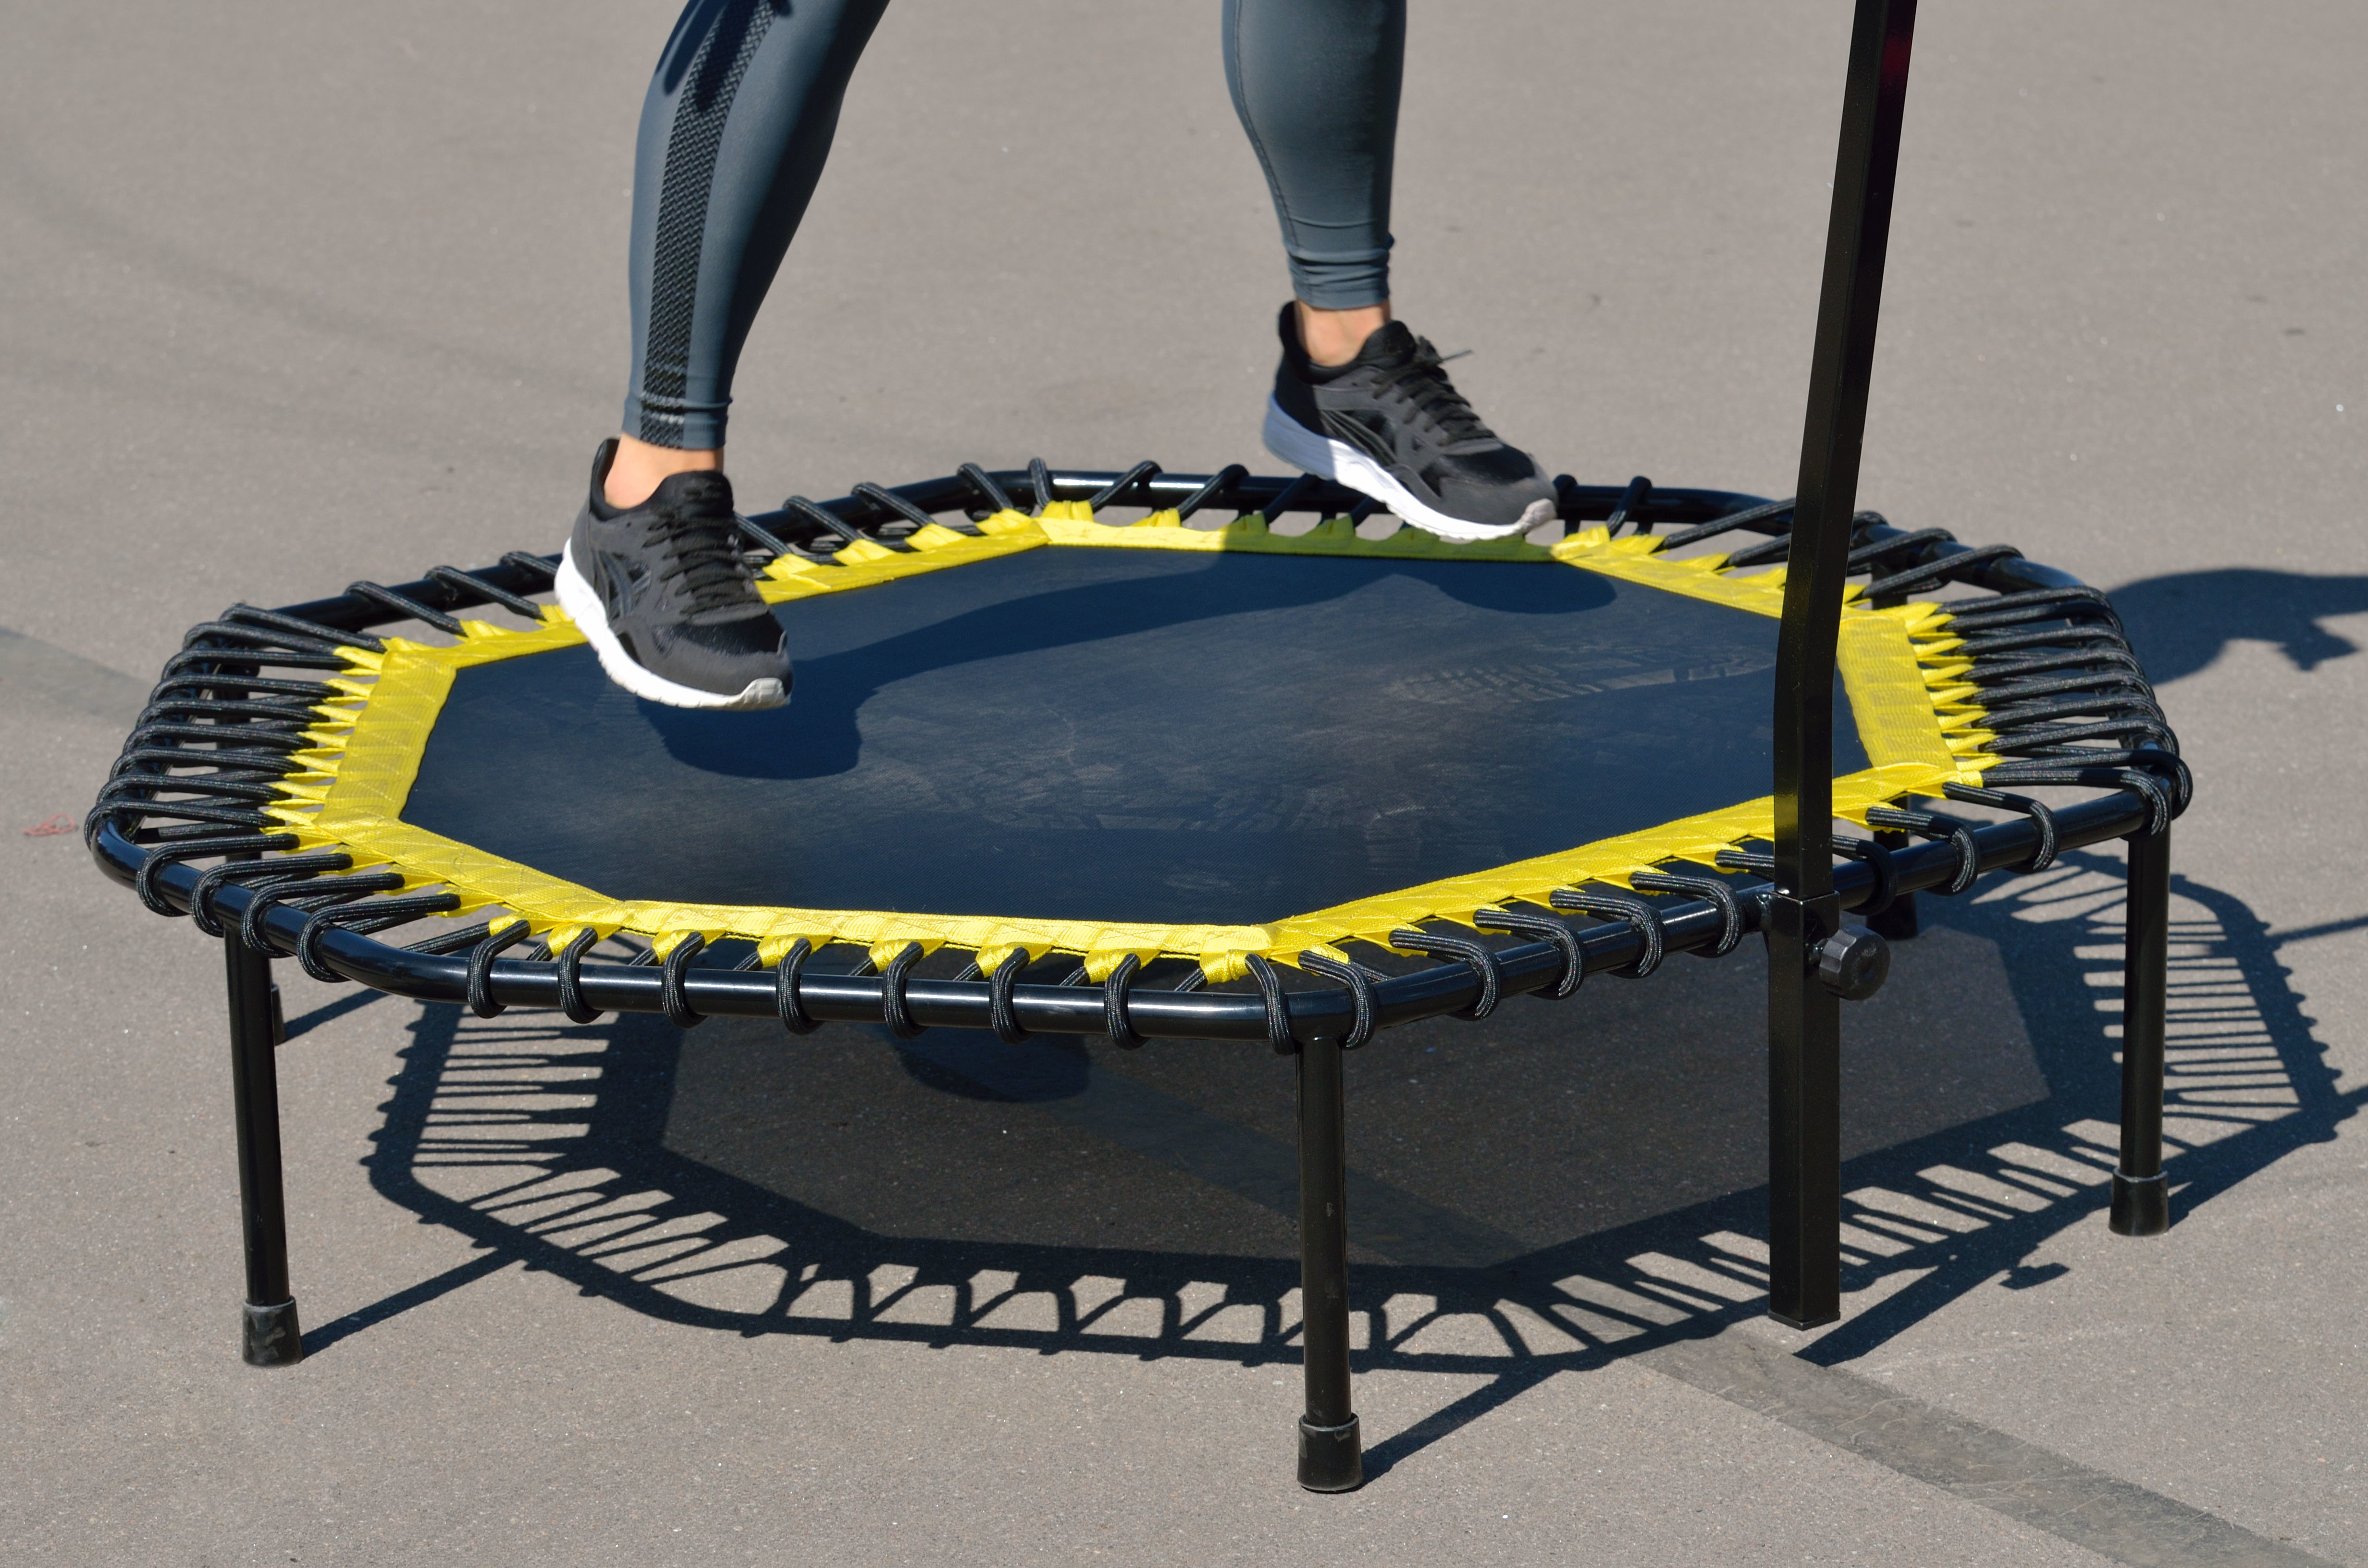
Rebounding is one of the exercises that astronauts do to stay fit on the space station, but it works great down here on earth, too. All you need is a small trampoline that you can bounce on. You can keep it as simple as just bouncing up and down while watching tv or listening to music or a podcast, or you can try a class at a gym where you combine your trampoline with aerobic routines.

Swimming

Unlike most of the other exercises, you can’t swim just anywhere. But if you have a pool in your backyard or a nearby neighborhood or gym pool, it’s one of the best ways to burn a lot of fat in a short time, and it’s very easy on your joints. Standard freestyle swimming works well, but if you can do breast or butterfly stroke, you will burn the most calories in each movement because these strokes require full body participation. Twenty or thirty minutes in a lap lane or lap pool and you will be fired up for the rest of the day.

Whatever exercise you choose, make sure you drink enough water, choose healthy foods, and watch your overall caloric intake. Just make sure you are eating enough to avoid pushing your body into starvation mode because it will hang onto that fat instead of burning it off. If you are really crunched for time, break up your session. All you need is 30 mins a day 5 days a week.  You can break you time up in two 15mins session.

Last but not least, any of the above can be use to perform a HIIT workout.

​​ 5 Ways to Protect Your Knees When You Exercise

​​

Knee problems can flare up at any age, and they’re inconvenient!  In some cases, knee pain can be severe enough that it’s difficult to work out or even get around comfortably.  While osteoarthritis of the knee is more common in older people, younger people can experience chronic knee pain due to a condition called patellofemoral pain syndrome, also known as jumper’s knee. No one knows exactly what causes jumper’s knee, but it can hang around for months and cause discomfort when you run, climb stairs, and squat. People who have anatomical problems such as poor knee alignment are more susceptible to jumper’s knee.  The other risk factor is knee overuse and muscle imbalances in the lower body. Too much running and jumping are common causes.

Knowing that knee pain can make it hard to exercise and comfortably get around, take steps to lower your risk of knee injury and chronic knee conditions like arthritis of the knee and jumper’s knee. Knees are forced to bear the force of 2 to 3 times your body weight when you go up and down stairs. So, the tendons, ligaments, and muscles that support your knees take a beating!  Here are some steps you can take to lower your risk of knee injuries and chronic knee pain when you exercise.

Wear the Right Shoes

Don’t buy exercise shoes based only on how they look or how much they cost. They perform a useful function! Choose shoes based on how well they support your feet. Consider having a professional at a sports store look at your feet and help you select the right shoe. It’s that important.  When your feet have proper support, it takes stress off your knees. For example, if you have a low arch, your feet need arch support. Otherwise, you’ll have a tendency to turn your foot inward when you walk or run. If you’ve had knee, foot, ankle, or hip problems in the past, see a sports medicine physician and have them analyze your gait. Anatomic problems can often be corrected with shoe inserts. Correcting existing foot problems and choosing the right shoes are small steps you can take to keep your knees healthy!

Strengthen the Right Muscles

Research shows strong quadriceps, the muscles in the front of your thighs, protect against a knee injury. Having strong quads may also lower the risk of developing knee arthritis by absorbing some of the force placed on the knee when you walk or run. You may have heard that squats are bad for the knees. But research doesn’t support the idea that squats are harmful if you use good form. In fact, squats are beneficial for knee health because they strengthen the quadriceps muscles, the muscle in the front of the thigh that supports the knee. One mistake people make when squatting that places stress on their knees is they let their knees move too far forward when they squat, sometimes to the point that their knees track over their toes. Bad idea!  Ideally, you want your knees to move as little as possible when you squat.

Cross-Train Cross-Train

Don’t do the same training over and over. Rather vary the types of workouts you do to avoid repetitive stress injuries. For example, runners are prone toward Achilles tendonitis because they stress the tendons by doing the same repetitive movements without giving the tendons enough time to recover.  If you have a history of knee injuries or arthritis, the bulk of your workouts should be low impact. However, low impact doesn’t mean low intensity. You can still get an effective workout without pounding your legs against a hard surface. If you do high-impact exercise, do it on a softer surface to protect your knees. Also, don’t increase the intensity or duration of your workouts too quickly. Give your muscles, tendons, ligaments, and joints a chance to adapt to the stress you place on them.

Correct Muscle Imbalances

Recent research, including a study published in the Journal of Aging Research, suggests that muscle weakness and muscle imbalances play a role in osteoarthritis of the knee. Therefore, strengthening muscles in the lower body symmetrically, including the quads and the opposing muscles, the hamstrings helps maintain balanced strength to support the knees. Studies also show that exercise has an anti-inflammatory effect that may help keep the knee joint healthy and reduce age-related cartilage breakdown. So, make sure your lower body workouts are balanced. Work the muscles in the front of your thighs, the quads, as thoroughly as you work the hamstrings and glutes in the back. Make sure you’re doing core strengthening exercise as well.

Watch Your Weight

Now that you know how much force your knees have to bear when you walk and when you go up and down stairs, it’s easy to see why not becoming overweight or obese is so important. Obesity, along with genetics and prior knee injury, and the biggest risk factors for osteoarthritis of the knee. Fortunately, exercise helps control body weight. Plus, movement helps lubricate the joints and keeps them healthy.

Conclusions

Now, you have a better idea of how to protect your knees when you exercise. You need your knees for a lifetime. Don’t take them for granted when you train. Take steps to protect them and lower your risk of injury. Also, if you have knee pain, stiffness, or your knees are giving out or locking up, see a physician. There are other more serious conditions, like a meniscal tear that can cause knee discomfort too. Don’t ignore knee pain.

References:

Ortho Info. “Patellofemoral Pain Syndrome”

Arthritis Rheum. 2009 Jan;60(1):189-98. doi: 10.1002/art.24182.

Int J Sports Phys Ther. 2014 May; 9(3): 320-328.

PM R. 2012 May;4(5 Suppl):S117-21. doi: 10.1016/j.pmrj.2012.02.011.

Journal of Aging Research. Volume 2011, Article ID 374653, 6 pages.

Short Summary:

.