The Best 15-Minute Lower Body Workout for Busy People

15-Minute Lower Body Workout: Your Ultimate Guide to Toned Legs and Glutes

Introduction

Are you looking for a quick, effective lower body workout that you can do in just 15 minutes? Look no further! Improving your lower body strength and appearance is now achievable with a fast and efficient 15-minute lower body workout plan. This concise program, designed to fit into even the busiest schedules, features 10 targeted exercises focusing on your legs and glutes. By dedicating just a quarter of an hour to this routine, you can work towards a sculpted, more defined lower body.

The benefits of working out your lower body extends beyond aesthetics; strengthening your lower body can improve your overall physical performance, boost your metabolism, and even enhance your posture and balance. This workout is an ideal solution for those aiming to develop a stronger, well-toned lower body without the need for lengthy gym sessions.

Targeted Training: A 15-Min Workout Focusing on Lower Body Muscles

The lower body consists of several major muscle groups, each with specific functions:

  1. Quadriceps: Located at the front of the thigh, the quadriceps are responsible for extending the knee and play a crucial role in walking, running, jumping, and squatting.
  2. Hamstrings: Situated at the back of the thigh, the hamstrings are involved in bending the knee and extending the hip. They are key in activities like running, jumping, and climbing.
  3. Gluteal Muscles (Glutes):
    • Gluteus Maximus: The largest muscle in the body, it’s crucial for hip extension, lateral rotation, and abduction. It’s essential in rising from a sitting position, climbing stairs, and staying upright.
    • Gluteus Medius and Minimus: These muscles are important for hip abduction and stabilization of the pelvis, especially when standing on one leg.
  4. Calves:
    • Gastrocnemius: This muscle aids in bending (flexing) the knee and plantarflexing the ankle (pointing the toes).
    • Soleus: Located beneath the gastrocnemius, it’s primarily involved in plantarflexing the ankle.
  5. Hip Adductors: A group of muscles (like adductor magnus, longus, and brevis) along the inner thigh, important for moving the thigh towards the body’s midline.
  6. Hip Flexors:
    • Iliopsoas: A combination of the iliacus and psoas major muscles, important in flexing the hip and stabilizing the lower spine.
    • Rectus Femoris (part of the quadriceps): Assists in hip flexion.
  7. Tibialis Anterior: Located in the shin, it dorsiflexes the foot (lifting the foot towards the shin) and inverts it.

Each of these muscles plays a pivotal role in various movements and activities involving the lower body, contributing to mobility, balance, and overall physical performance.

The 15-Minute Lower Body Workout Plan

  1. Squats: Stand with feet hip-width apart, bend your knees, and lower your body until your thighs are parallel to the floor. Then, push back up. Do 3 sets of 10 reps. This targets your quadriceps, hamstrings, and glutes.
  2. Lunges: Stand tall, step forward with one leg, and lower your body until both knees form a 90-degree angle. Push back up and repeat with the other leg. Do 3 sets of 10 reps per leg. This works your quadriceps, hamstrings, and glutes2.
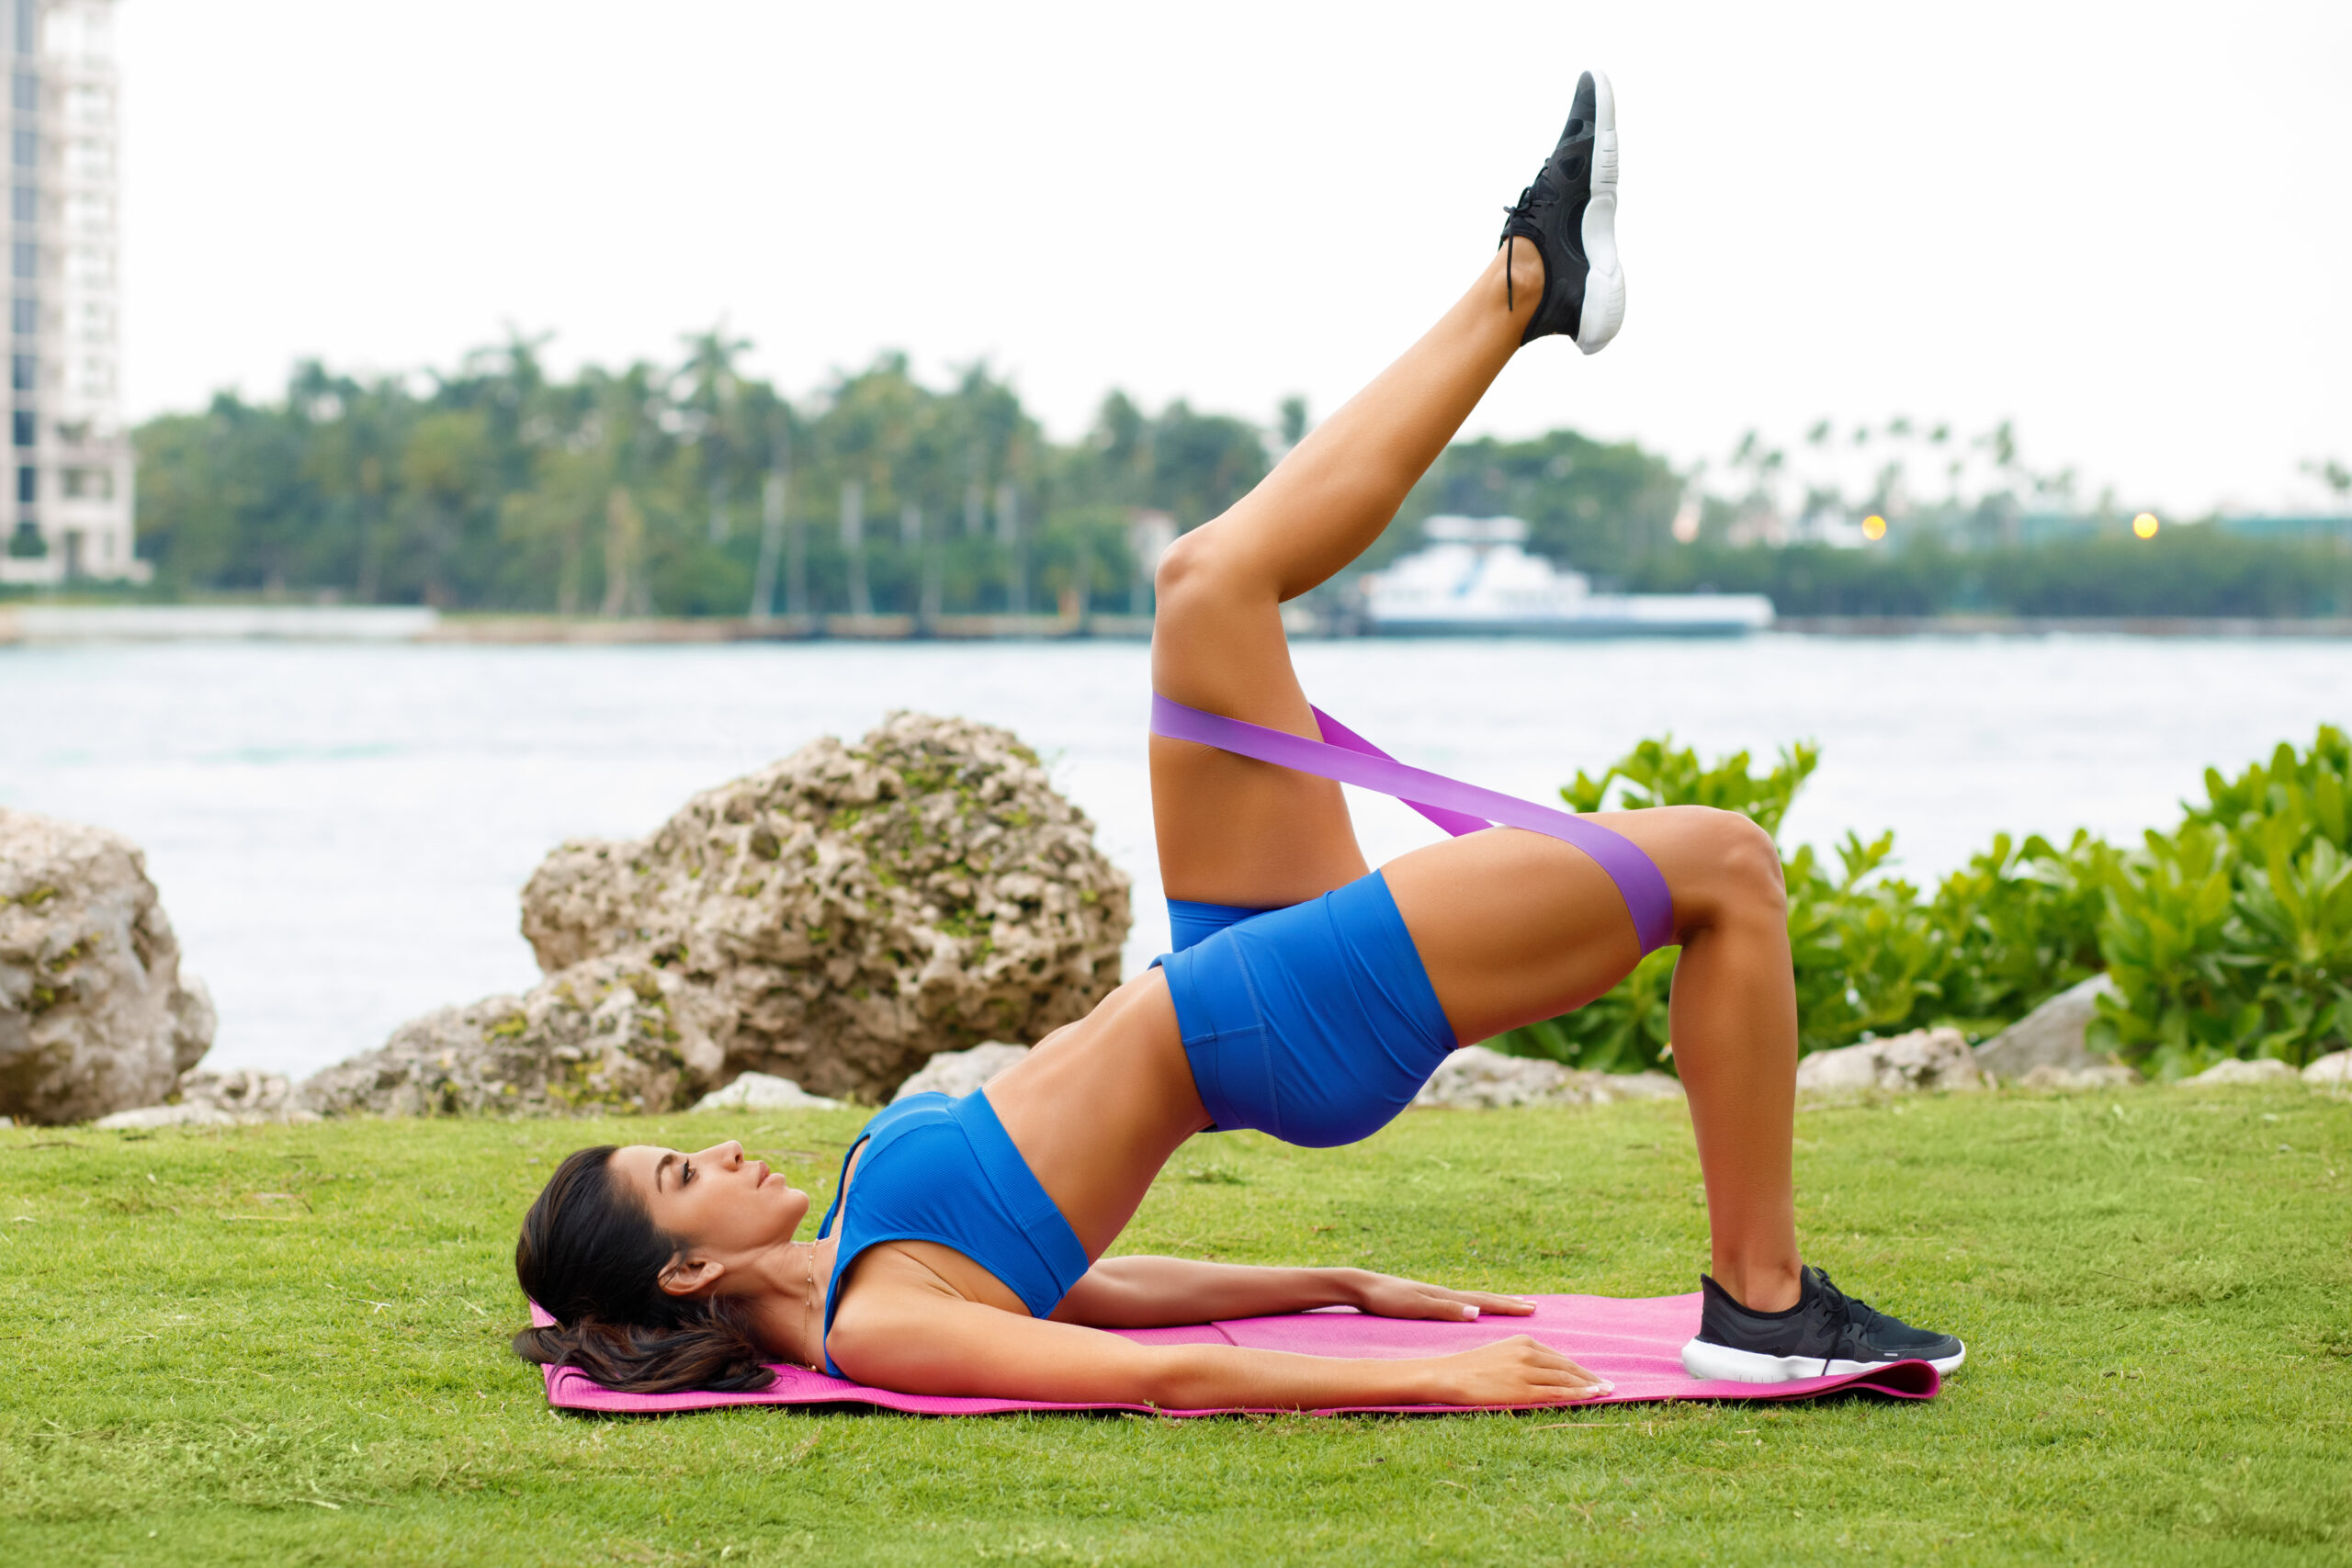
  3. Glute Bridge: Lie on your back with knees bent and feet flat on the floor. Lift your hips to form a straight line from knees to shoulders. Lower back down. Do 3 sets of 15 reps. This targets your glutes and hamstrings.
  4. Deadlifts: Stand with feet hip-width apart, bend at your hips and knees, and grab a pair of dumbbells. Without changing the bend in your knees, push your hips forward and stand up straight. Lower the dumbbells back down. Do 3 sets of 10 reps. This works your hamstrings and glutes.
  5. Step-ups: Stand in front of a bench or step, step up with one foot, followed by the other, then step back down. Do 3 sets of 10 reps per leg. This targets your quadriceps, hamstrings, and glutes.
  6. Side Leg Lifts: Lie on one side with legs extended. Lift the top leg as high as comfortable while keeping hips steady. Lower it back down. Do 3 sets of 15 reps per leg. This works your outer thighs and glutes.
  7. Donkey Kicks: Get on all fours, lift one leg off the floor, and push it upward towards the ceiling while keeping it bent at a 90-degree angle. Lower it back down without touching the floor and repeat. Do 3 sets of 15 reps per leg. This targets your glutes.
  8. Calf Raises: Stand tall with feet hip-width apart, rise onto the balls of your feet as high as possible, then lower back down slowly. Do 3 sets of 20 reps. This works your calf muscles.
  9. Jump Squats: Perform a regular squat but jump up explosively when rising up to the starting position. Land as softly as possible which requires control. Do 3 sets of 10 reps.
  10. Donkey Kicks: Get on all fours, lift one leg off the floor while keeping it bent at a 90-degree angle, then push it upward towards the ceiling before lowering it back down without touching the floor. Do 3 sets of 15 reps per leg.

Making It More Challenging

Here is how to make these lower body exercises’ more challenging:

  • Increase the number of reps or sets.
  • Add weights to exercises like squats, lunges, deadlifts, step-ups.
  • Increase the height of the step for step-ups.
  • Perform exercises slower to increase muscle tension.
  • Use resistance bands

15 – Mins Lower Body Weekly Workout Schedule

Aim to do this 15-mins lower body workout three times a week on non-consecutive days (e.g., Monday, Wednesday, Friday) to allow for recovery.

Conclusion

Remember to warm up before starting these exercises and cool down afterward.

This  15-minute lower body workout is perfect for those who want an effective workout in a short amount of time! Remember to listen to your body and adjust as needed.

Be safe and consistent. Enjoy your  journey towards a leaner and tighter lower body.

The Perfect 15-Minute Full Body Workout for Busy People

No Gym? No Problem! Try this 15-Minute Full Body Workout at Home

Introduction

Are you looking for a quick, yet effective full-body workout that you can do in just 15 minutes? Look no further! This workout plan is designed to target your entire body muscles, and all you need are some hand weights. Let’s dive in!

The Workout Plan

Here are ten basic exercises that make up our 15-minute full body workout:

  1. Burpees: Start with 3 sets of 10 reps. To make it more challenging, try doing burpees with a push-up or a jump at the end.
  2. Squats: Grab your hand weights and do 3 sets of 12 reps. To progress, increase the weight or try squat jumps.
  3. Step-ups: Use a chair or bench to perform 3 sets of 10 reps per leg. Make it harder by adding a knee lift at the top.
  4. Squat press: With your hand weights, do 3 sets of 12 reps. Increase the weight for more challenge.
  5. Squat-curl-press: Holding your hand weights, perform 3 sets of 12 reps each. Try adding a shoulder press at the top for progression.
  6. Single arm hinge and swing: Start with 3 sets of 10 reps per arm. To make it more challenging, try doing it with a heavier weight.
  7. Deadlift row: Use your hand weights to perform 3 sets of 12 reps. Make it harder by adding a row at the top.
  8. Side squat to overhead press: Do 3 sets of 10 reps per side. Increase the weight for more challenge.
  9. Single arm clean and press: Start with 3 sets of 10 reps per arm. To progress, increase the weight or try doing it with both arms.
  10. Plank: Aim for holding the plank for 30 seconds to one minute. To make it more challenging, try lifting one leg or one arm off the ground.

Remember to maintain proper form throughout to prevent injuries and maximize results.

Exercise Instructions

Here are the simple instructions for each exercise:

  1. Burpees:
    • Start standing with feet hip-width apart.
    • Squat down and plant hands firmly on the ground.
    • Jump feet back into a plank position, forming a straight line from head to heels.
    • With control and an engaged core, drop knees, hips, and chest to the floor.
    • Press back up to plank.
    • Jump feet back up to hands.
  2. Squats:
    • Stand tall with your hands by your sides, feet shoulder-width apart, and toes pointed forward.
    • Keeping your back flat and core braced, push your hips back, bend your knees, and lower your body until your thighs are parallel to the floor.
  3. Step-ups:
    • Face a step, box, or bench.
    • Interlace your fingers and place your hands behind your head.
    • Pull your elbows back in line with the back of your head.
    • Place an arch in your lower back.
    • Step up with your right leg.
    • Lift your left leg up until your knee is hip height, making a ninety-degree bend at the knee and hip.
  4. Squat press:
    • Stand with feet shoulder-width apart and hold a pair of dumbbells at shoulder height.
    • Lower into a squat position by pushing hips back and bending knees to lower the body as far as possible without losing the natural arch of the lower back.
    • Push heels into the ground to stand up out of the squat position while pressing weights overhead.
  5. Squat-curl-press:
    • Stand with feet shoulder-width apart and hold a pair of dumbbells at arm’s length by sides, palms facing forward.
    • Lower into a squat position by pushing hips back and bending knees to lower the body as far as possible without losing the natural arch of the lower back.
    • Push heels into the ground to stand up out of the squat position while curling weights to shoulders.
    • Press weights overhead.
  6. Single arm hinge and swing:
    • Stand with feet hip-width apart and hold a dumbbell in one hand in front of thigh.
    • Hinge at hips to lower torso until it’s almost parallel to floor while letting dumbbell hang at arm’s length from shoulders.
    • Bend knees slightly and brace core.
    • Swing dumbbell between legs while keeping core engaged.
  7. Deadlift row:
    • Stand with feet hip-width apart and hold a pair of dumbbells at arm’s length in front thighs, palms facing body.
    • Hinge at hips to lower torso until it’s almost parallel to floor while letting dumbbells hang at arm’s length from shoulders.
    • Bend knees slightly and brace core.
    • Pull dumbbells to sides of torso by squeezing shoulder blades together.
  8. Side squat to overhead press:
    • Stand with feet hip-width apart and hold a pair of dumbbells at shoulder height, elbows bent and palms facing each other.
    • Take a big step to side with right foot and lower into a squat by pushing hips back and bending knees.
    • Push off right foot to return to start while pressing weights overhead.
  9. Single arm clean and press:
    • Stand with feet hip-width apart and hold a dumbbell in one hand in front of thigh.
    • Bend at hips and knees while letting dumbbell hang at arm’s length from shoulders.
    • Pull dumbbell straight up close to body until it reaches chest level while quickly dipping body underneath it by bending knees.
  10. Plank:
    • Start on all fours with forearms flat on the ground, elbows under shoulders, legs extended behind you, and feet together so that body forms a straight line from head to heels.

Remember to always maintain proper form during these exercises to prevent injury. If you’re new to these exercises or have any health concerns, it’s a good idea to talk to a fitness professional or healthcare provider before trying them out. Enjoy your workout! 😊

Making Your Exercises More Challenging

To make these exercises more challenging, you can increase the number of sets or reps, add more weight, or decrease rest time between sets. You can also try different variations of these exercises.

Progressing Your Workout

Progression is key to continuous improvement and avoiding plateaus. You can progress by increasing the intensity (more weight, more reps), increasing the frequency (more workout days), or trying more advanced exercise variations.

Weekly Workout Schedule

A good weekly schedule could be:

  • Monday: Full Body Workout
  • Tuesday: Rest
  • Wednesday: Full Body Workout
  • Thursday: Rest
  • Friday: Full Body Workout
  • Saturday: Rest
  • Sunday: Rest

Remember, rest is crucial for muscle recovery and growth!

Conclusion

This 15-minute full body workout is perfect for those with busy schedules. With just a pair of hand weights and a little determination, you can effectively work your entire body muscles in no time.

Remember, consistency is key! Stick with it, and you’ll see results you want.

10-Minute Workout at Home: Quick, Effective, and No Equipment Needed!

Portrait of a confident asian fitness woman doing squats

In today’s fast-paced world, finding time for a full-blown gym session can be challenging. But what if we told you that you could get a solid workout in just 10 minutes, right in the comfort of your home? Yes, it’s possible! Here’s a listicle of a 10-minute workout that requires no equipment. Plus, we’ve added tips on how to make each move harder for those who want an extra challenge.

  1. Jumping Jacks
    • Sets: 1
    • Reps: 30 seconds
    • How to Make it Harder: Increase speed or wear ankle weights.
    • Instructions: Stand with feet together and hands at your sides. Jump while spreading your legs and raising your arms overhead. Return to the starting position and repeat.
  2. Push-Ups
    • Sets: 1
    • Reps: 15
    • How to Make it Harder: Elevate your feet or try one-handed push-ups.
    • Instructions: Start in a plank position with hands under shoulders. Lower your body until your chest almost touches the floor. Push yourself back up to the starting position.
  3. High Knees
    • Sets: 1
    • Reps: 30 seconds
    • How to Make it Harder: Increase speed or hold a light dumbbell in each hand.
    • Instructions: Stand tall and run in place, bringing your knees up as high as possible.
  4. Plank
    • Sets: 1
    • Duration: 30 seconds
    • How to Make it Harder: Try a side plank or lift one leg off the ground.
    • Instructions: Begin in a push-up position but with your weight on your forearms instead of your hands. Keep your body straight and hold.
  5. Squats
    • Sets: 1
    • Reps: 15
    • How to Make it Harder: Jump at the top of each squat or hold a heavy object in front of you.
    • Instructions: Stand with feet shoulder-width apart. Lower your body as if sitting in a chair. Push through your heels to return to the starting position.
  6. Mountain Climbers
    • Sets: 1
    • Reps: 30 seconds
    • How to Make it Harder: Increase speed or cross your knees to the opposite elbow.
    • Instructions: Start in a plank position. Bring one knee towards your chest and then quickly switch to the other knee.
  7. Tricep Dips
    • Sets: 1
    • Reps: 15
    • How to Make it Harder: Elevate your feet or place a weight on your lap.
    • Instructions: Sit on the edge of a chair or couch. Place your hands next to your hips and move your body forward. Lower yourself by bending your elbows and then push back up.
  8. Lunges
    • Sets: 1
    • Reps: 15 per leg
    • How to Make it Harder: Jump to switch legs or hold weights in each hand.
    • Instructions: Stand tall. Step forward with one leg and lower your body until both knees are bent at a 90-degree angle. Push back to the starting position and switch legs.
  9. Bicycle Crunches
    • Sets: 1
    • Reps: 30 seconds
    • How to Make it Harder: Slow down the motion or extend your legs fully.
    • Instructions: Lie on your back with hands behind your head. Bring one knee towards your chest while twisting your upper body to meet the knee with the opposite elbow.
  10. Burpees
  • Sets: 1
  • Reps: 10
  • How to Make it Harder: Add a push-up or a tuck jump at the end.
  • Instructions: Start standing. Drop into a squat position, place your hands on the ground, kick your feet back into a plank. Jump your feet back towards your hands and explode up into a jump.

Remember, consistency is key! Even if it’s just 10 minutes a day, regular exercise can make a significant difference in your health and fitness levels. Always consult with a fitness professional or physician before starting any new exercise regimen. Happy sweating!

Fitness over Fifty: Healthy Exercise Tips To Get You Started

Ball SitWhen is it Too Late in Life to Exercise?

It’s never too late to take exercise. While in later life your exercise regime won’t be the same as for younger people, it’s still important for your health. Even if you’ve never exercised before you can enjoy regular workouts. Keeping fit and healthy prolongs life, supports independent living, and improves mood.

The Positive Power of Exercise in Later Life

Whatever exercise you adopt, it will help you in several ways. Living an active life can help you off-set many of the problems of aging. It will help you keep strong and flexible, support a healthy weight, avoid disease, and keep cheerful.

 Maintain Muscle Mass

As people age, they lose muscle mass. Regular workouts help counteract this effect, rebuilding muscle tissue. Resistance training combined with stretching will keep you strong and flexible as you age.

Burn Fat and Boost Metabolism

As you get older, your metabolism slows down and you may put on weight. Regular cardiovascular exercise helps burn excess fat and keeps you trim. If you do resistance training too, the added muscle will also burn more calories and help you keep a healthy weight.

Fight Disease

Scientific research shows that you can reduce or avoid the risk of many of the diseases associated with aging by living an active life. Heart disease and high blood pressure, stroke, diabetes, osteoporosis, and even Alzheimer’s disease are all less likely if you exercise. Working out boost metabolism and keeps your immune system in good shape.

Exercise and Mental Health

If you exercise you are more likely to feel positive about yourself. One risk as you age is the possibility of social isolation and depression. Exercise can also get you out and about with other people.

What Exercise To Do?

Whatever your age when you start exercise, your needs will be different to those of someone else. Before starting any new exercise regime, it’s a good idea to see your doctor for  check-up and get clearance. A session with a training or fitness advisor can be a helpful start. If you haven’t exercised for a while, you should always start with something easy and build up to harder activities as you improve your fitness. To reach optimum health, besides eating a healthy, balanced diet, you should include the following in your regime:

Cardiovascular Exercise

Cardiovascular exercise is any activity which increases your heart rate and warms you up. Fast walking, gentle jogging, skipping rope, swimming, and gymnastics are examples of cardiovascular exercise. “Cardio” improves heart health, burns calories, and oxygenates your brain. Plug your earphones in or turn on the stereo and dance to your favorite music. Get lost in the music and just dance.

Resistance Training

Resistance training involves lifting weights or doing body-weight exercises. You don’t have to aim for bodybuilding to enjoy resistance work. Weight training builds muscle and strength and helps keep you trim. Body weight exercises such as push ups, lunges and squats can be done at home. Once you have mastered the basics you can add weights or resistance bands.

Flexibility and Balance

Exercises for flexibility and balance may include stretches and activities like yoga, tai chi, and Pilates. Keeping flexible helps you with everyday activities like gardening or housework besides decreasing your risk of injury during other exercises. Working on balance helps avoids risks associated with falling.

Functional Training

Workouts can be non- traditional when you add in functional training. Sit to stand, wall pushups, and climbing stairs are bodyweight functional exercises you can start at home without equipment. The objective of these exercises is to get you moving in ways that you normally move when going about you daily life.  For instance, sit to stand. I am sure you are already standing from a sitting position. You can do it even when you are watching TV. Here is how to do it. Proceed to sit with the back of your legs against the chair. Push your butt out in a squat and lower your body. Your butt and leg muscles will be activated.  Push up with your legs to stand all the way up before hitting the seat. You will feel your legs working .  If you need to hold on to the arm rest, you can. Repeat 8 times to start. Its important that your form is good. Therefore, practice as much as you can.

Experiment and Explore

Experiment and explore several exercise options. Low-impact exercises which don’t involve jumping and pounding are better for your joints. Walking, jogging, swimming, dancing, cycling, and racquet sports are all good options for cardiovascular exercise. Weight training under proper supervision is a good idea. Yoga, tai chi, and Pilates help with flexibility and mental health. It’s up to you how much of each you do and it can be a good idea to vary your routines to stop you getting bored. Exercising in a class or with your friends brings you physical, psychological, and social benefits.

Should You See Your Doctor?

It’s a good idea to see your doctor before you take up any new form of exercise. Your medical practitioner can advise you of any precautions you may need to take based on your current health profile. If after you exercise you experience chest pains, dizziness, nausea or any other unpleasant symptoms, talk to your doctor as soon as possible. In most cases, it will be nothing to worry about but it’s as well to be sure.

Live Strong, Live Long

Unless you have been an athlete all your life as you age your body will slow down and you won’t be able to exercise as intensively as a younger person. But that doesn’t mean you should stop altogether. With the right exercises and at the right pace, keeping active is always a good plan, whatever your time of life. And it’s never too late to start.

​​ Does Heat or Ice Work Best for Sore Muscles?


Delayed Onset Muscle Soreness (DOMS)

When you first begin a new exercise routine, it’s quite common to experience a type of muscle soreness known as delayed onset muscle soreness or DOMS. This is a common phenomenon that isn’t serious but makes your muscles feel stiff and sore for a few days.

Delayed onset muscle soreness happens because you work your muscles in a manner they’re unaccustomed to. If you just started exercising, every movement you do is unfamiliar, so DOMS is almost a given. As you progress in your training, you typically won’t experience muscle soreness unless you increase the resistance or volume of your routine or add new exercises. This is due to the “repeated bout effect,” muscles adapt to repeated stress placed on them so they’re more resistant to injury.

Delayed onset muscle soreness is more pronounced after workouts that emphasize eccentric contractions, contractions where the muscle lengthens against resistance. An example is when you bring the weights back down to the starting position during a biceps curl. You’re lengthening the muscle in a controlled manner with weight in your hands.

In most cases, the muscle soreness associated with DOMS comes 24 to 48 hours after a workout your muscles are unaccustomed to. When delayed onset muscle soreness strikes, your muscles feel stiff and movement causes discomfort, especially when you first get out of bed in the morning. However, the soreness often eases a bit when you move and the muscles warm up a bit. That’s why it’s best to do a light workout when you have DOMS rather than skipping exercise entirely. The soreness and stiffness usually last from four to seven days, but during that time, it feels uncomfortable. That’s when some people whip out a cold or hot pad to get relief. You might wonder whether it’s best to apply heat or ice to those sore muscles. What does science say?

It’s not clear what causes DOMS, but research suggests that tiny tears in muscle fibers may play a role. According to some studies, the tears create an inflammatory response that triggers muscle soreness. The inflammation is most pronounced in the first 24 to 48 hours after a DOMS-inducing workout. That’s when the application of cold is most effective. Why does cold work? Ice or a cold pack constricts the blood vessels. This constriction reduces the number of inflammatory cells that reach the injured areas. This diminishes the release of inflammatory chemicals called cytokines that cause swelling and soreness.

Does science support the use of cold for delayed onset muscle soreness? A review of 17 studies published in the Cochrane Database, an esteemed site built around evidence-based medicine, found immersion in cold water reduced muscle soreness at one day, two days, three days, and four days after exercise that induced delayed-onset muscle soreness. However, they point out that the quality of the studies wasn’t high.

Another Variation on Cold – Cryotherapy

Another “cold” approach, whole body cryotherapy also may also reduce delayed onset muscle soreness, although studies are limited. The evidence, thus far, isn’t strong enough to recommend it. Cryotherapy consists of repeated exposure to very cold, dry air in a special chamber for a few minutes at a time. Athletes sometimes use this approach, but it’s not practical for the average person. However, you may get benefits from using ice packs or taking cold baths the first 48 hours after a workout that causes muscle soreness. If you don’t have an ice pack, grab a bag of frozen vegetables from the freezer!

What about Heat?

After 48 hours or so, there’s evidence that heat may help muscle soreness. Most studies suggest that moist heat works better than dry heat as it penetrates the tissues better. Why does it work? Applying heat opens up the blood vessels to the muscle so that nutrients and oxygen can reach the tissue. Plus, it helps to relax and relieve muscle spasms.

What’s the best way to apply heat? A heating pad, a hot water bottle, or a special pad you heat in the microwave are options. Sitting in a warm sauna, if you have access to one, or a hot bath can be beneficial as well.

Conclusion

Depending on the timing, cold or heat can modestly make sore muscles due to DOMS feel better. Be careful though. Avoid using temperature extremes that can damage your skin. Also, if you have certain medical conditions like peripheral artery disease, Raynaud syndrome, or diabetes, don’t use hot or cold packs without talking to your physician.

Fortunately, whether you use a hot or cold pad or just wait it out, DOMS is self-limited. It’ll subside in less than a week. But don’t be surprised if it shows up again the next time you do a challenging strength-training workout.

References:

Cochrane Database. “Cold-water immersion for preventing and treating muscle soreness after exercise”

J Clin Med Res. 2013 Dec; 5(6): 416-425.

Medical News Today. “Heat and cold treatment: Which is best?”


How Often Do You Need to Strength Train to Build Muscle?

Corpulent male in sportswear lifting dumbbells sitting on fitness ball, activity
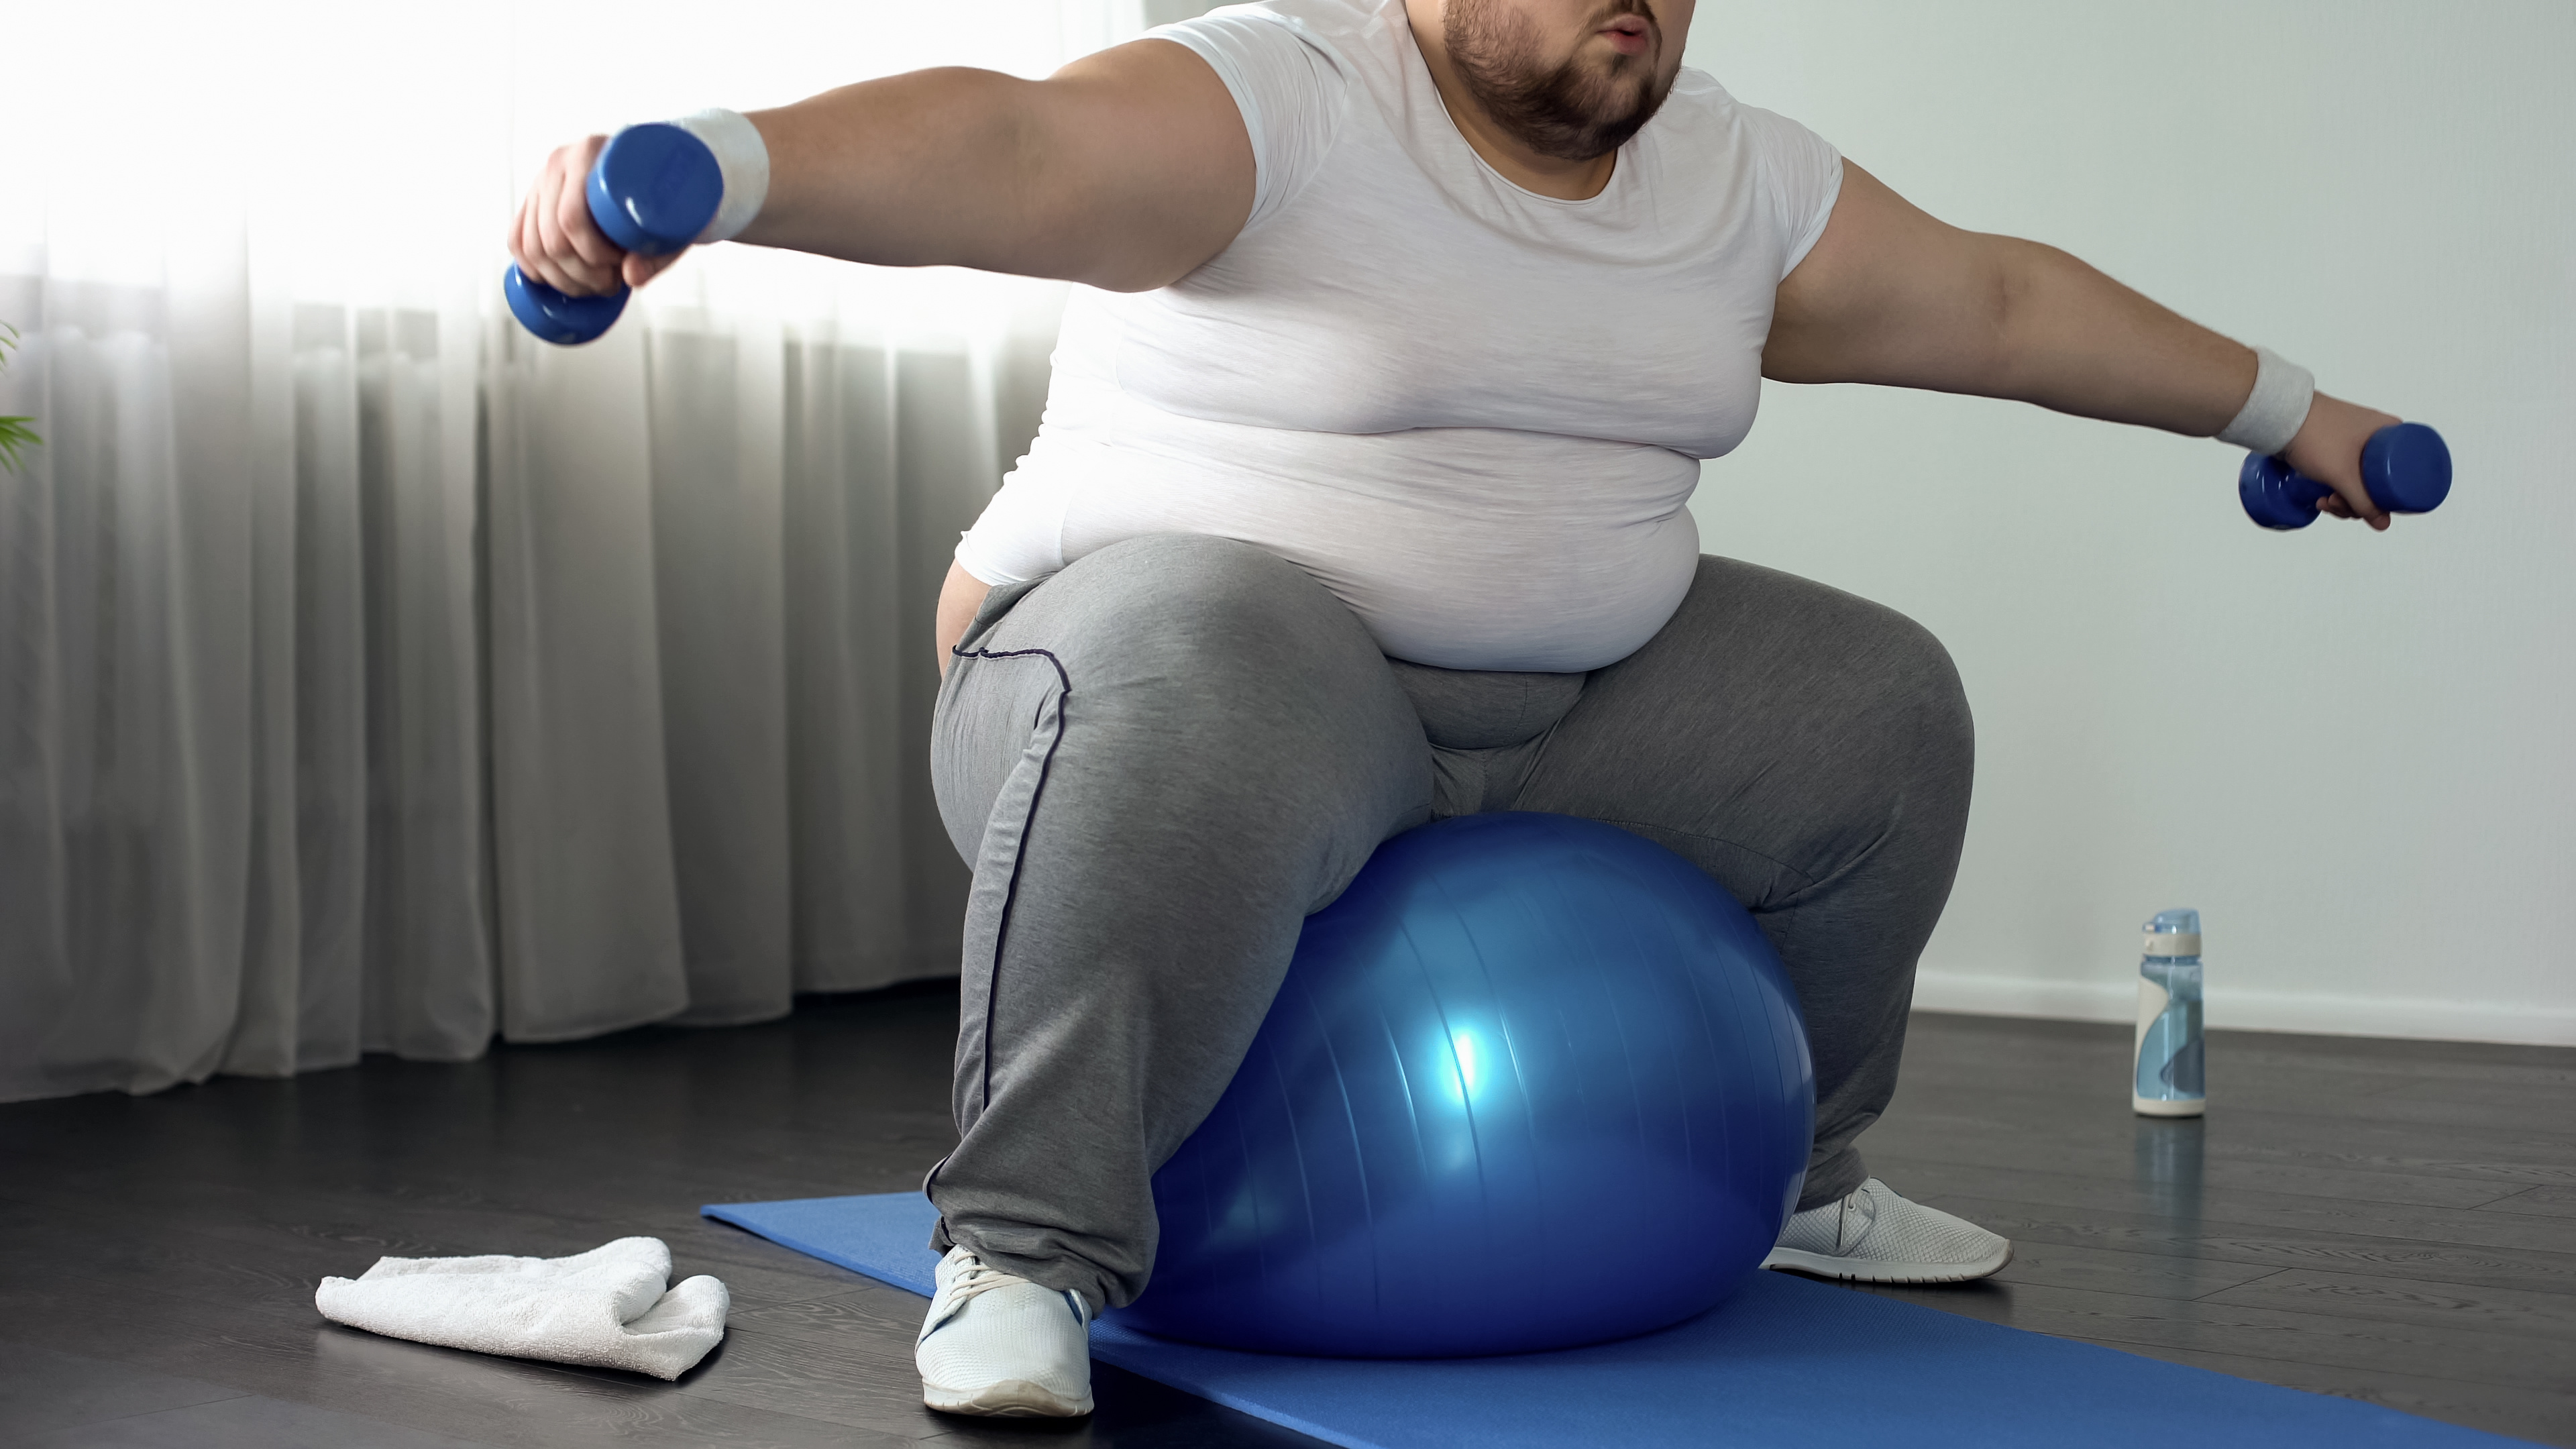
Strength training is important at all ages and stages of life, for both men and women. The good news is you don’t have to join a gym or train every day to get fitness benefits and build muscle. These days, more people use bodyweight exercises and do strength workouts at home with little or no equipment. Some invest in a few pairs of resistance bands or dumbbells to enhance their training but that’s not necessary, especially in the beginning. There’s no one way to strength train. You can work your muscles against resistance in a variety of ways, including resistance bands, dumbbells, barbells, machines, or your own body weight.

How Often Should You Strength Train?

Suppose you want to get stronger. How much time do you need to put in and how frequently do you need to train to get benefits? The frequency with which you train is a variable that can impact the hypertrophy and strength gains you make. In fact, a number of studies have looked at whether more frequent training leads to greater strength gains. What can we learn from these studies?

Frequent training is lifting three times per week or more while low-frequency training is working muscle against resistance only one time per week. Working muscle groups one time per week seems to be the minimum you can get by with and still see strength gains. Is low-frequency training as effective for strength gains?

A study published in the International Journal of Exercise Science compared strength gains subjects made when they trained three times per week as opposed to only once per week. Despite the differences in how often the subjects trained, total training volume was similar. The subjects who trained only once per week did three times the volume on their training days to even things up.

The results? After 8 weeks, strength gains between the two groups were similar. Based on this study, it appears you can train only once per week and get similar strength gains to someone who works out three times per week. The key is to do equal training volume. So, total training volume is more important than strength training frequency, based on this study.

Another study in 2012 that compared strength training 3 times per week to 6 times per week and controlled for total training volume found that more frequent training led to greater strength gains. However, this study was published in a peer-reviewed journal. Plus, it involved highly trained powerlifters.

Finally, a recent meta-analysis of 12 studies looking at the impact of training frequency on strength gains showed no additional benefits of more frequent training on strength gains when the total training volume was the same. These studies suggest that total volume is more strongly linked with strength gains than how frequently you train.

Also, of interest is a study showing you can retain the strength gains you gain through strength training by training as little as one day per week. However, the endpoint of the study was 12 weeks, so it’s not clear if that holds true over a long period of time. The good news? It takes less training to retain strength than it does to develop it in the first place.

Conclusion

Training frequency seems to be less important than training volume for strength gains. Most of the research showing greater strength gains with more frequent training didn’t control for total training volume. But there haven’t been enough studies that adequately controlled for total training volume to draw firm conclusions. How frequently to train to maximize strength can vary based on a variety of factors – age, genetics, gender, how heavily you train, and the muscle groups you work. It’s hard to draw firm conclusions based on limited data.

Here’s the bottom line. Although it may be possible to gain and retain strength by working your entire body only once per week, the volume you’d have to do could be time prohibitive. But it’s reassuring to know if you ever get into a time squeeze and can’t train more than once per week for a while, you can still make strength gains and retain them.

Whatever approach you take, be sure to give the muscles you worked at least 48 hours of rest and recovery before working them again. Strength adaptations take place in response to training, but they occur between training sessions when your muscles are recovering and rebuilding. Rest is an important part of the equation and one you shouldn’t skimp on. Also, give as much attention to nutrition as you do to your training. If you don’t consume enough calories and protein, the gains you make will be slow.

References:

Stronger by Science. “High-Frequency Training for a Bigger Total: Research on highly trained Norwegian powerlifters”

International Journal of Exercise Science 9(2): 159-167, 2016.

Sports Med Open. 2018 Dec; 4: 36.

Int. J. Sports Med. 1988 Oct; 9(5): 316-9.