Total Body Workout Without Weights

Total Body Workout Without Weights


You can get a full body workout at home without weights.

No access to a gym, no worries. We got you covered.

The tools you need are right in your house.

Here are 15 exercises that anyone can do at home using your floor, bed, wall, and couch.

Floor

With a flat surface, you can do pretty much any exercise. Here are 5 that will help you to keep in shape:

1. Jumping jacks

Jumping jacks are a great form of cardio that engages the entire body.

Step 1: Stand with your back straight, feet together and flat on the floor and hands by your side.

Step 2: Jump upwards, bringing your hands straight above your head and landing with your feet hip-width apart

Step 3: Jump again, this time bringing your hand and feet to the original position. This is one rep.

Modification: Instead of jumping, do a side step.

2. Burpees

This is another form of cardio, that can function as bodyweight training.

Step 1: Stand upright with your feet shoulder-width apart. Your hands should be by your side.

Step 2: Keeping your back straight, push your hips back, and bend your knees to initiate a squat.

Step 3: Put your hands on the floor in front of you and shift your body weight to your hands.

Step 4: In a quick jumping motion, extend your feet backward and get into a plank position.

Step 5: Jump your feet forward, back into step 3’s position, and jump upwards quickly, landing flat on your feet. This is one rep.

Modification: Replace jumping with a gentle step back in step 4 to make it easier. Make your burpee more advance by doing a push up when you are in the plank position

3. Squats

Squats help to tone the leg muscles and glutes. They also help to improve stability and lower body strength.

Step 1: Stand upright with your legs shoulder-width apart and toes parallel (or outwards if it helps you to stay balanced.

Step 2: Contract your abs and push your butt backward as if you’re sitting in an imaginary chair. Do not concentrate on bending your knees.

Step 3: As you descend, look straight ahead and avoid hunching over. Extend your hands in front of you to maintain your balance, or bend your elbows to clasp your hands. Your knees should not pass your toes.

Step 4: Keep your body tight and push through your heels to get back to your original position. This is one rep.

Modification: Use a chair for guidance

4. Calf raises

Calf raises are great for toning the legs and improving stability.

Step 1: Stand flat on the floor, or on the edge of your steps, or anything that can keep your heels off the floor.

Step 2: Straighten your back, contract your abs, and use the wall or railing or a piece of furniture that is taller than you for stability.

Step 3: Raise your heels off the floor by getting on your tippy-toes, and hold for 3 seconds.

Step 4: Lower your body to stretch your calves. This is one rep.

Modification: Try doing calf raises with one leg at a time.

5. Forearm Plank

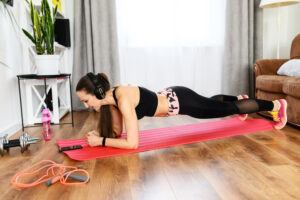
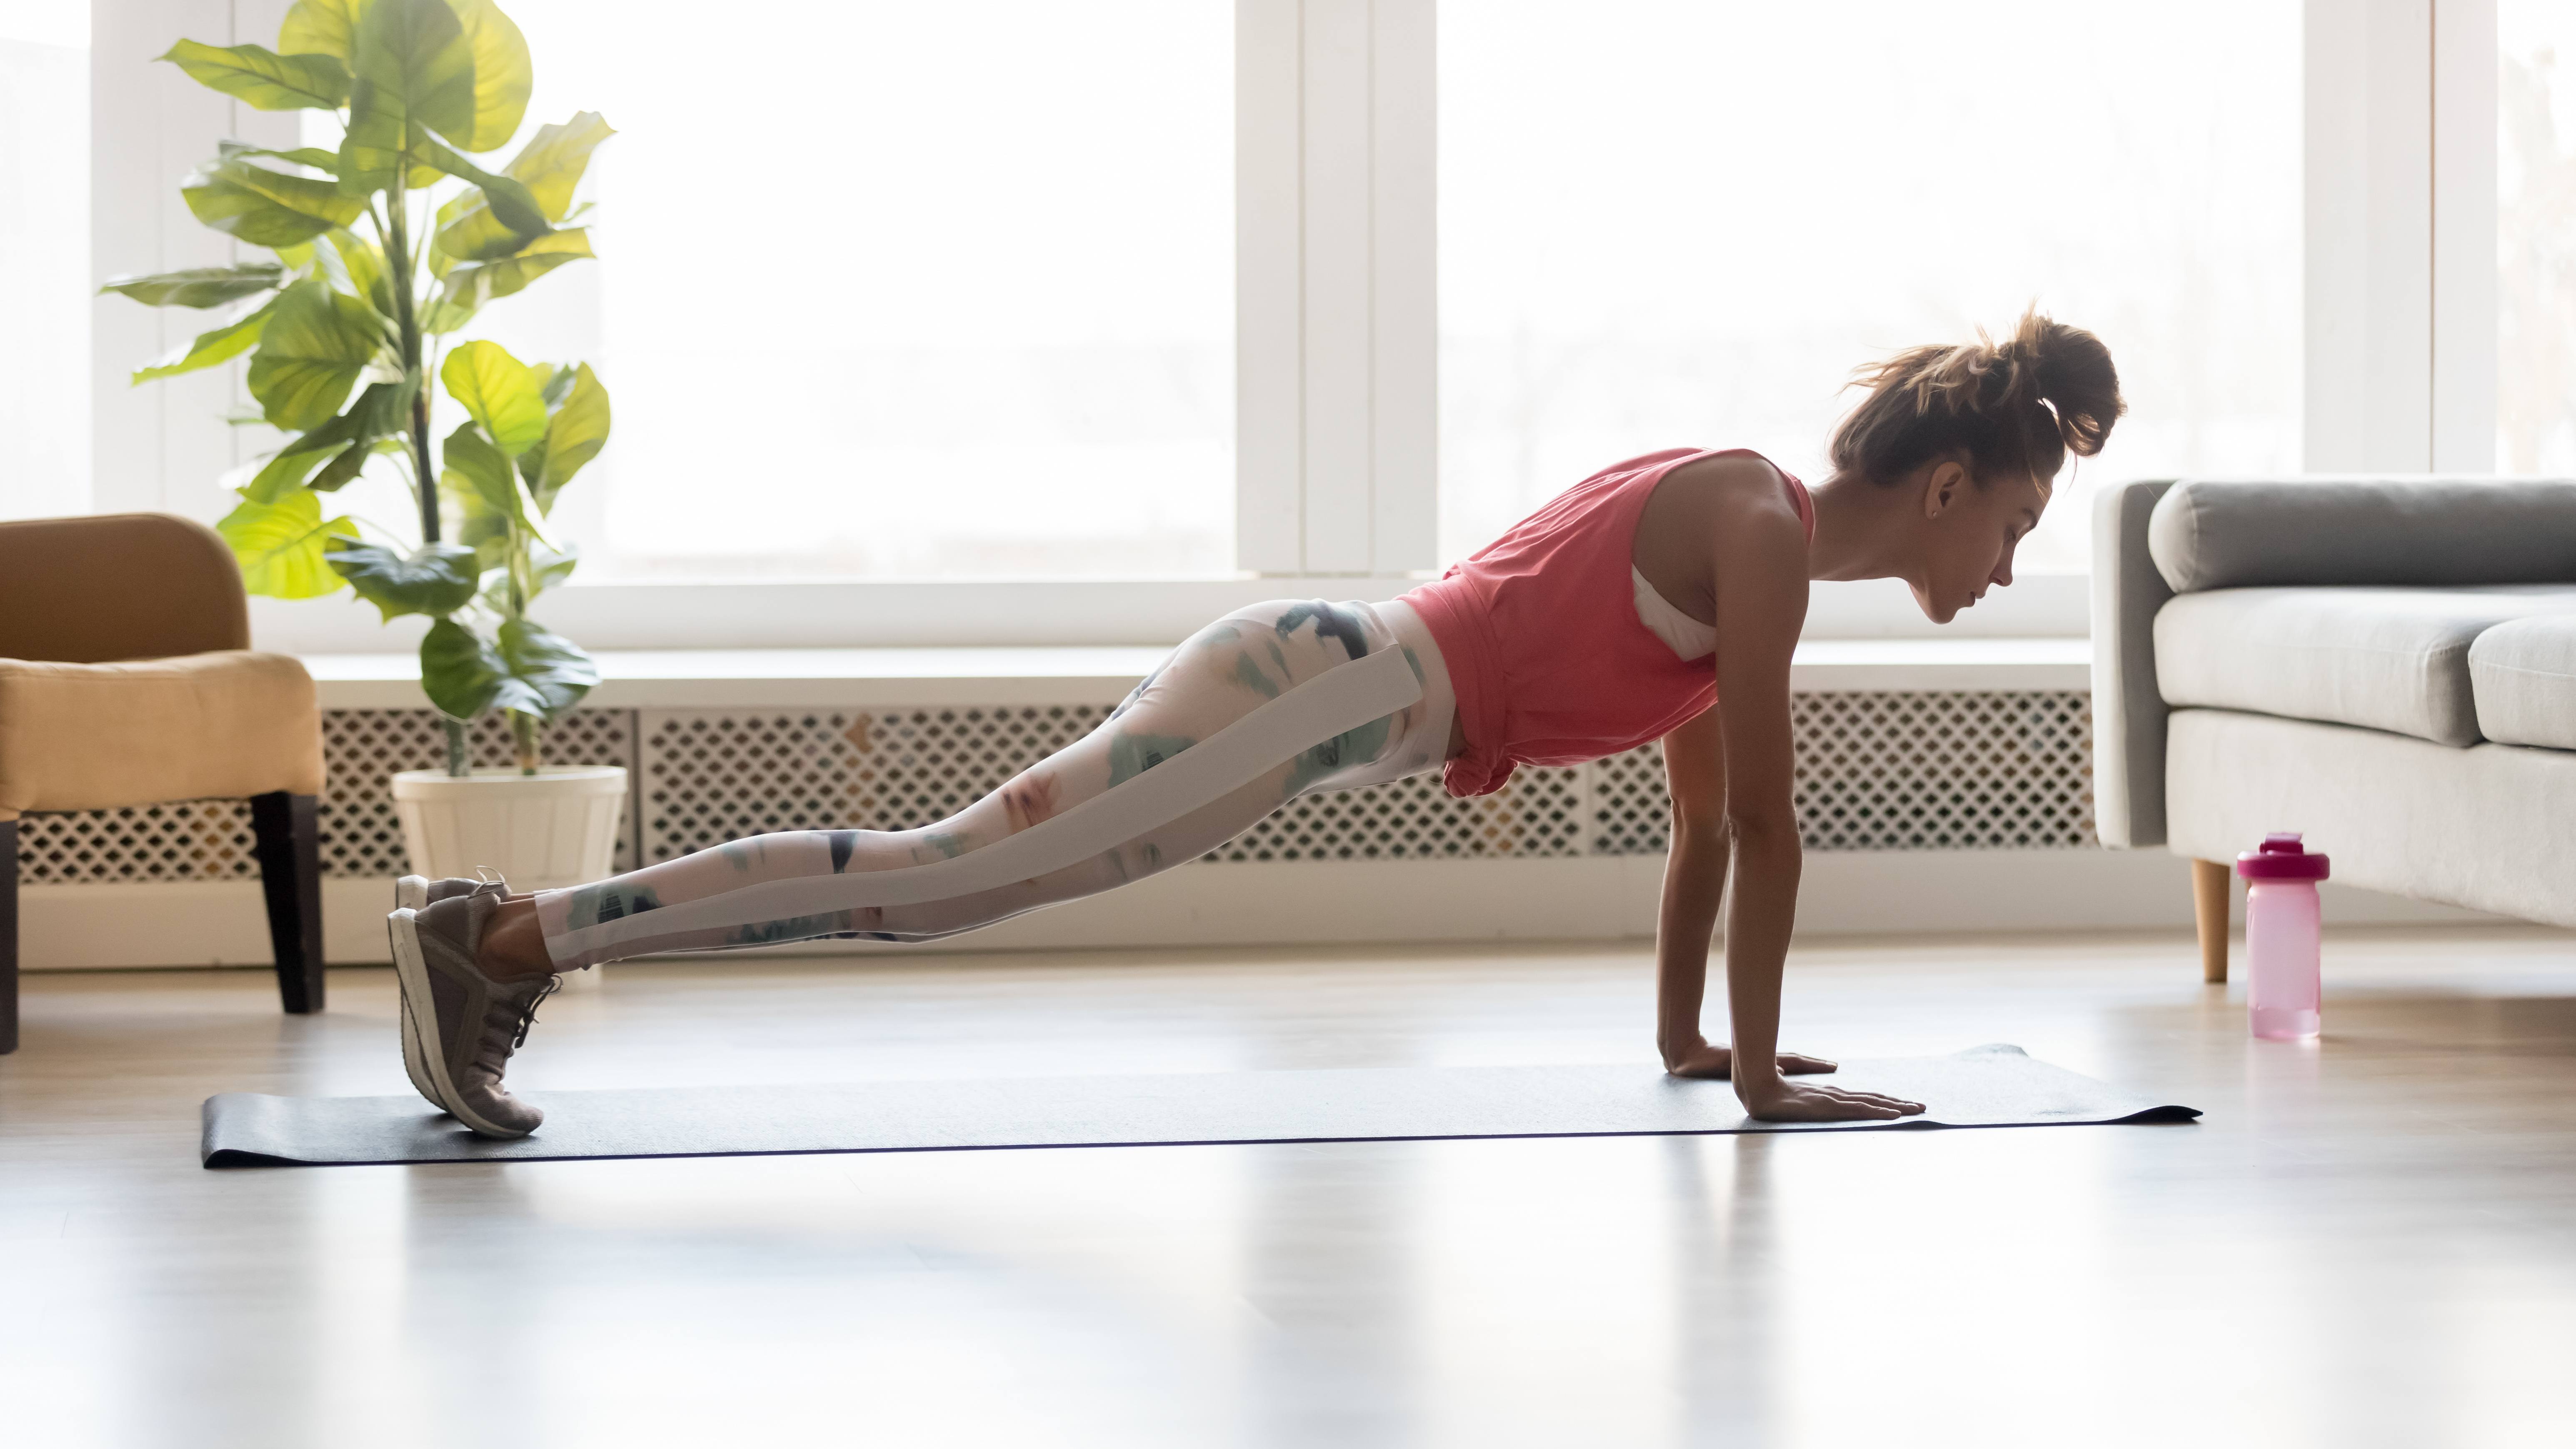
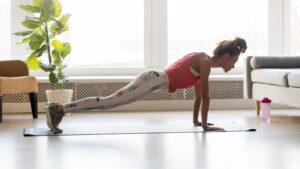
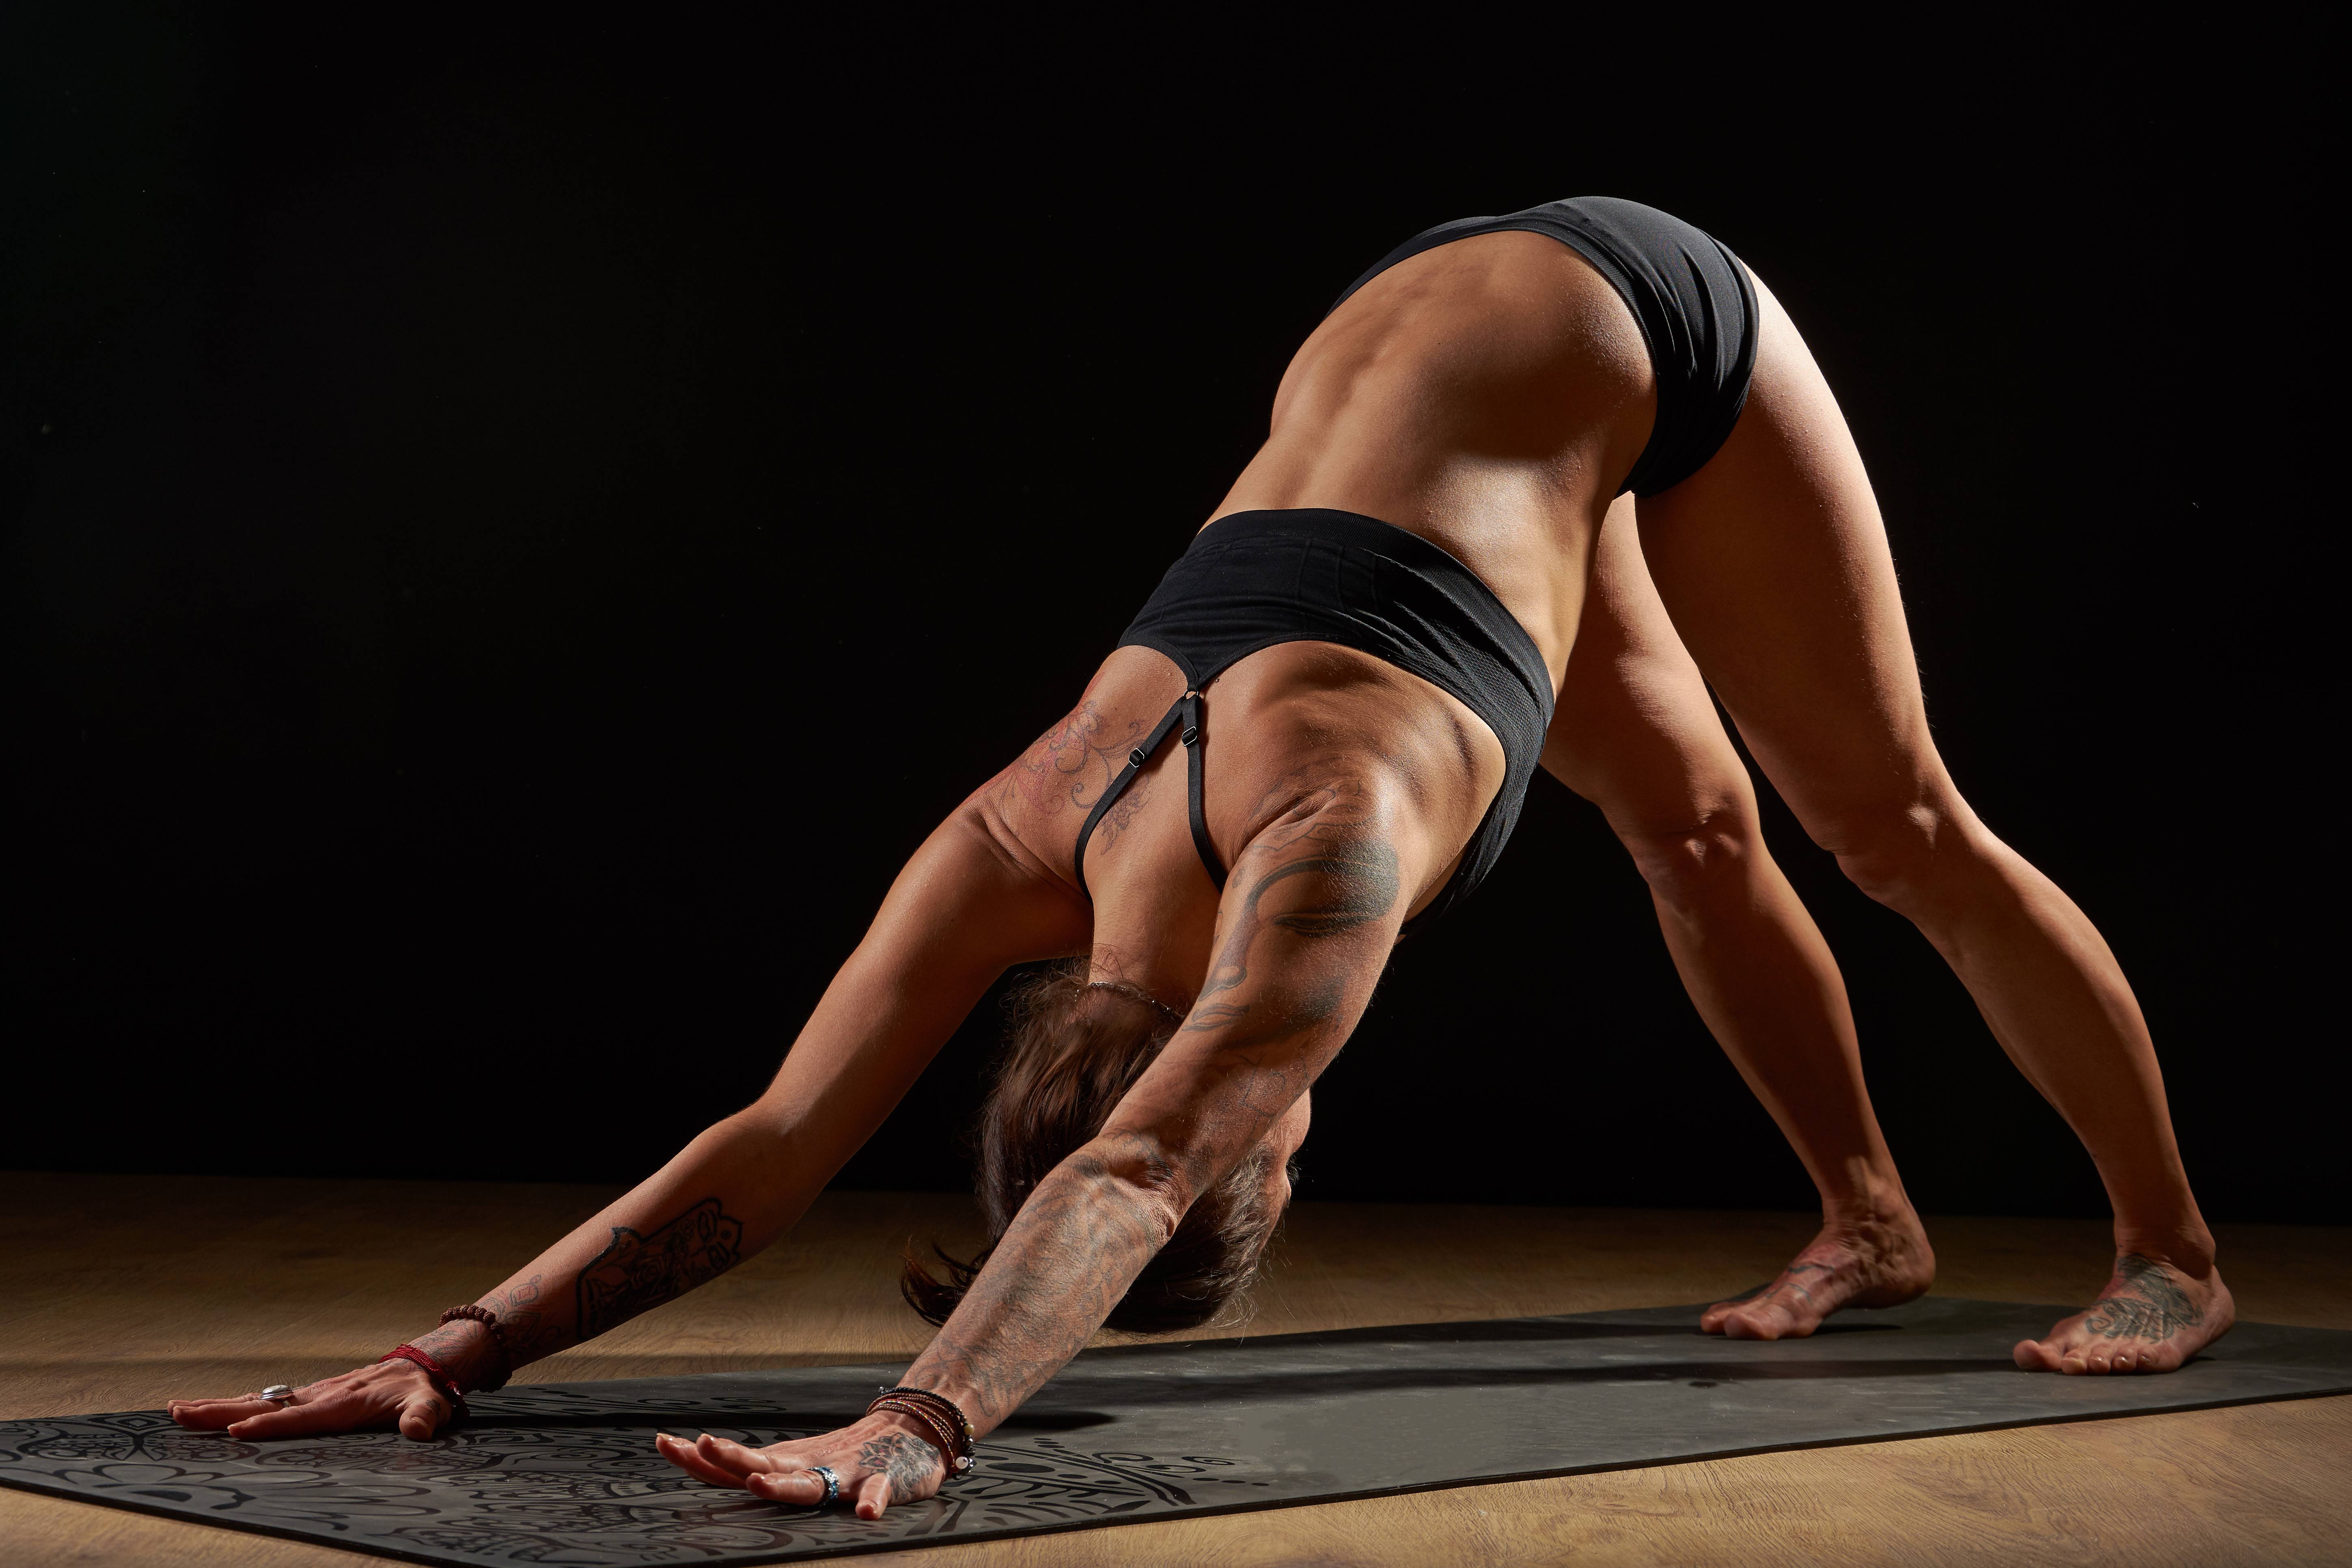
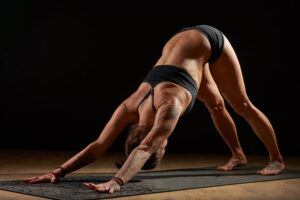
Planks strengthen the core, promote balance, and can improve posture.

Step 1: Lay flat on your stomach and place your forearms parallel to the floor.

Step 2: Extend your legs outwards onto your tippy toes and press your forearms into the floor to raise your body above the floor.

Step 3: Squeeze your glutes, keep your neck neutral, and engage your abs. Your head should be in line with your back and your body should be as stiff as a piece board. Hold this position for at least 30 seconds.

Modification: If you cannot manage to hold this pose, bend your knees to the floor. If you want to make this harder, straighten your elbows and place your palms flat on the floor as if you were going to do a pushup.
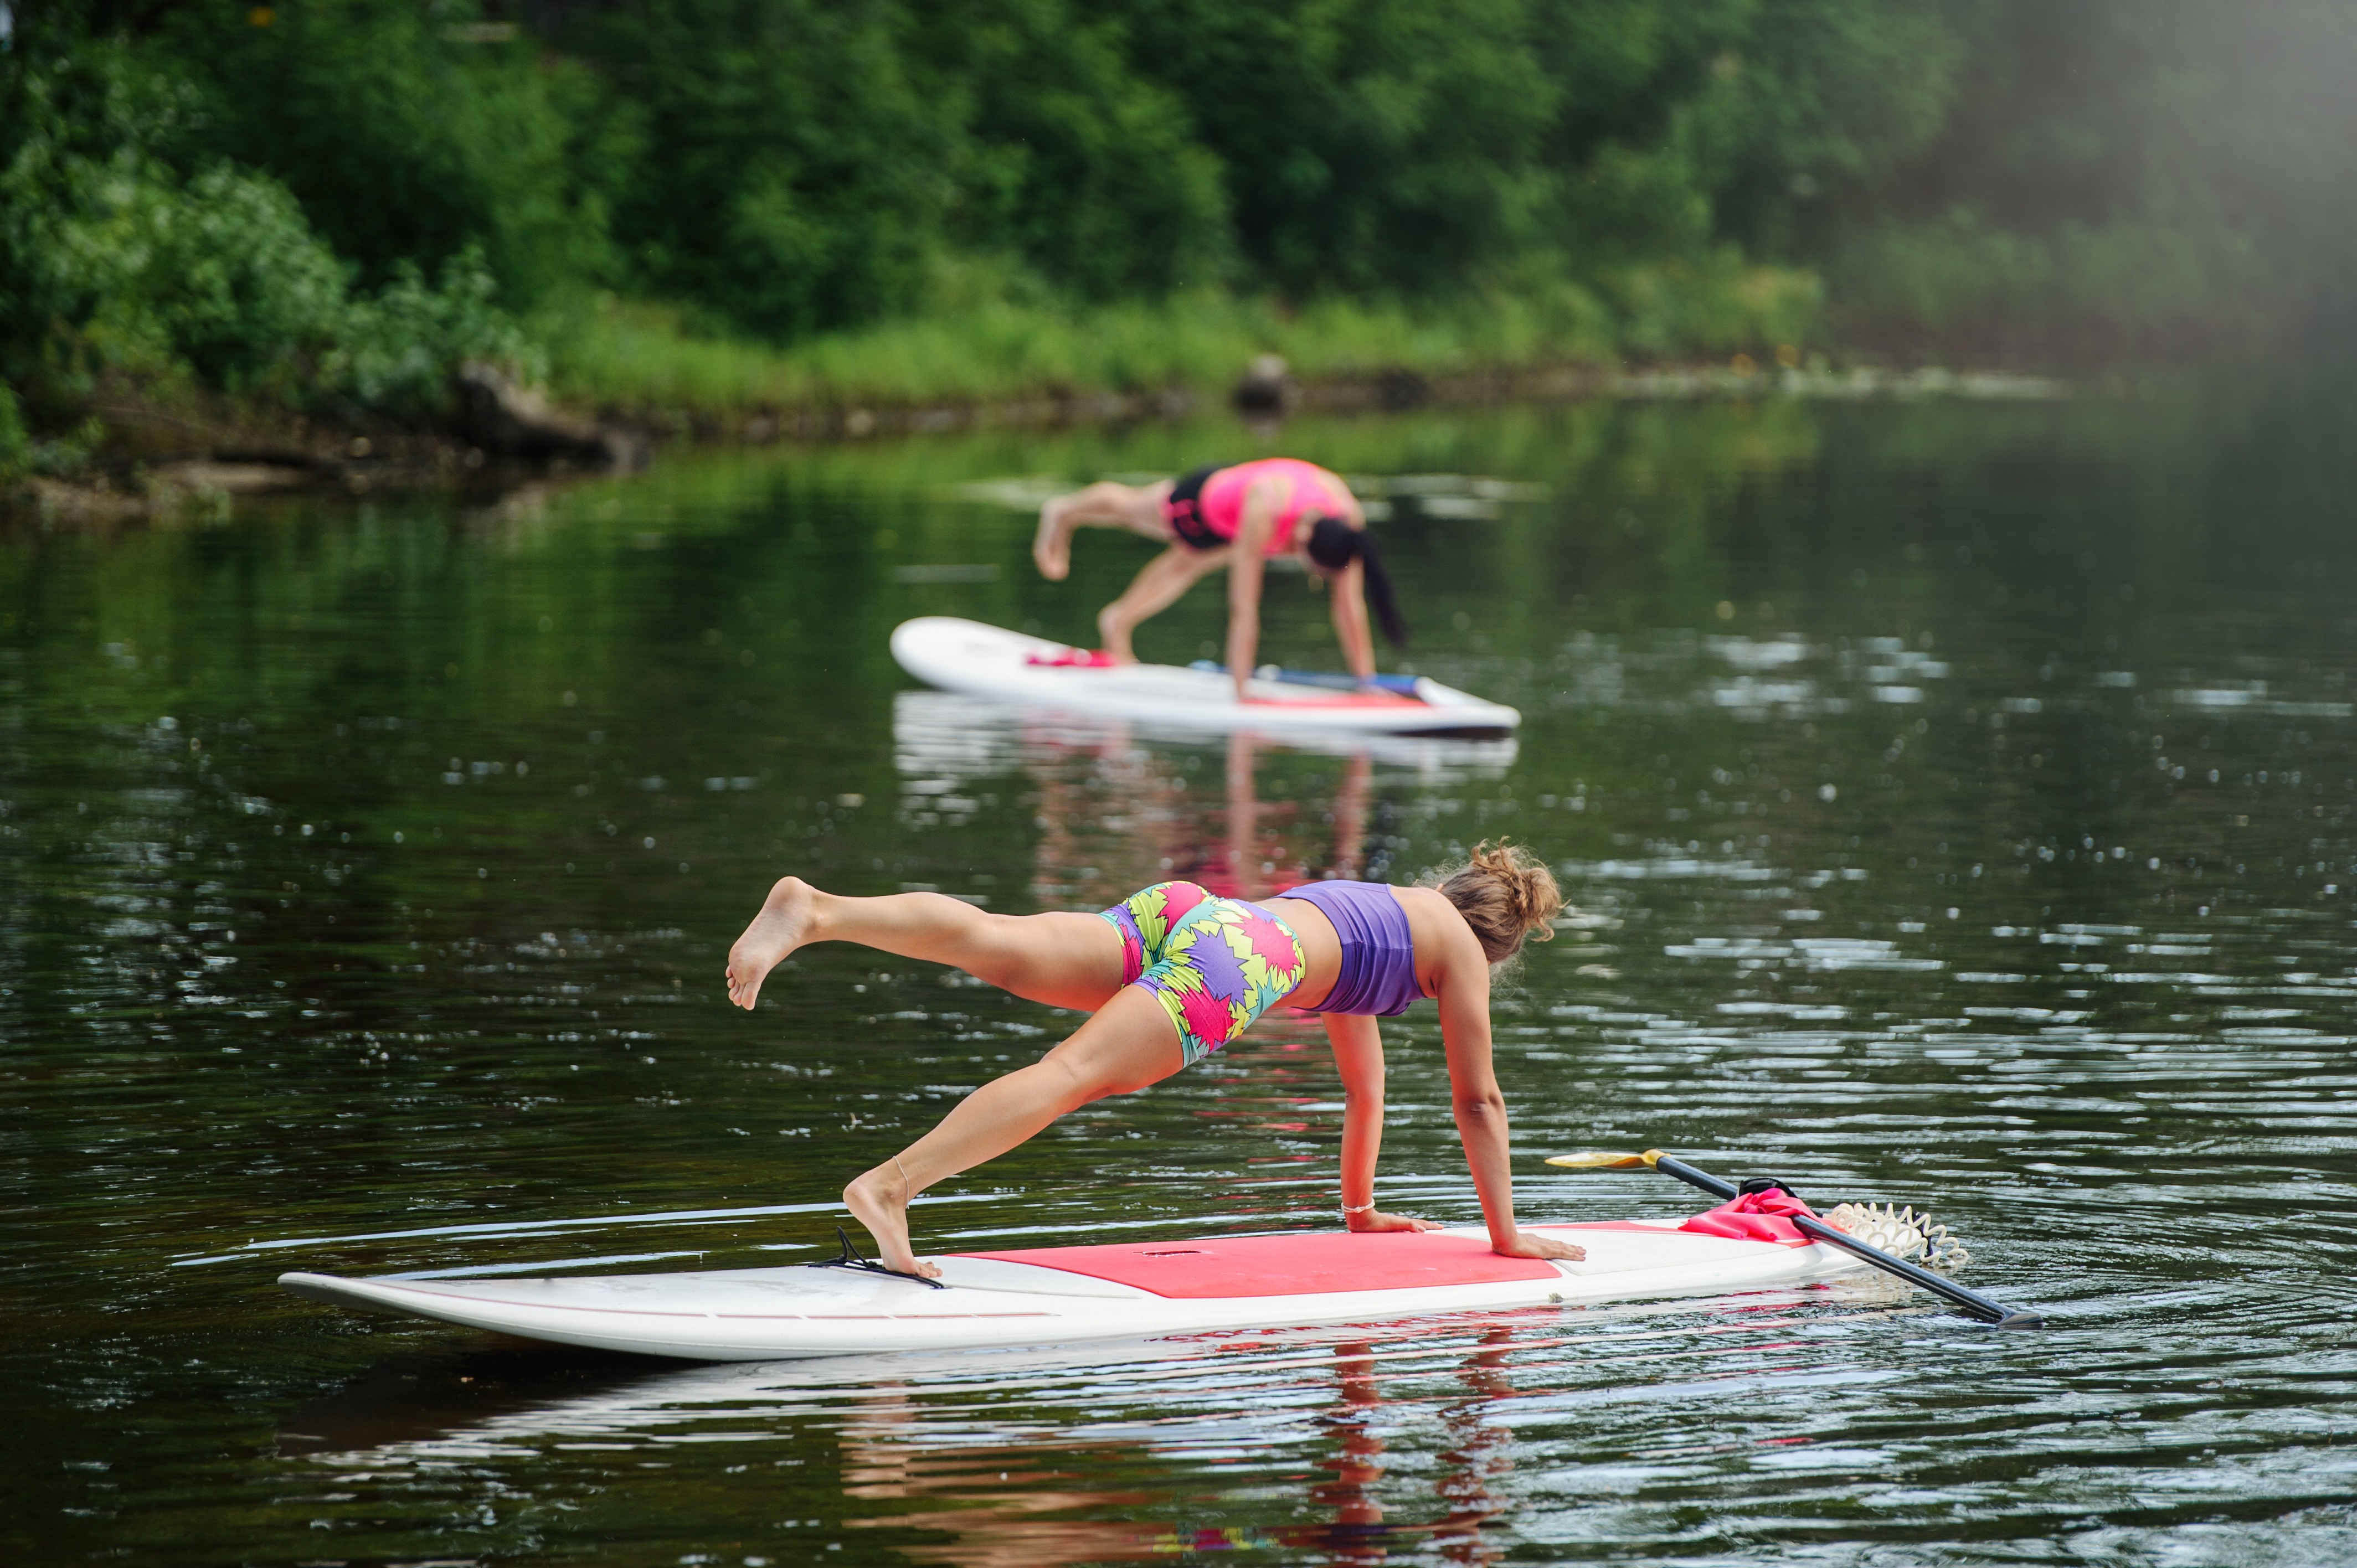
Bed

Getting out of bed in the morning sucks, so why not stay in bed while you do your workout?

6. Bicycle crunches

Bicycle crunches work both the upper and lower abs, along with the thighs and obliques.

Step 1: Lay flat on your back, bend your knees and place your arms behind your head.

Step 2: Lift your bent legs off the floor and pull your navel in. Raise your shoulder blades off the floor slightly.

Step 3: Pull your left knee in towards your chest and meet it with your right elbow while extending your right leg. Repeat by pulling your right knee in towards your chest and meet it with your left elbow while extending your left leg. This is one rep.

Modification: If you can’t manage to extend your leg for each crunch, rest the soles of that foot on your bed.

7. Scissor kicks

Scissor kicks work the core, glutes, abs, and legs.

Step 1: Lay with your back flat on the floor with your legs extended.

Step 2: Place your palms beside your hips or below your glutes.

Step 3: Raise your legs, engage your core, and tuck your pelvis. Lift one leg above the other and alternate in a scissors motion. Each alternation is one rep.

Modification: Keep your legs barely raised above the mat to relieve the pressure on your lower back.

8. Marching hip raises

This exercise engages the glutes and helps to increase hip stability.

Step 1: Lay on your back with your palms flat and knees raised off the floor.

Step 2: Lift your hips off the floor until your knees and shoulders are in a straight line.

Step 3: Brace your core and raise your right leg off the ground. Do the same with the left leg. Do not drop your hips.

**You may also try this exercise at the edge of your bed. These are flutter kicks.

Modification: Instead of placing your palms flat on the floor, extend them to a T-shape for greater stability.

9. Lateral leg lifts

This targets the legs, hips, lower black, and glutes.

Step 1: Lay on your side with your feet together. Your right forearm should be braced against the bed and your left arm should be by your side.

Step 2: Lift your left laterally and lower it slowly. This is one rep.

Step 3: Repeat on your right side after a couple of reps.

**You may also try this exercise by laying flat on your back and doing leg lifts towards the ceiling to target the abs.

Modification: None

10. Superman

This is an exercise that targets the core, glutes, hamstrings, hips, and upper back.

Step 1: Lay flat on your stomach and assume superman’s flying position. In other words, raise your head slightly and extend your legs and arms. Lift your chest as high as you possibly can and hold the pose for at least 3 seconds. This is one rep.

Step 2: Release and repeat.

Modification: None


Wall

If you’ve managed to get out of the bed, good for you! These are some excellent wall exercises:

11. Wall pushups

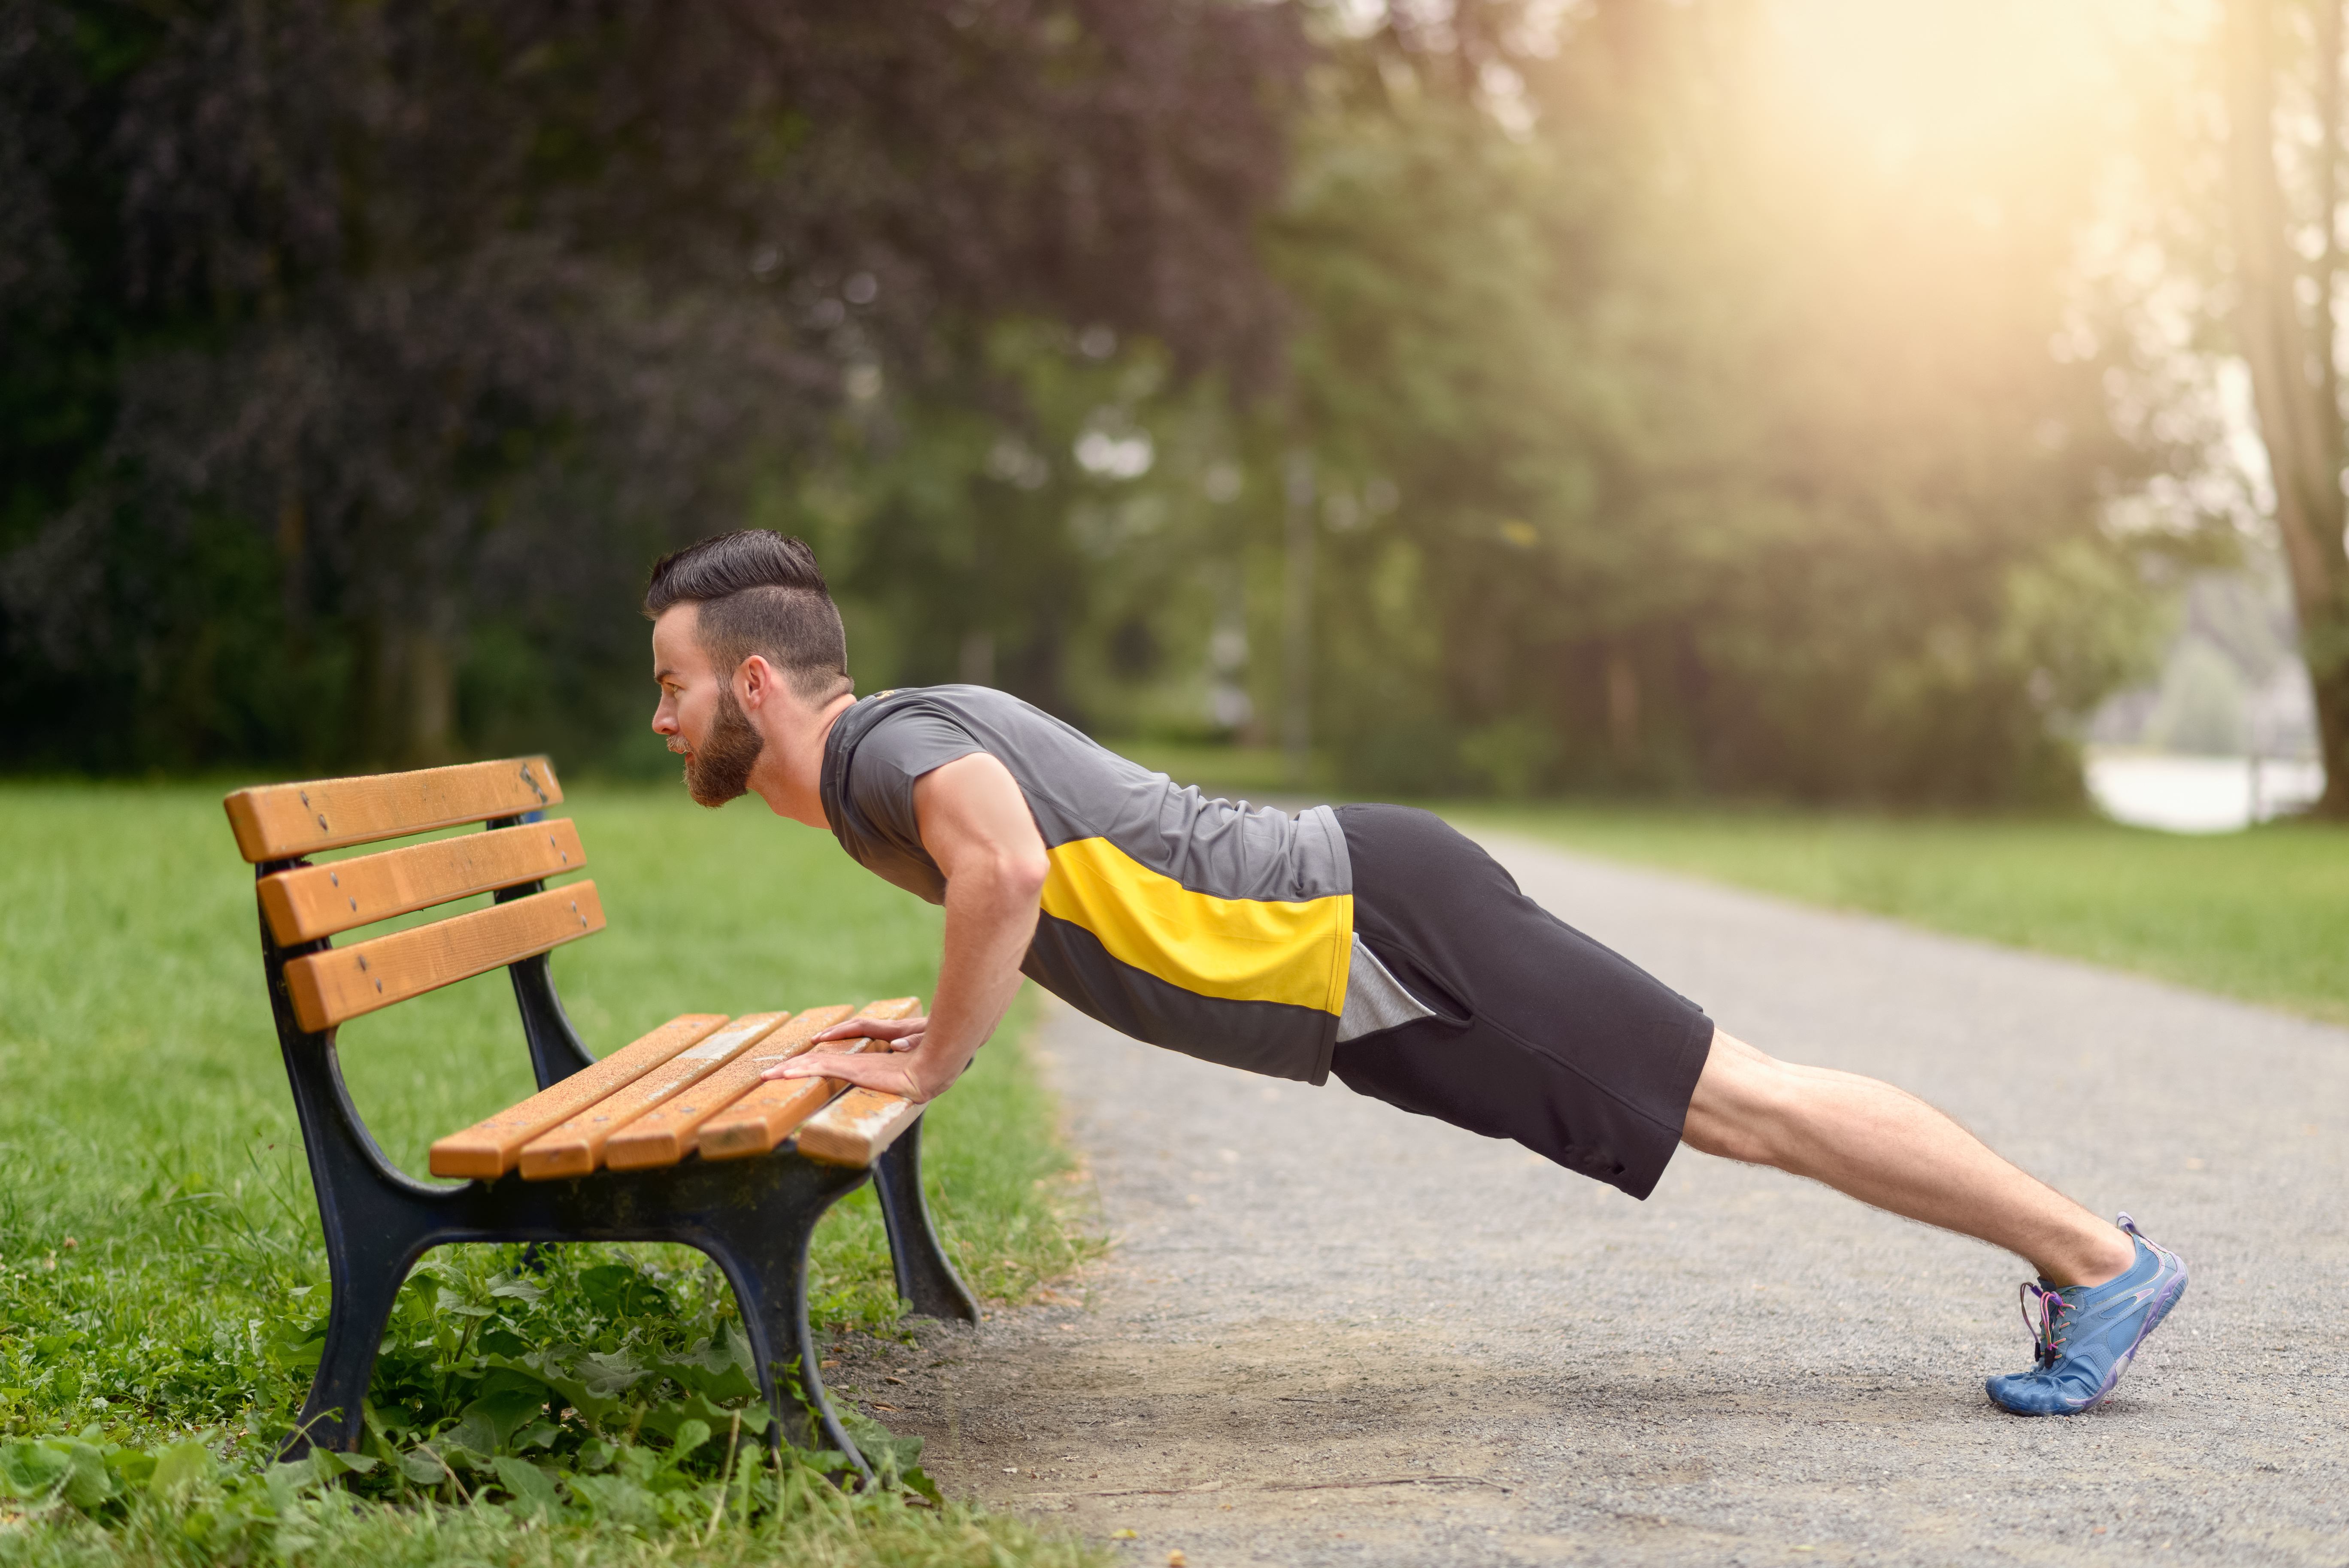
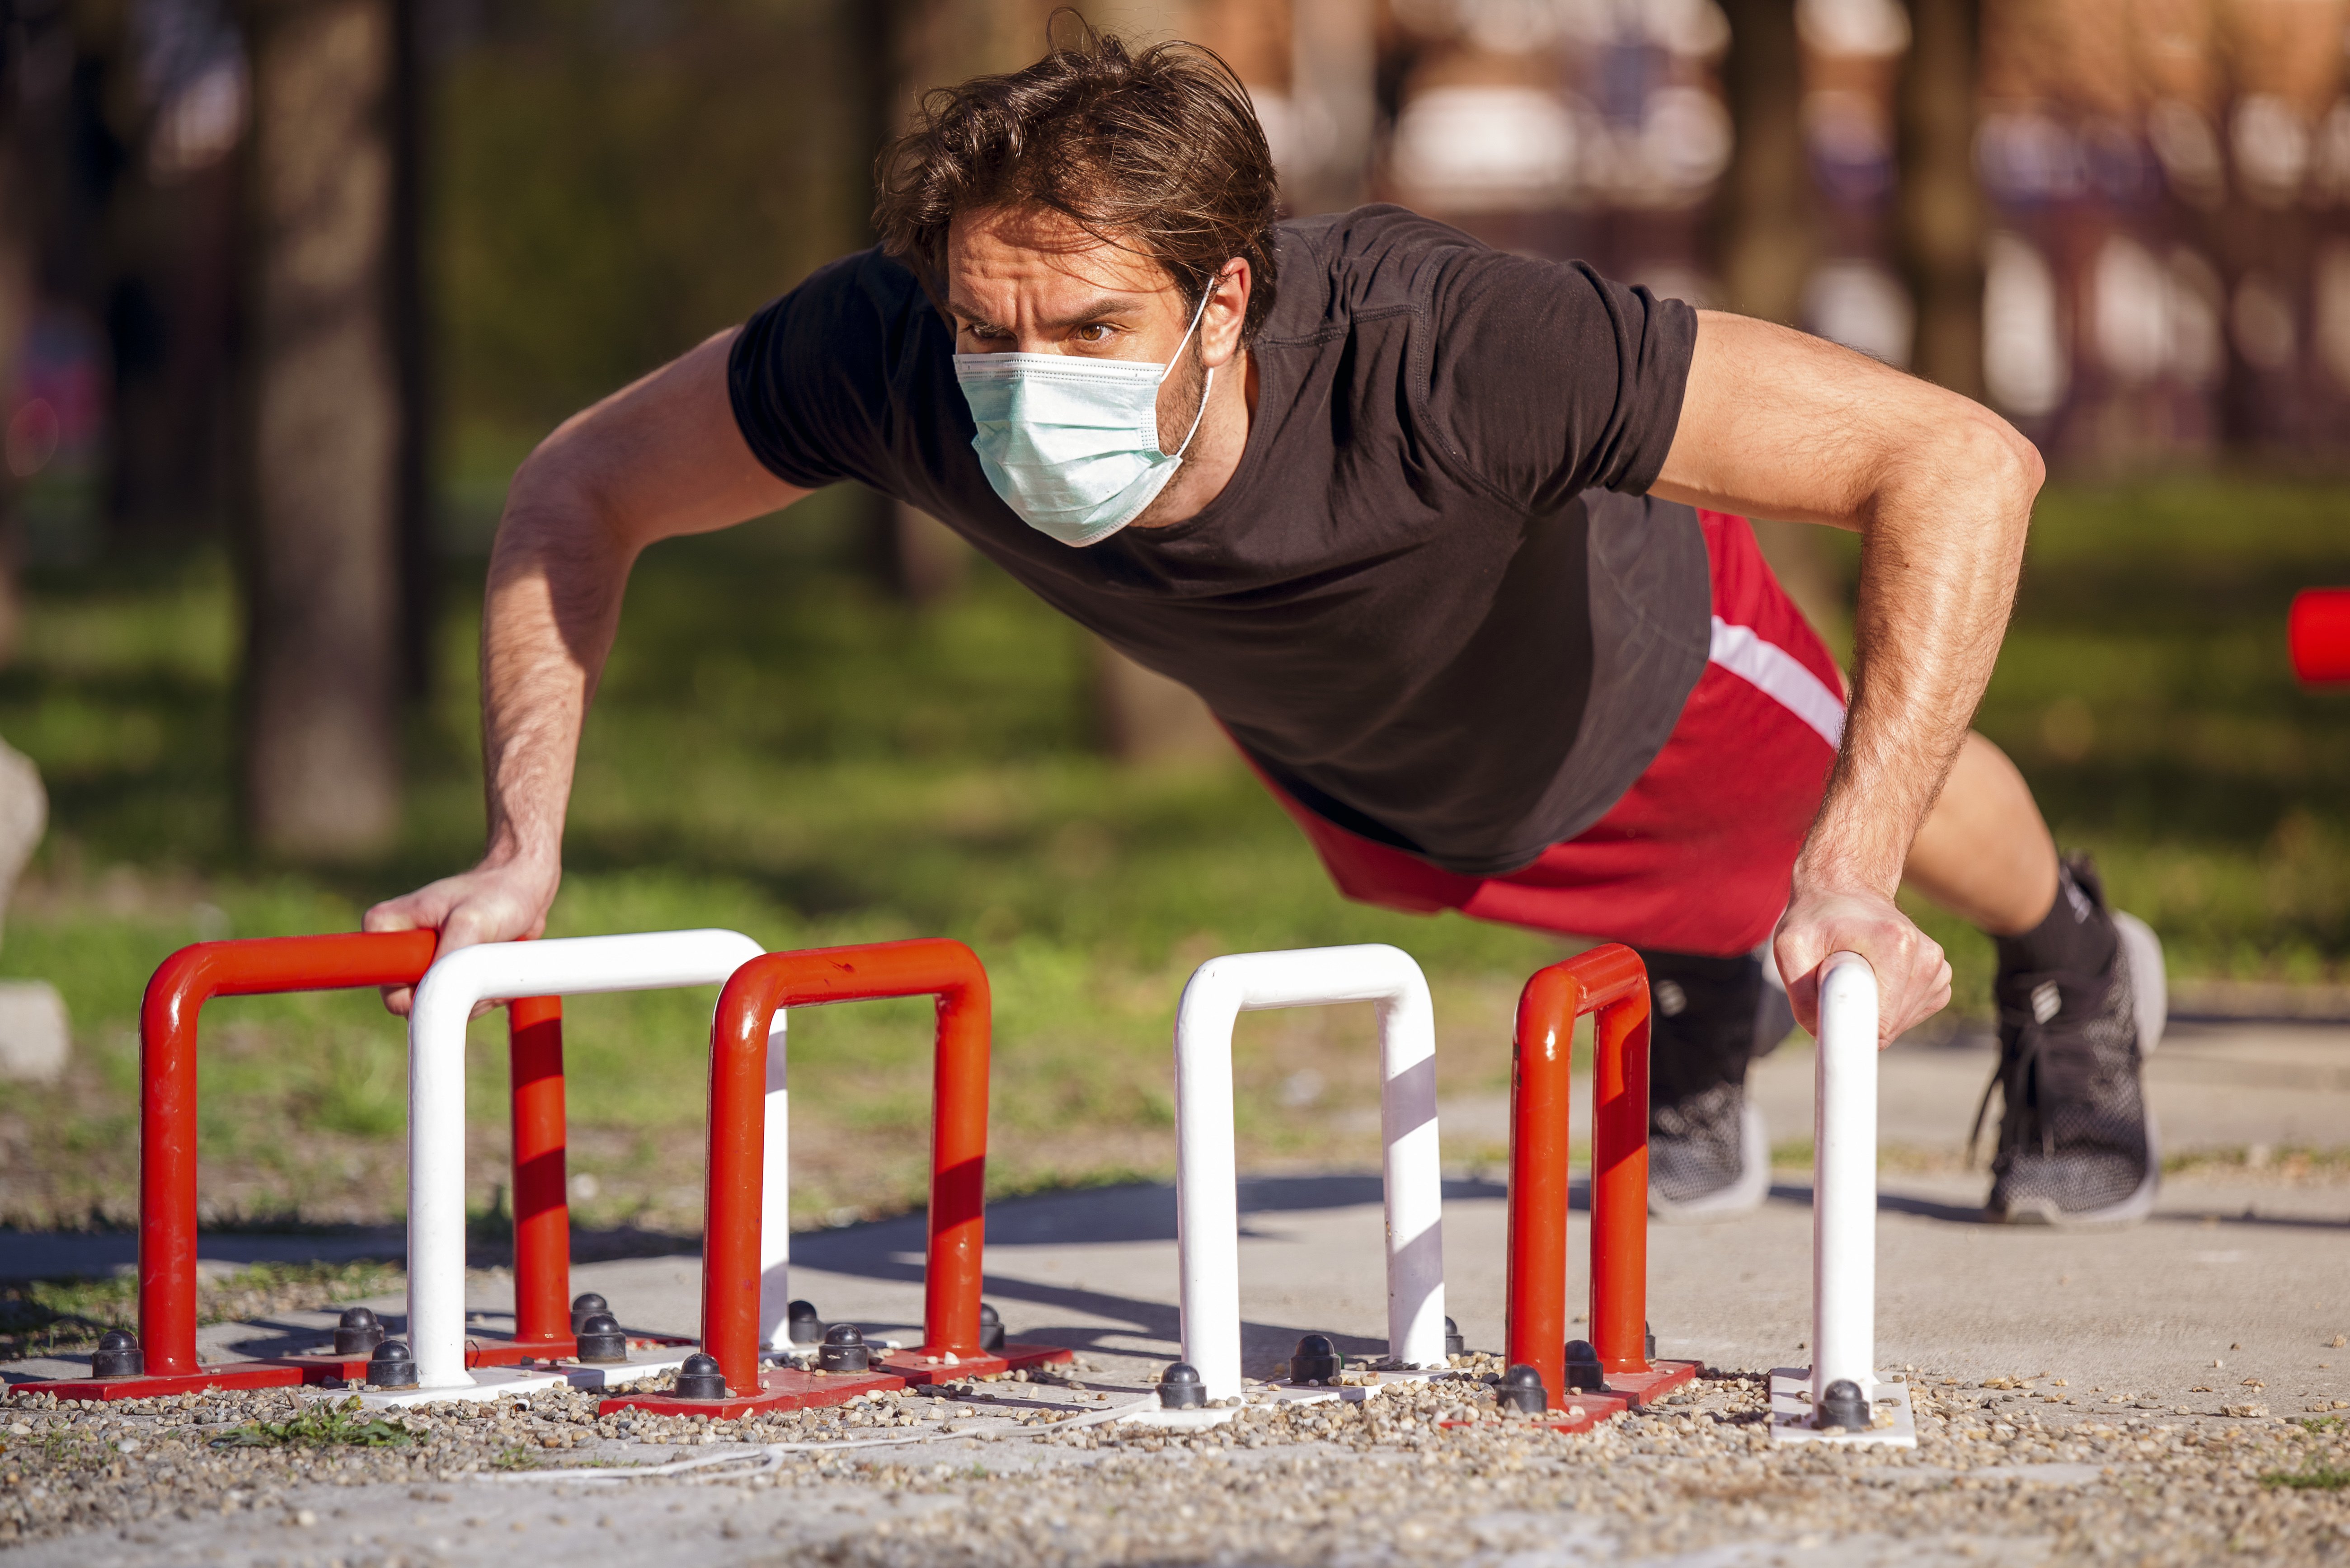
Wall push-ups are the same as regular pushups, but instead, you do them on your wall. They’re much easier and target the shoulders, upper back, chest, and arms.

Step 1: Stand 2 feet away from the wall and extend your hands in front of you. Your palms should be touching the wall.

Step 2: Bend your elbows and lean your body in towards the wall, bringing it as close as you can without touching.

Step 3: Push your palms into the wall to straighten your elbows and return to the original position. This is one rep.

Modification: None

12. Wall sit

This exercise helps you to tone your legs and abs, strengthen your calves and thighs, and improve balance.

Step 1: Stand upright with your back facing the wall.

Step 2: Slowly slide into a squat position with your knees at a 90-degree angle.

Step 3: Hold this position for at least 30 seconds.

Modification: None.

13. Leg curls

Legs curls strengthen and tone the muscles in your legs and help to stabilize the knee joints.

Step 1: Lay flat on your stomach with the soles of your feet pushed up against the wall.

Step 2: Slowly kick back your right leg towards to glutes then lower it to the wall. Repeat with the left leg. This is one rep.

Modification: Curl both legs at once.

14. Wall bridge

This is an exercise that engages the core, glutes, and stabilizes the hips and lower back.

Step 1: Lay flat on your back with your palms on flat on the floor.

Step 2: Bend your knees to a 90-degree angle and press the soles of your feet into the wall.

Step 3: While squeezing your glutes, lift your hips off the floor as high as you can then lower it to the floor. This is one rep.

Modification: Hold the position for 30 seconds.

15. Wall lunges

Lunges target the legs and the glutes. They also help with stability.

Step 1: Stand 3-4 feet away from the wall with your back facing it.

Step 2: Bend your right knee slightly behind you until it touches the wall. Press the balls of your foot into the wall and tighten your abdomen.

Step 3: With your back straight, bend your left knee to 90 degrees and dip. Your knees should not pass your toes.

Step 4: Press your right heel into the wall to slowly raise your body to the position in step 2. This is one rep.

Modification: None.

Summary

You don’t need weight to get fit. Everything you will possibly need is in your home.
Floor exercises you can try include jumping jacks, burpees, squats, calf raises, and forearm planks.
Stay in bed and perform exercises like bicycle crunches, scissor kicks, marching hip raises lateral leg lifts, and the superman.
Use your wall for exercises like wall push-ups, wall sits, leg curls, wall bridges, and wall lunges.


Natural Ways to Lower Your Blood Pressure Quickly

How To Lower Blood Pressure Quickly Naturally


You must know by now that high blood pressure is very dangerous and deadly. It can cause a stroke, kidney failure, vision loss, heart attack, sexual dysfunction and cardiovascular disease.

The only way to know your blood pressure is to have it measured by your doctor or you can also learn how to take it yourself. This way you can prevent high blood pressure, delay high blood pressure, and improve the effectiveness of your blood pressure medication.

If you have been tracking your blood pressure or if your doctor told you that your blood pressure is high and you don’t want to take medications then lowering your blood pressure naturally without medication is possible.

The quickest and easiest way to lower your blood pressure naturally without medication will require you to change some of the ways you are currently doing things.

What The Experts Recommend

According to the American Heart Association, here are the changes that you can make starting today to lower your blood pressure:

• become more physically active

• limit alcohol intake

• manage stress

• maintain a healthy weight

• quit smoking

• lower your intake of sodium

• increase your intake of potassium

Of the above, the quickest way to lower blood pressure naturally will be to change the way you eat.

To accomplish this goal, the dietary approach to stop hypertension, also known as the DASH diet, can help. It is recommended by the American Heart Association, and also the US National Heart Lung and Blood Institute and is an effective way to lower your blood pressure without medications. This is the only natural way you can lower your blood pressure quickly without medication. But in order for this to work effectively and quickly you have to follow a diet that is low in sodium and high potassium.

If you follow this diet, in four weeks you should see a reduction of your blood pressure. However, this can only be effective if your blood pressure is on the lower side of high blood pressure. In other words your blood pressure can’t be too high. Preferably the top number should not be above 150mgHg. Keeping your blood pressure too high for too long can lead to damage to your blood vessels. Diet alone will not work fast enough to get it down to recommended levels.

If your blood pressure falls within the severe hypertension range you should not follow this diet alone because it will not work as quickly as you want. You might have to take medications prescribed by your doctor.

About the DASH Diet

The DASH diet focuses on whole foods such as fruits, vegetables, whole grains, low fat and dairy, poultry, beans, seeds and nuts.

How do you start the DASH diet?

First you would want to look at the food that you are currently eating and determine which ones are high in sodium or salt. Check your pantry and fridge; any packaged food should have the sodium content of that food.

If you eat out a lot then start there. Your goal is to eat no more than 1200 mg of sodium daily. The American College of cardiology recommends somewhere between 1000 to 1500 mg daily. This includes all source of food including liquids such as soups and solid food such as breads. If you like to use condiments such as mayonnaise and ketchup on your french-fries and hamburger then you also need to examine the sodium content of those foods.

Reducing, not eliminating, your sodium intake can decrease systolic blood pressure. That’s the top number in your blood pressure measurement by about 7 to 10 points.

This might not seem like a lot, but if your blood pressure is 140/80 review sent it by 10 points will put you right at 130. Along with all the other measures mentioned above, this will help keep your blood pressure in the normal image.

Your goal should not be to eliminate sodium. You need sodium in your body to help with the function of your muscles and nerves. However, too much sodium in your body causes your body to retain water. Extra water in your body causes your heart to work harder to pump the blood and water throughout your body.

While sodium keeps water in your body potassium does the reverse. A diet that is high in potassium and low in sodium can help keep your blood pressure normal. Sodium and potassium are opposing electrolytes in your body.

The American Heart Association recommends about 4700 mg of potassium daily. Depending on the literature that you need, you will see recommendations between 3500 mg to 5000 mg per day.

You should get your potassium from food not supplements. Your goal is to identify foods that are high in potassium but low in sodium. This shift in fluid balance will help normalize your blood pressure.

Let’s be honest, salt makes everything taste good. In fact some people add salt to their food without tasting it.

Sodium can be found naturally in whole foods therefore you can easily increase the sodium content of your food by adding salt. It’s best not to add salt until you actually taste the food. On the other hand salt is an acquired taste. Therefore, your taste buds can adjust to lower levels of salt. For the record 1 teaspoon of salt has 2300 mg of sodium.

Foods That Have the Most Salt

The best way to the sodium content of food is simply the label. This might be very hard to do if you don’t actually prepare the food yourself. Dining out might not be the best thing to do if you’re trying to lower your blood pressure quickly. This might be the first step to going about lower your blood pressure quickly.

Even if you are taking blood pressure medication you should still flow a diet rich in pottasium and low in sodium/salt.
There, are some exception. If you have kidney disease then you should not increase your pottasium intake. You will have rely on low sodium diet to lower your blood pressure.

Here is a list of foods with most salt/sodium content:

• sauces (meat, spaghetti, chili, BBQ)

• breads/rolls

• canned foods

• processed meats

• frozen dinners

• cheese

• salty snacks

• salty nuts

• condiments (ketchup, mayonnaise,)

• salad dressings

• breakfast cereals

Al thought not food per se, over the counter medications such as cough syrups and allergy medication can also be a source of sodium so is Sea Salt.

According to the American Dietetic Association, you should look for packages that are low sodium low salt, less than 120 mg of sodium per serving salt free, sodium free, very low sodium, low sodium, unsalted, no salt added, reduce sodium, or lower sodium. Always check the labels for the sodium content.

Instead of process foods eat fresh fruits and vegetables and skip the sauces. You can also use citrus, spices and herbs to enhance the flavor of your favorite foods. Be mindful of the seasoning that you add to your food such as garlic powder, onion powder and blended seasoning. The powdered seasons can also be a source of sodium. Read the label for the sodium and think salt.

How To Increase Your Intake of Potassium

If you want to decrease your blood pressure quickly without having to take medications you will also want to increase your intake of potassium.

Potassium is tasteless; therefore unlike salt you won’t taste it in your food. This is the main reason why it’s not added to food because it does not affect the taste. However, potassium is needed in your body because it helps your muscles to contract, especially your heart. In addition, along with sodium, potassium helps to regulate fluids in your body. Remember an increase in fluid in your body causes your heart to work harder to pump blood throughout your body.

Best Sources of Potassium

• leafy greens

• sweet potatoes

• cantaloupes

• banana

• tomatoes

• carrots

• zucchini

• eggplant

• pumpkins

• dairy products

• meat

• poultry

• fish

• nuts

Conclusion

To effectively manage your high blood pressure, you will need a team approach. Your team should include your doctor, a registered dietitian and you. If you want to know if this approach works, you will also have to check your blood pressure regularly.

Here are some articles about taking your blood pressure the right way and best blood pressure monitors.

The Correct Way To Take Your Own Blood Pressure at Home

Best iPhone Compatible Blood Pressure Monitor: Qardioarm Review

The Right Fit: 7 Factors That Affects Accurate Blood Pressure Measurement

4 Types of Blood Pressure Monitor: Which One is Right For You

Low Blood Pressure Diet Plan: DASH Diet Explain

5 Foods That Will Lower Your Blood Pressure

2020 Best Bluetooth Upper Arm Blood Pressure Monitors:Check Your Blood Pressure Today

12 Triceps Workouts Without Weights You Can Try Today

12 Triceps Workouts Without Weights You Can Try Today!

We taught you how to exercise and build your biceps without weights, now it’s time to talk about how you can get your triceps in shape.

You can’t work one muscle and not work the other. It doesn’t work like that. The biceps and triceps are like yin and yang and if you want well-toned and balanced arms, then you have to check out this article.

In this article, we’ll discuss 12 different triceps workouts you can do today without using any weights. But first, let’s talk about what the triceps are and how they are different from your biceps.

Where are Your Triceps?

Like biceps, triceps are located in the upper arm between the shoulder blades and elbows. However, instead of lying at the front of the upper arm, triceps lie at the back. They are pushing muscles and oppose your biceps.

Biceps are used for pulling or bending the arm at the elbow while triceps are used for pushing or extending the arm.

1. Triceps Push Ups

These are similar to normal push ups, however, you’ll have to position your arms slightly different to target your triceps

Step 1: Get into a plank position with your shoulders directly above your wrists, body straight and on your tippy-toes. Your feet should be together.

Step 2: Bend your elbows in line with your shoulders to lower your body to the floor. Do not extend your bent elbows outwards, they should be tucked at your sides.

Step 3: Straighten your arms to return to the plank position. This is one rep.

Modification: Instead of extending your body to your tippy toes, bend your knees.

2. Triceps Dips

Tricep dips are one of the most common exercises used to tone the triceps without weights. All you need to do it is a flat surface.

Step 1: Sit on the floor with your back straight and legs extended.

Step 2: Position your arms shoulders width apart behind you and bend your knees, keeping the soles of your feet flat on the ground.

Step 3: Use your arms to push down into the floor, and raise your glutes off the floor to create tension in your triceps. Your knees and arms should never change position.

Step 4: Slowly bend your elbows to a 90-degree angle to return to your original position with your glutes hovering the floor slightly. This is one rep.

Modification: This is the simplest form of the exercise, but if you want to ramp it up, use a chair to elevate your arms for a deeper dip.

3. Diamond Push Ups

This is another variation of push ups that targets the triceps better than traditional push ups.

Step 1: Assume a tall plank position with the body extended to the tippy toes with your feet together.

Step 2: Place your hands together to form a diamond or triangle by touching your thumbs and index fingers.

Step 3: Exhale into bending your elbows to lower your chest toward the floor, and by extension your entire body.

Step 4: Inhale and straighten your elbows to assume your original position. This is one rep.

Modification: Bend your legs at the knees or separate your feet.

4. L-Sit

This exercise requires tremendous strength so don’t be discouraged if you can’t maintain it right away.

Step 1: Sit on the floor in a piked seated position, i.e. with your back straight and your legs extended in front of you.

Step 2: Place your palms on the floor beside your hips and straighten your locked arms.

Step 3: Squeeze your glutes and press your palm into the floor to lift them.

Step 4: Your body should be supported from your shoulders all the way to your palms. Next, tighten your core and slowly lift your legs off the floor, keeping them straight and together, while pointing your toes.

Step 5: Bring your hips slightly in front of your hands and hold for at least ten seconds.

Modification: There isn’t any, we told you it was a challenge!

5. Dive bomber

The diver bomber is primarily an upper body and core workout

Step 1: Assume the downward dog position. In other words, your belly should be facing the floor and your body should be in an inverted V position by extending the arms and feet while raising the hips.

Step 2: Slowly bend your elbow to lower your chest while keeping your hips raised.

Step 3: Straighten your arms again, but instead push your chest outwards in front of you with your hips hovering above the floor.

Step 4: Return to the original position by pushing your hips upwards, causing your chest to face the floor. This is one rep.

Modification: Bend your knees as you lower your body from the plank position 

6. Renegade row with towel

For this exercise, you will need a long towel

Step 1: Assume a tall plank position. Your hands should be a bit wider than shoulder’s width apart and your legs should be hip-width apart

Step 2: Grasp the towel tightly with both hands and brace your core.

Step 3: Bend one arm back as much as possible while grasping the towel. Your bodyweight should be focused on one hand and your elbow should be pointed upwards.

Step 4: Hold this position for at least 15 seconds then return to the starting position. This is one rep. Repeat with the other arm for another rep.

Modification: Bend your knees 

7. Inchworm

Inchworm is great for your triceps but it also works as a great body stretch.

Step 1: Stand up straight. Your legs should be together and your feet should be flat.

Step 2: Bend over and touch your toes while keeping your feet straight.

Step 3: Use your hands to start walking your body forward until you are in a plank position.

Step 4: Take small forward steps with your legs until they are near your hands. You may bend them a little. This is one rep.

Modification: Bend your knees 

8. Arm circles

This exercise is a great warm-up for upper body exercise since it targets the shoulders, biceps, and triceps.

Step 1: Stand up straight. Your feet should be flat on the ground.

Step 2: Extend your arms upwards and outwards from your side until they are at a 90-degree angle with your body.

Step 3: Move your arms in small forward circles for 30 seconds. This should be a fast motion.

Step 4: Do reverse circles for 30 seconds.

Step 5: Do larger circles in forward and reverse motions.

Modification: None

9. Wall push ups

If your floor is too hard and you don’t own a yoga mat, then you may not be too keen on floor exercises. Good thing you can do your push ups on a wall. Yup, you read correctly. This is how you do it:

Step 1: Stand about one or two feet in front of a wall with your back straight and feet flat.

Step 2: Lift your arms and place your palms on the wall, a bit wider than shoulder feet apart with your fingers pointing to the ceiling.

Step 3: Bend your elbows and bring your chest and chin as close to the wall as possible. Your feet should not move.

Step 4: Push your palms into the wall to straighten your arms and return to your original position. This is one rep.

Modification: You didn’t seriously think there was a modification did you? Let’s move on to the next exercise. 

10. Plank up-downs

Planks are great for building core strength but they also do a ton for toning and strengthening all your arm and shoulder muscles.

Step 1: Assume the tall plank position with your palms flat, back straight, neck neutral and feet extended to your tippy toes.

Step 2: Bend one elbow at a time and rest on your forearm.

Step 3: When supported by both forearms, extend your arm, one at a time to return to your original position. This is one rep.

Modification: Do a forearm plank instead. Do not extend your arms.

11. Plank rotation

Plank rotations are a more advanced form of the traditional plank and can be hard for a beginner since it requires a lot of arm strength.

Step 1: Get into a plank position. Ensure your abs and arms are tight, elbows are locked, feet are together and your body is in a straight line.

Step 2: Lift one arm off the ground and extend to the sky. While doing this, turn your entire body to the side. Your feet should still be together and your body should still be in a straight line. Try to hold this position for 10 seconds and stretch your body.

Step 3: Return your body to the original position in a smooth, controlled motion and repeat on the other side.

Modification: The only way to modify this exercise is by doing it faster, which makes it even harder. 

12. Reverse plank leg lift

Here’s an exercise that lets you work on your triceps, but also your legs, glutes, and abs.

Step 1: You will need to assume what is known as an inverse plank position. Instead of facing the floor, you will need to face the ceiling. To do this, sit on the floor with your back straight and legs extended. Place your palms flat on the floor behind your back, shoulder’s width apart. Your fingers should be pointed in the same direction as your body.

Step 2: Extend your arms by pushing into the floor. In doing so, raise your body off the floor onto your heels.

Step 3: Tighten your abs and lift one leg high in the air, then lower it back onto its heel. Repeat with the other leg. This is one rep.

Modification: Do not raise your leg. Hold the plank position. 

Committing to the triceps and biceps exercises without weights we have given you can give you the arms you’ve long for but could never achieve. Say goodbye to flabs and hello to spaghetti strap tops. What are you waiting for? Those arms aren’t going to tone themselves!

12 Biceps Workouts Without WeightsYou Can Try Today

12 Biceps Workouts Without WeightsYou Can Try Today

You’re probably used to seeing commercials or TV shows with fit men and women lifting weights with their strong, toned arm and based on that you assume that’s the only way to get those guns.

But, unfortunately, you’re recovering from an injury and your doctor told you to stop using weights during exercise, or perhaps you just don’t have access to a gym at the moment. Whatever the reason is, that shouldn’t stop you from working on those biceps. You can still get toned and lose arm fat.

The secret to it is using your body weight. It’s free after all, so why not? We’ll discuss 12 exercises you can try right now in the comfort of your own home!

Where Are Your Biceps?

The biceps are what people refer to as “guns”. It’s a set of muscles located at the front of the upper arm, between the shoulders and the elbow. They are considered pulling muscles and oppose your triceps.

To target these muscles, you’ll need to do some sort of forearm contractions. These contractions are more effective when there is some sort of resistance, whether from weights, body weight or resistance bands.

Since weights are out of the question, we’ll focus on exercises you can do with your bodyweight or with resistance bands. Here you go:

1. Push ups

Push ups are sometimes known as press-ups since you are using your arms to lower your body to the ground, then pressing against them to push it back up. To do this exercise, all you will need is a flat surface.

Step 1: Start in a tall plank position with your arms fully outstretched and your belly facing the floor. Your legs should b

e straight, and you should be on your tippy-toes.
Step 2: Use your elbows to slowly lower your chest by bending them. Your knees should not be bent and your body should not touch the flokoior.

Step 3: Squeeze through your chest to straighten your arm to the original tall plank position. This is one rep.

Modification: Bend your knees

2. Shoulder taps

Shoulder taps are great because they target several muscles, strengthen the core and improve stability.

Step 1: Get into a tall plank position by extending your arms downwards and extending your body into your toes.

Step 2: Keep your hip and shoulders level and in slow, controlled motion, lift your right palm off the ground and tap your left shoulder.

Step 3: Return your right palm to the floor, then use your left palm to tap your right shoulder. This is one rep.

Modification: If you want to make it more advanced you can push ups in between each tap.

3. Standing shoulder taps

This is a simple version of shoulder taps you can use when you are new to the workout lifestyle.

Step 1: Stand with your back straight and feet flat.

Step 2: Curl your arms and place the tips of your fingers on your shoulder. Your arms should resemble wings.

Step 3: Raise your arms above your head by extending your elbows, then return them to the original position. This is one rep.

Modification: None. You can do it!

4. Side bicep extensions

This exercise is more effective with weights, but it doesn’t mean you can’t do it without them.

Step 1: Stand with your back straight, feet flat and with your hands by your side. Your palms should be facing your body.

Step 2: Extend your arms sideways and upwards until they are in line with your shoulder blades.

Step 3: Return your arms to the original position. This is one rep.

Modification: This is the most basic form of the exercise. The only way to modify is with weights or a resistance  band to make it more advanced.

5. Forearm plank

The forearm plank is similar to a regular plank, however, the weight is concentrated on the forearm rather than the palms.

Step one: Lay flay on your stomach then bend your arms at your elbows in front of you. You can lay your palms flat or roll your hands into a fist, whatever is more comfortable for you.

Step two: Extend your body until you are on your tippy-toes.

Step three: Tighten your abs and your glutes and hold for 30 seconds. This is one rep.

Modification: None. You’ll have to tough this one out!

6. Sitting knee curl

To do a sitting knee curl, all you need is a chair. For the modified version, all you need is a flat surface. If you don’t own a yoga mat, a clean floor should do.

Step 1: Sit on a chair with your legs outstretched.

Step 2: Tuck your hands underneath your hamstrings and use your biceps to pull your knees into your chest.

Step 3: Return to the original position. This is one rep.

Modification: Sit on the floor or mat

7. Inverted body row

To do an inverted body row, you will need a sturdy table with the feet at its corners that have an area you can grip from underneath.

Step 1: Sit on the floor with your legs underneath the table to chair

Step 2: Grab the grip area with your palms facing your body and pull your body off of the ground as you walk your legs further underneath the table. At this point, your head should be hanging out and your chest should be in line with your grip area.

Step 3: Your elbows should be far apart. Slowly lower your back and by extension the rest of your body to complete one rep.

Modification: If possible, bend your knees.

8. Chin-ups

This exercise will only work if you have a chin-up bar, and it’s pretty easy to make one if you’re handy. If not, you can easily do this in an area of your house with a sturdy horizontal surface that is taller than you, like a door frame or handrailings. Be sure to test if it is strong enough to manage your body weight before going all out.

Step 1: Find an area to grip if you aren’t using an actual bar. This should be an underhand grip, meaning your palms should face you. In other words, you should be standing on the opposite side of the grip surface.

Step 2: Pull your body up to the bar until your chin is at the height of the bar.

Step 3: Lower your body to your starting point smoothly. This is one rep.

Modification: This doesn’t get easier, but you can make it more advanced by pulling your body high enough that your chest is in line with the bar.

9. Jump rope

For this exercise, it is good to have a jump rope, but you can always make a makeshift jump rope with an old piece of rope, a flexible old cable or a PVC cord.

Step 1: Stand with one end of your jump rope in each hand. The rope should be behind you, held at waist height.

Step 2: Bend your knees, get onto your tippy toes and prepare to jump. As you do, spin your wrists to lift the rope off the ground, over your head and behind you again. Your elbows should not move. You can jump with both feet at once or jump in a hopscotch motion (hop with one leg), whichever works best for you.

Step 3: Don’t stop at one jump. Even if you step on the rope or trip on your first try, the more you practice it the better you get so keep going.

Modification: None really, try jump rope at a slower pace until you are comfortable.

10. Resistance band bicep curl

For this exercise, you’ll have to have resistance bands at home already. If you don’t, they’re pretty cheap and you can get a good pair on Amazon in no time.

Step 1: Kneel on the floor with your buttocks touching the heels of your feet.

Step 2: Relax the upper body and sit up straight.

Step 3: Tuck the resistance band beneath your right knee and hold the excess with your right hand.

Step 4: Pull the resistance band towards your right shoulder by bending your arm whilst keeping your shoulder stationary and your back straight.

Step 5: Slowly release the band by straightening your elbow to a 90-degree angle without letting the resistance band go. This is one rep. After one set, switch to the next leg.

Modification: None.

11. Standing bicep curl

This exercise requires a resistance band as well.

Step 1: Place the resistance band beneath your feet and grab both ends, one with your right hand, and the other with your left hand.

Step 2. Stand up, as you do so, pull up the resistance bands until your hands are at your hips.

Step 3: Keeping your chest tall, bend your elbows. This will bring your hands along with the band up to your shoulder. This is slow, controlled motion.

Step 4: Slowly lower your hands by straightening your elbows. This is one rep.

Modification: None.

12. Handstand push ups

This exercise should only be performed if you are athletic, have done handstands before and can support your body weight.

Step 1: Stand in front of a wall and kick your feet up to assume the handstand position

Step 2: Tighten your entire body by squeezing the abs, glutes, and thighs.

Step 3: Lower your body to the floor by bending your elbows. This motion is slow and controlled.

Step 4: Extend your elbows to raise yourself off the floor again. This is one rep.

Modification: None

What are you waiting for? It’s time to workout!
Get those biceps ready for questions like “Wow, have you been working out?”.

Of course, you’ll let them know you got a little help right? Be sure to share where you got the secret to great arms without using weights.

4 Strength Yoga Poses For Beginners

yoga for strength

If you’ve been wanting to experience a home yoga practice for strength, here is a flowing yoga practice that you can do to help build strength in your core. The poses featured in this sequence include:

Boat Pose

Side Plank Pose

“Dolphin Plank Pose”

Bridge Pose

Each posture will be described and the benefit of each movement. Let’s begin.

Start your practice by standing at the top of your mat. Be sure to have your feet about hip distance apart with your toes pointing forward to create alignment in the lower half of your body. For good posture, slightly roll your shoulders back and gaze forward. Hold here in Mountain Pose to focus on your breath. Take slow inhales and slow exhales to tune into your body. Standing in stillness at the beginning of your practice creates a mindset of awareness and connection.

Pay attention to each breath. As you inhale deeply, feel the breath rise to fill up your lungs. Also feel the lengthening in your spine. As you exhale, draw your navel inward toward your spine to engage your abdominal muscles. This is called the Abdominal Lock. This will be a focal part of your yoga for strength practice.

Half Salute to the Sun

When you’re ready to move, inhale and extend your arms overhead. Exhale to fold forward. As you fold, hinge at your hips and keep a slight bend in your knees to protect your back. When you touch your toes, this is Standing Forward Fold. Inhale to slide your hands up to your shins and extend your spine so that your torso is parallel to the ground. This is Half Forward Fold. Exhale to lower back down to Standing Forward Fold. Feel free to hold this posture for a few breaths. It creates a nice release in your entire back, neck, and shoulders.

To come out of the pose, lean back gently onto your heels, bend your knees, inhale deeply, and rise up to a standing position. Lift your arms overhead. Exhale to lower your arms back down by your side. This short series is called the Half Salute to the Sun.

Sun Salutation (Series A)

To continue, inhale and raise your arms overhead, exhale to lower to Standing Forward Fold. Inhale to slide your hands to your shins and extend your spine: Half Forward Fold. As you exhale, bend your knees enough to place your palms on the floor. Step both feet back until you are in a high push-up position. This is Plank Pose. Inhale to feel the breath move through your entire body, exhale to lower yourself to Chaturanga Dandasana (Four-Limbed Staff Pose). Do this by bending your elbows as if you’re completing a push-up.

On your next inhale, press your hands firmly into your mat to straighten your arms, and lift your upper body. Your legs will remain long behind you as you lift just the upper portion of your body. You’ll be in a backbend position called Upward Facing Dog. As you exhale, tuck your toes, bend your knees, press your hands into your mat, and lift your hips into the air. You’ll arrive in an inverted V-shape position. This is Downward Facing Dog. Hold this posture for at least five breaths.

Inhale to lift and extend your right leg up into the air. Exhale to bring your right foot to the floor next to your right hand. You will be in a lunging position. Turn your left heel to the floor then inhale to lift your upper body. Extend both arms into the sky and face forward. This is Warrior One. Exhale to lower both hands down to the floor, returning to the lunging position. Step your right foot back to me the other: Plank Pose. Take a breath in, and as you exhale, complete the push-up, moving into Four Limbed Staff Pose. Inhale to lift your torso into Upward Facing Dog. Exhale, lift your hips, and return to Downward Facing Dog. Repeat this segment on the other side.

Inhale and extend your left leg upward. Exhale and send your left foot to the floor next to your left hand. Turn your right heel to the floor behind you. You want to create a firm foundation for your body. Inhale to lift your whole upper body while extending both arms into the air as you move into Warrior One. Exhale and lower your hands to the yoga mat, slide your left foot back into Plank Pose. Breathe in deeply and as you exhale lower your body by bending your elbows into Chaturanga Dandasana. Inhale to Upward Facing Dog. Exhale into Downward Facing Dog. Hold this pose for at least five full breaths.

Side Plank Pose

Slowly shift your body by lowering your hips to return to Plank Pose. To work your obliques, you will move into Side Plank Pose. Keep your right hand firmly planted into your yoga mat as you raise your left arm into the air turning your body sideways. Flex your feet to keep your legs straight and strong. Make sure your left hip stays lifted to maintain alignment in your body. Hold the posture for 5-10 breaths. When complete, return to Plank Pose, then perform the pose on the other side. While keeping your left hand on your mat, turn sideways, and extend your right arm up towards the ceiling. If you need to, you may stagger your feet; one in front of the other to maintain stability. Keep your right hip raised. By holding static in this posture, you gain more strength in your side bodies. After 5-10 breaths, return to Plank Pose and complete the Vinyasa (flow): Chaturanga Dandasana, Upward Facing Dog, and Downward Facing Dog.

If you need to rest during your practice, you may come down to your knees, sit back onto your haunches, and lower your upper body toward the floor. This is a restful posture called Child’s Pose. Hold for 10 breaths before moving to the next yoga position.

“Dolphin Plank Pose”

Rise up to your hands and knees. Place your forearms onto the mat parallel to one another. Step your feet back holding steady on your toes with your knees off the ground. This is another version of Plank Pose, but you are performing it on your forearms. It has a nickname: “Dolphin Plank.” There is a pose in yoga called Dolphin Pose where your forearms are on the mat while your hips are in the air like Downward Facing Dog. With this variation you put more emphasis on your abdominal system. Hold for 10-20 breaths. You will certainly feel your abdominal muscles engage to hold you in this position. Feel free to pause after the breaths and repeat this plank posture two more times.

Bridge Pose

The last posture you’ll practice for strength is Bridge Pose. It is a backbend that strengthens your back muscles. Roll over onto your back. Lie down with your knees bent and feet flat on the mat. Take a full breath in to fill up your lungs. As you exhale, press your feet firmly into your yoga mat in order to lift your hips into the air. As your are able, bring your arms slightly underneath you by squeezing your shoulder blades together. This will engage your upper back muscles to help you support your body in this position. This is Bridge Pose; your body forms the shape of an arching bridge. For greater support, you may bend your arms at 90 degrees. Press the back of your arms (your triceps) into the mat so that you stay lifted. Meanwhile, you are taking deep inhales to fill up your lungs, and as you exhale, squeeze your glute muscles and engage your abdominal muscles. Hold Bridge Pose for 5-10 breaths. You are welcome to release your body from this pose allowing your muscles to disengage then repeat the posture two more times.

Savasana

When you are complete with your strength yoga practice, it is time to move into Savasana which means “Corpse Pose.” This is your resting yoga position to finish your work. In this reclining posture, you lie on your back with your legs extended straight out in front of you on the floor. Your arms will rest down by the sides of your body. You want to be able to fully relax. It is the opportunity to review the hard work you have done in this practice to build strength. It is a reminder, too, that it is important to rest your mind and body after your accomplishment. Lie in stillness and focus on your breath. Let the ease of your breath sweep over your body, calming you, and relaxing you. Your are welcome to stay in this meditative position as long as you’d like.

Namaste

This could complete your yoga practice, or you may eventually rise to a comfortable seated position with your legs crossed and hands at your heart. Keep your eyes closed and continue to focus on your slow deep breathing. There is a word that is often said at the end of each yoga practice; that word is “Namaste.” It is a salutation that literally means “to bow.” But ii holds deeper meaning. One translation of the word is this: “I bow and honor the Light in you, as you honor the Light in me.” Bow and honor yourself as you finish your yoga practice. Namaste.

11 Ways to Work Out Without A Gym

How many times have you put getting fit on your list of New Years Resolution? How far did you get into it? Were you one of those who signed up for a gym and never went? How about going for a couple of days then quitting?

If you’re still signed up, cancel that membership ASAP. We both know that the gym just isn’t your scene, whether it’s because you feel intimated or have a busy lifestyle, and you’re probably just wasting your money.

So now what? If not the gym, how can I possibly lose weight? Well, you can:

1. Download workout apps

If you have a smartphone, tablet or laptop, you have a wealth of knowledge and content at your fingertips. All you have to do is go to your app store, and type in “workout app”.  It’s as simpleas that.

When you do this, you’ll come across numerous apps so it will be left up to you to read the reviews and features in order to choose the best one for you. You may even have to download 2 or 3 just to find the right fit but that’s no big deal since you can always delete it after.

Some apps allow you to choose from a series of workouts, or difficulty levels, while others have one set routine to follow. You’re better off with one that has varying levels of difficulty.

The good thing about this is that you don’t have to leave your house to get a workout. You can do it anytime and you probably won’t have to pay for it. The drawback, however, is the annoying ads that you’ll probably have to pay to remove. If they aren’t too disruptive and won’t pop up during the workout then you can probably ignore them and click away when they appear (if you have that option).

2. Watch YouTube videos

If you don’t want to use an app, you could always go on YouTube to find a workout video. If you’re a beginner, you can specify by typing “workout videos for beginners” and a bunch of beginner-friendly videos will pop up.

Again, you’ll have to scroll through the videos to find a good one and even read to comments to see how manageable or helpful the video is.

If you have equipment like weights at home, you can follow along with them, but there are plenty of workout videos on Youtube that doesn’t require equipment.

The good thing is you are not limited to standard workouts and the content creators on Youtube always come up with fun new ways to get a workout done inside or in your yard, where you can utilize household items and furniture such as stairs, chairs, tables and even your kitchen counter into your workout routine. These videos are all free and easily accessible as long as youhave a steady internet connection.

3. Use old Workout DVDs

Workout DVDs are where it all started when it comes to at-home workouts. If you have some at home, brush them off and pop them into your laptop. They’re still useful!

While you can still find some of them online, usually they’re low quality or have some pieces missing. Many people still prefer to use old Jillian Micheals, Jane Fonda, Leslie Sansone, and P90X DVDs. If you don’t know who these are, your parents probably do! They were and still are fitness guru whose workout videos helped to change the lives of many Americans, and other persons across the world. They’re intense, motivational and when done correctly, get the job done.

4. Sign up for fitness programs

While many fitness programs are affiliated with gyms, many others are independent and are geared towards fitness outside of the gym environment. Some of these include dance classes, group cycling, 5K runs, martial arts, and sports tournaments.

Some fitness programs also include dietary regimens that help you to lose weight even faster. Many are for a limited period, but you can carry over what you learned into your daily life and continue the activities as best as possible.

5. Take up sports

Taking up a new sport or continuing to play one that you were really good at is a great way to lose weight and stay fit. No, this doesn’t mean that you need to be a track and field star to use sports to lose weight.

If you enjoyed swimming in high school, go by your local pool or swim club for a couple of laps as much as you can. Swimming is great for toning and building muscle, boosting endurance and encourages a healthy heart and lungs.

Tennis and badminton are great as well since they build arm strength and endurance, reduce body fat and increases aerobic capacity. Soccer will give you a full-body workout and will also help to increase your stamina and endurance. Gymnastics helps to increase flexibility, improve bone health and density and improve coordination.

Lacrosse, hockey, golf, cricket, skateboarding, volleyball, rugby, karate, baseball, cycling, and fencing are all great sports to try out. As long as they keep you active, work up a sweat and help you commit to a routine, they’re great alternatives to the gym.

6. Set up a home gym

If you can’t be bothered by the gym, you can set up your own gym at home. Of course, this will cost you money but it doesn’t have to an insanely expensive state-of-the-art gym for it to be useful.

You can get equipment at reasonable prices online or in stores on sale. You can invest in some weights, or if you have limited space, resistant bands which are quite useful for strength training. For cardio, you could buy a cheap jump rope or a cheap elliptical machine. There must be someone in your vicinity having and yard sale, just dying to get rid of equipment. Disc core sliders aren’t expensive and work just as well as expensive machines for building core strength.

If you’re handy, you can set up your own pull-up bar and use your body strength for exercise. You can build balance rails, use old tires for strength and cardio, create agility ladders from old ones or make your own with some duct tape or build your own squat rack. The possibilities really are endless once you start to think outside of the box.

7. Go to the beach

The beach isn’t just for taking pictures for Instagram or getting a suntan. You can use the beach to your advantage and get a pretty good workout.

You can take a dip and swim along the shore or to a specific point if you’re a strong swimmer, or do water aerobics in waist-deep water if you don’t know how to swim.

Get out of the water and do a few laps on the sand or your regular workout routine. The moving sand grains beneath your feet activates more muscles and gives you a better workout and results ! Additionally, sand absorbs some of the shock so you’ll reduce the impact and stress on your joints.

Just be sure to wear sneakers since there may be seashells, pieces of coral or other sharp objects that can injure your feet during a run or workout. The sand may also be hot which can be very uncomfortable.

The best part about a beach workout is that when you’re done, you can take a dip and cool down!

8. Visit your local park

Many persons workout in a park because it’s an open space with a cool breeze and great walking and jogging trails. Maybe they’re onto something that you should get on!

The great thing about working out in a park versus a gym or at home with equipment is that it is environmentally friendly. There’s no A/C, no equipment plugged in or anything that uses electricity. You’ll feel much better outdoors since you’ll be in contact with nature, meet a few friends and even experience a boost in self-esteem and confidence.

You may experience a reduction in stress and you’ll get the vital Vitamin D that you don’t get inside of a gym or when cooped up indoors. There’s also nothing to pay for, i.e no membership fees since these are usually community spaces that are accessible to everyone.

9. Go up and down those stairs

Stairs aren’t just for getting to your upstairs or downstairs. Nope! You can use them to get fit.
Start with simply walking up and down the stairs a few times to improve agility and build your leg muscles. When able, you can jog up and down them, and even run. Just be careful of slips on hardwood floors or tile.

There are many leg exercises you can do with stairs, such as long steps, traverses, walking on toes, crouch walks, jumps, calf raises and split squats. You can engage your arms and core with money crawls, crab walks, inclined push-ups, and tricep dips.

As best as possible, avoid doing these exercises around children who might get the wrong idea and try it behind your back since they saw mommy or daddy doing it.

10. Use your bodyweight

The best and cheapest weight you can ever use to exercise is your body weight. These can be done anywhere at any time by using your own weight as resistance against gravity. There are many, many exercises you can try using your body weight and includes beginner-friendly exercises all the way up to the advanced and experts.

Not only are bodyweight exercises cost-effective, but they are also extremely efficient and can help to build muscle while shedding pounds, increase mobility and stability, encourage discipline, boost confidence and improve vo2 max.

Some of the most popular bodyweight exercises are:

Press-ups/Push-ups
Steps up with/without knee raises
Squats
Calf raises
Superman
Spider crawls
Groiners
Burpees
Handstands
Pull-ups
Planks

Wall sits

11. Do household chores

Household chores keep your home looking neat and tidy, but they can also double as a great workout.

Mopping and vacuuming burn a ton of calories, so does unloading groceries and decluttering. If you have a room that needs a touch-up or an old shed, don’t waste your money on a painter when you can do it yourself. Painting involves a lot of squatting, standing, overhead presses, and hand movement.

Got a dirty car? Save money by washing it yourself, then by giving it a nice wax. All those motions burn calories, stabilizes your shoulder muscles and improves mobility and flexibility.

Getting yard work done is also a great exercise. Mowing the lawn gets you moving, as does edging and trimming. Raking up fallen leaves works all areas of the body, especially in a big yard where you do a lot of walking and squatting. Pruning trees is basically strength and endurance training and weeding will engage your arms and legs.

Final Word

Who needs a gym when there are cheaper, more convenient alternatives? Save that extra money and get yourself something nice as a reward for your hard work every month to help keep you motivated. It will be one of the best decisions you’ll ever make!

What is Cardio Yoga?

How to use yoga to increase your heart rate


For most of us, cardio is not an attractive form of exercise, but yoga can be! It’s an easy and fun way to get your heart rate up, and you’ll pass the time quickly whilst doing something hugely beneficial for your health.


Though yoga is technically not considered to be an aerobic exercise, there are faster-paced styles of yoga that are sure to increase your heart rate – it’s all about finding the right style of yoga for you.


Yoga can be a great workout even if you consider yourself to be relatively fit. It requires you to move your body in ways that you’re probably not used to – spend 90 minutes on the mat and you might get a cardio workout that you weren’t expecting.


Benefits of increased heart rate


Though it doesn’t always feel very pleasant, increasing your heart rate has a whole heap of benefits! Here are some of the best.


Partaking in aerobic exercise 5 x per week for 30 minutes can help you to live longer, improve your quality of life, and allow better management of chronic conditions such as diabetes and hypertension
Aerobic exercise trains the body to move oxygen and blood to your muscles more efficiently – this leads to your muscles using fuel more effectively, allowing you to move with more ease and start getting fitter!
Increasing your heart rate can lead to a decreased risk of metabolic syndromes – such as obesity, high blood pressure, and high cholesterol.
Cardio workouts are stress-relieving – a good workout will leave you feeling on top of the world. Exercise releases endorphins, which make you happier, and soon enough you won’t be able to get enough of your cardio workout!
You’ll have a better cognitive function and improved focus, as well as possible protection against short-term memory loss.
You’ll have energy in other areas of your life – such as the walk to work, keeping up with your kids, and doing the gardening.


Why should I choose yoga


Maybe you’ve got your heart set on a yoga practice and are simply trying to find out how to use it to improve the health of your heart. Or maybe you’ve stumbled across this article and are unsure as to why you should choose yoga over a more traditional form of cardio exercises – such as running, cycling or swimming.

Switch it up

Though you may not increase your heart rate in the same way that a sprint would, a yoga class with little rest will get your heart rate up towards what is considered a cardio exercise. It can be a great way to switch up your exercise routine, maybe swap your Saturday morning run with a yoga class to keep things interesting for yourself. Incorporating yoga into your already existing fitness routine can help you to advance in the sport that you already practice.

Add yoga positions into your workouts

If you’re already working out and want to use yoga to add elements to your routine, consider simply adding poses to your HIIT workouts. You could stretch out the hamstrings whilst working on core and arm strength by adding downward dog into your burpees. Maybe you could do 10 rounds of sun salutations for a great warm-up and effective way to prepare your body before your next fitness class.

Stress relief

If the mere thought of the treadmill leaves you wanting to curl up in a ball and scream, it’s probably not the cardio workout for you. Yoga is known for its stress-relieving properties – spend an hour increasing your heart rate by doing something that you both love and look forward to, and your body and mind will thank you. And who knows, maybe after a few weeks of regular vinyasa classes, the treadmill won’t look quite so scary.

Using the larger muscles

Yoga classes that strengthen large muscles such as the quads and hamstrings will require your heart to work faster to deliver them all of the oxygen that they need.

Use a monitor

If you’re interested in yoga’s ability to increase your heart rate, use a wearable pulse tracker throughout your next class and see just how much of a workout you get! The great thing about doing this is you’ll see just how quickly you can improve by attending classes regularly and becoming stronger.

Intensity, duration, and frequency

These are the three components necessary for reaching cardiovascular fitness. Most yoga classes last for 60-90 minutes, and depending on the style can be quite intense. The more you practice, the easier it becomes – even though it might not feel that way after your first vinyasa class! Once your class starts to become easier, consider adding another element of cardio to your fitness routine, or trying out a different style of fast-paced yoga.


It’s up to you how you use yoga to increase your heart rate! Read on for the best styles of yoga for a cardio workout.


Types of yoga for cardio

You’ll need to consider the style of yoga that you are practicing to know whether it can qualify as a cardio workout. If you’re spending more time in floor-based classes such as restorative yoga or yin yoga, you won’t be increasing your heart rate by very much. A faster-paced class will get you on your feet, flowing through poses, and breaking a sweat in no time!

Ashtanga

Ashtanga yoga classes teach a set of movements in a specific order, often repeated many times for a very physically demanding class.

Vinyasa

Vinyasa is fast-paced and incorporates positions that will vary from class to class. Some vinyasa classes might pick a focus – such as core strength or upper body strength. During a vinyasa class, the breath is synchronized with movement and is a quick way to increase the heart rate.

Power

Power yoga focuses on the positions and the body more than it focuses on the breath. A power yoga class will definitely feel like a workout. Positions are moved through in a physically challenging way, with many of the poses being held for longer periods to increase strength.

Online classes

Though the best way to practice yoga is under the supervision of a licensed instructor, there is also a whole world of online classes to choose from. Online classes can help you to get familiar with the poses before heading to a group class, and you’ll also be able to see which style of yoga suits you best.


It can be challenging to move through fast-paced yoga classes as a beginner, start with Hatha (which is a little slower and great for beginners) so that you learn the poses and can more easily follow a vinyasa class. You may even find Hatha to be enough of a cardio workout!


Positions to increase cardio

Here are some of the best yoga poses to increase your heart rate.

Plank pose

Laying on the floor, bring your hands underneath your shoulders and push into them to lift your whole body. Engage through the legs and keep pushing the heels towards the back of the mat, as you hold your core tight. Challenge yourself to see how long you can stay here.

Chair pose

Start in a standing position, then deeply bend the knees as though sitting on a chair, bring the hands to a prayer position at the heart and stay for a few breaths. Try to get a little deeper with every exhale, and maybe move between standing and chair pose to start getting your heart rate up.

Crescent lunge

Starting from plank position, step the right foot forward so that it rests on the mat between your hands. Then lift from the torso to bring your body upright. You could switch between plank pose and lunges (alternating sides) for a great workout.

Boat pose

Sitting with the soles of your feet on the floor, start to gently lean your torso back as you lift your feet away from the mat. Keep a bend in the knees, and the shins should be parallel to the floor. Once you’re here, bring your arms alongside your shins and engage the core.

Downward facing dog pose

Though technically a ‘resting pose’, it certainly doesn’t feel that way when you first start practicing yoga. From plank pose, lift from the core to push the hips up towards the ceiling, as you reach the heels towards the ground. You’ll increase your heart rate and get a  great hamstring stretch. Alternate between plank pose and downward facing dog to add more of a cardio element to the movement.

Ujjayi breath

Ujjayi breath is achieved by making a slight constriction in the back of the throat as you inhale and exhale through the nose. Once you’re familiar with your regular vinyasa class, this can be a great way to add a little more difficulty to your practice.

Sun salutations

A few rounds of sun salutations is probably the easiest way to get your heart rate up in no time. To practice sun salutations, you flow between a set of predetermined positions, moving each time you inhale and exhale. Use a video to learn sun salutations until you’re able to do them on your own. The best part is that you can repeat them as many times as you like to increase your heart rate – they’re a great way to wake up the body and stretch out the knots in the morning!


Give yoga a try and you’ll gain much more than a cardio workout!

Best Portion Control Plates For Adults

porion control plate

Best Portion Control Plates For Adults That Can Help You Loose Weight


If counting calories, points, carbs, fats or calculating macros is not for you then portion control might be a better option to help you lose weight and live a healthier life.

You can portion control on your own, or make life a bit easier for yourself with a portion control plate. This article was written entirely for this purpose, to help you to find the most suitable portion control plates on the market and to compare them with ease.

Portion control can benefit everyone. Let’s face it, not everyone adheres to the serving portions outlined on the package, or the ones recommended by medical professionals. So many of us are guilty of just eating to our heart’s content and that’s the end of the story.

Well, it’s no wonder over 70% of Americans , and 39%  of all adults are overweight. This puts us at greater risk of certain conditions such as diabetes, cardiovascular disease, osteoarthritis, and certain cancers.

The solution to this is simple, watch what you eat. With a proper diet, you can lose at least 1-2 pounds without even setting foot inside a gym. You don’t even have to feed on veggie sticks and tofu. It’s as simple as choosing an appropriate portion control plate!

Portion Control Plate Buying Guide- What ‘s Important


When buying anything for the first time, you’ll need a sort of reference that will help you find the best one for your particular needs. This buying guide contains all the essential elements you need to look for when choosing a portion control plate for the first time.

Is it easy to use?

The whole point of portion control plates is to make watching what you eat easier. Therefore, the plate itself shouldn’t be too complicated to use or hard to understand. Ideally, potion control plates for beginners will have labels or some sort of indication of what goes where, for example, grains in this compartment, meat in the other, carbs here and veggies in this slot.

If the plate has adjustable compartments, you shouldn’t have to be running to a user manual, googling tutorials or making someone else for help when it’s time to adjust. It should be intuitive or at least simple to figure out and use.

Is it durable?

The plate should last you for quite some time so you need to look for one made of durable material. Plastic is perhaps the best if you’re clumsy and used to breaking ceramic or glass. Wooden plates are cute but they can start to dry rot after a while.

Can I transport it easily?

If you have to travel for work, then you may want to take your portion control plate along with you to stick to your dietary plan and to avoid overeating.

The plate should be one that you can easily slip into a bag without fear of it getting damaged during transport. It should be easy to fit and won’t require additional storage space especially when you prefer to travel light.

Is it easy to clean?

Keeping plates clean is very important since dirt, bacteria, and grime can quickly accumulate. The portion control plate you buy should be easy to clean with simple soap and water, and if you have a dishwasher, it shouldn’t be affected by hot water.

If it is a material that will start to strip if you apply hot water or bleach, then it isn’t ideal. Wooden plates are generally absorbent if they don’t have special coating and bacteria can seep into micro crevices that are beyond the reach of your washcloth. On the other hand, ceramic, plastic, and glass are not porous and moisture will slide right off or accumulate on the surface, making it much easier to clean.

Does it have enough slots?

Different portion control plates have different numbers of slots. If you’re going to have a dinner of mashed potatoes, beef, greens, and mac and cheese, then a portion control plate with only three slots won’t be enough. Unless you plan to force two of these items into one slot, but this would defeat the purpose. If you know your meals are more basic, there’s no need for a portion control plate with 6 slots when half of it is going to be empty.

It is always better to have slots and don’t need them than to not have and require them. An ideal plate will have adjustable slots or 3-4 slots.

Is it in my budget?

Portion control plated vary in price and the one you choose must be well-suited to your budget. This does not mean you should automatically choose the cheapest one and try to save a few bucks since you may only get a few uses out of that plate. On the other hand, the most expensive plate isn’t necessarily the best option for you.

After considering the aforementioned factors, you will be able to determine the value of the plate for your money. Be sure to read the reviews since this can give you unbiased insight on how well the plate will function and help you figure out if the plate is worth it for that price.

Now, you can think about things like design and color since you’re the one that will be seeing and using it every day. If it’s ugly, it can have an impact on your mood, so choose wisely.

With these things considered, you’re just about ready to take a look at some actual portion control plates. Since there are many of them on the market, we took some time to find the top 5 portion control plates that are perfect for beginners and are the best value for your buck. Have a look:

Top 5 Portion Control Plates for Weight Loss Reviewed and Compared


Health Beet Portion Control Plate – Choose MyPlate for Teens and Adults, Nutrition Plate with Food group Sections, 10″ – English Language (Single Plate)

Cost: $8.95
Amazon rating: 4.4/5

The Health Beet Portion Control Plate is an affordable option for someone who isn’t looking for something too fancy and is someone experienced with portion control.

The Health Beet Portion Control Plate can come as a single plate, or you can get it in a set of 4 for your entire family or just to have in case one gets broken or misplaced. This plate is divided into 4 color-coded sections, namely fruits, vegetables, grains, and protein, not by an actual divider but by printed fractions of a circle which complements the shape of the plate perfectly.

Another interesting thing about this portion control plate is that you can get it in either English or Spanish, so you can easily gift it to a Spanish speaking relative or child.

This plate is made of plastic but isn’t bendy or flexible. It’s completely sturdy so you won’t have to worry about food spilling. It is washable, completely dishwasher and microwave safe and has a streamlined shape so there are no sharp edges or corners.


Pros

It’s relatively inexpensive
It’s easy to use and understand
It’s great for kids
It comes in two languages
It’s easy to store with regular plates

Cons

It doesn’t come with a divider and portions are printed on the plate
The plastic can start to change color especially when washed in the dishwasher
The plate is relatively large

Rehabilitation Advantage 3 Compartment Portion Plate with Lid (Set of 2)

Cost: $12.95
Amazon Rating: 4.4/5

The Rehabilitation Advantage 3 Compartment Portion Plate with lid comes in a set of 2 and was designed to make watching how much of what you eat simpler. This plate isn’t just for adults such as yourself and can be used by children and adults of any age since it’s made of plastic.

The plate comes in avocado green and features dividers that split it into 3 sections that are marked vegetables, proteins, and carbs. It also comes with a snap-shut lid that makes it perfect for storage in the refrigerator or for transporting the container safely. If you ever have to leave the dinner table to go to the bathroom or attend to your kids, all you have to do is pop the cover on and your food will be protected from flies or dust.

If your food gets cold, you don’t have to reheat it in a separate container since the Rehabilitation Advantage 3 Compartment Portion Plate is microwave-friendly. When you’re done with your meal you can easily clean this plate by popping it in the dishwasher or handwashing it.

Pros

It’s easy to use
It’s durable
It has actual dividers so food won’t touch
The larger portion is dedicated to fruits and vegetables
It has a lid

Cons

Three slots may not be enough for some persons
It only comes in one color

Meal Measure 66700 Portion Control/Weight Management Plate

Cost: $9.47
Amazon Rating: 4.1/5

If you already have tons of plate, there may be no need to buy an entirely new one just because it comes with dividers. What if you could buy a divider that you could use with any plate?

Well, that’s where Meal Measure 66700 Portion Control/Weight Management Plate comes in. This plate was designed to work on any plate so that you can measure your servings accurately based on USDA my pyramid serving sizes.

You can get this plate in either red or blue and it features a series of labeled cavities, with labels such as fruits/vegetables, starch, and protein that are precisely one cup at the top with a half cup line on the inside. These slots are the same except for the protein slot which is approximately the height or a deck of playing cards, so anyone can use it for any diet. When done, simply lift the divider plate off your plate and voilà, your meal is served.

Not only does this plate take the guesswork out of portion control, but it is also easy to clean and is dishwasher safe. When done with it, simply pop into a drawer or your cupboard until it’s time to eat again.


Pros

It’s relatively easy to use
It’s relatively inexpensive
It’s pretty sturdy
Over time you’ll be able to eyeball serving sizes without the divider

Cons

It’s not actually a plate
It may be harder to store than an actual plate
All circles are the same size


La Boos Round Dish Healthy Separation Plate, Cereals, Vegetables, Protein, Keep Health Ratio Per Meal, Lunch Plate, Dinner Dish (Round Dish)

Cost: $18.95
Amazon Rating: 4.7/5

If you are not a fan of plastic and prefer eco-friendly products, then you may be interested in La Boos Round Dish Healthy Separation Plate since it is made entirely of bamboo. This plate is perfect for persons who eat organic since bamboo is a natural material and is worth the cost of a sustainable product.

The plate has an elegant round design and deep slots which make it perfect for liquids such as soup or cereal with milk, that will stop it from spilling into the next slot. This design follows USDA guidelines as its four slots are divided into the following proportions: 38% Fruits and Vegetables, 32% Grains and Cereal, 18% Protein and 12% for your favorite snacks and treats. There’s also the option of getting a square design from the seller with the same portioning so it really is up to you what you’d prefer.

This plate comes with a booklet on how to care for it since bamboo is a natural material and you can’t treat it like you would a regular plate. This means you can’t store anything in it overnight, place it in direct sunlight or expose it to humidity or use abrasive scrubbing pads to clean. It is however easy to wash with mild soap and water which should happen as soon as possible to prevent staining.

Pros

It has deep slots
It’s easy to use
It’s eco friendly
It has an elegant design
It’s sturdy but can break if it falls

Cons

It’s relatively expensive
Special cleaning instructions

Not microwave friendly

Marianne’s PLATE (Melamine Word Portion Plate)

Cost: $8.45
Amazon Rating: 4.4/5

Marianne’s Plate is a great option for when you aren’t looking for something that is both budget-friendly and attractive. Printed on the food side of the plate is the portions of vegetables/fruits, protein and starch you should consume. Instead of lines, the slots are actual words that indicate the type of food you can put in that section. So, the vegetable/fruits section will have words like cucumber and lettuce, while the protein and starch sections have words like pork and chicken, and pasta and rice respectively. The sections are also color-coded in red, yellow and green so you won’t mix them up or get confused.

Marianne’s plate is made of melamine, a sort of durable plastic that is food safe and easy to clean. It’s 10 inches in diameter but has approximately 7 inches of eating surface to keep meals small and to avoid overpacking. The plate is dishwasher safe, however, it’s not recommended that you slip this plate into the microwave for reheating.

Since it’s a flat plate that doesn’t come with dividers, it’s easy to store among your other plates and can be used by anyone in your home. It’s lightweight, beginner-friendly and all in all an inexpensive way to portion control.

Pros

It’s relatively inexpensive
It’s relatively durable
It’s easy to store
It’s attractive
It’s easy to clean

Cons

It doesn’t have dividers

Not microwave friendly

Final Advice


Choosing a portion control plate is the hardest decision you’ll have to make regarding watching how much you eat since it does all the work for you.

If you’re a beginner, you’ll probably want to go with a plate that has actual dividers like the Rehabilitation Advantage 3 Compartment Portion Plate, the Meal Measure 66700 Portion Contol/Weight Management Plate or the La Boos Round Dish Healthy Separation Plate.

If you’re already familiar with portion control plates then you can go ahead with the Health Beet Portion Control Plate or Marianne’s Plate.

When to Check Your Blood Sugar

Studies show that people with diabetes who maintain normal or near-normal blood glucose (sugar) levels are at a reduced risk for complications. If you have diabetes, it is best to keep your blood sugar in a target range to reduce the risk of problems, including diabetic kidney disease (nephropathy), eye disease (retinopathy), nerve disease (neuropathy), heart attack, or stroke. Some individuals can work toward lower numbers, while some may need higher goals. You need to work closely with your doctor to set your personalized target range for your blood sugar. This target will help you achieve control of your blood sugar without having a high risk of dangerous spikes or drops.

But, just how often does one need to check blood sugar levels? The answer to this question depends on important information about your specific condition. Specifically, here are the factors you may need to consider to know when to check your blood sugar:

  •  The type of diabetes you have (e.g., type 1, type 2, gestational diabetes)
  • Your treatment or management (i.e., lifestyle, use of insulin or oral medications)


This article will discuss the following topics:


  • When to check blood sugar for type 1 diabetes
  •  When to check blood sugar for type 2 diabetes
  •  When are the best times in a day to check blood sugar?
  • When to check blood sugar more frequently
  •  When to contact the doctor
  • When to test blood sugar: The different types of tests• Factors that affect blood sugar values

When to check blood sugar for type 1 diabetes

If you have type 1 diabetes, your healthcare provider may have advised you that frequent testing is the only safe way to manage your blood sugar levels effectively. You may need to test at least four times daily.

If you are using an insulin pump (e.g., continuous subcutaneous insulin infusion), or if you give yourself three or more insulin injections daily, you may need to test as many as ten times daily or more.

When to check blood sugar for type 2 diabetes

• For individuals with type 2 diabetes, the frequency of testing may depend on factors, including your treatment (lifestyle, insulin, oral medications), risk for extreme blood sugar levels (especially low blood sugar), and goals of management.

When are the best times in a day to check blood sugar?

  • As advised, most people with diabetes check their blood sugar first thing when they wake up before eating (called “fasting” blood sugar), and also before taking other meals in a day. Here’s a list of the best times in a day to check your blood sugar:
  •  Before breakfast (with fasting)• Before lunch• Before dinner• Two (2) hours after starting a meal (called “postprandial”)
  •  Before bedtime
  • Before driving
  •  Before, during, and after performing rigorous exercise
  •  When you have symptoms of high or low blood sugar

When to check blood sugar more frequently

  • When you are feeling sick or stressed
  • When you are having less or more physical activity than usual
  •  When you are experiencing changes in eating habits or daily routines (e.g., when traveling)
  • When adjusting/changing insulin or medication
  • When you are having symptoms of low blood sugar (e.g., sweating, blurred vision, shakiness, a fast heartbeat)
  • When you are having symptoms of high blood sugar (e.g., increased thirst, frequent urge to urinate, nausea, vomiting, headaches, fatigue)
  • When you experience morning headaches or night sweats
  • When the trend of your blood sugar readings are above the target range
  • When you are pregnant
  • When you’re recovering from or preparing for surgery
  • When you are starting on new medications that can affect blood sugar (e.g., steroids)

When to contact the Doctor

Seek medical attention immediately when your blood sugar readings are in the extreme range (i.e., either a fasting blood sugar greater than 360mg/dL or less than 70mg/dL), especially with two or more abnormal readings.

Recognizing the “red flags” of high and low blood sugar iscrucial to your health condition. Thus, it is essential for you to be wary of the signs and symptoms of hyperglycemia (high blood sugar) and hypoglycemia (low blood sugar).

When your blood sugar has dropped below the normal range (typically less than 70mg/dl), you may feel:

  • lightheaded or with headaches
  • sweaty
  • nauseated
  • shaky
  • hungry, weak, or drowsy
  • irritable, nervous, or anxious
  • confused and unable to concentrate
  • tingling or numbness on your lips or tongue
  • an increased heartbeat

With a very low blood sugar (less than 50mg/dl), you may experience severe symptoms such as:

  • a seizure loss of consciousness
  • confusion
  • disorientation

What to do when your blood sugar gets too low

A condition of low blood sugar level can be dangerous and needs to be treated without delay. If you are taking oral medications or insulin, you may have a greater chance of having low blood sugar. If you feel very hungry, sweaty, and shaky, you need to check your blood sugar right away.

Even if you do not feel any of these symptoms but think you may have low blood sugar, check your blood sugar at once. If your meter reading confirms a blood sugar lower than 70 mg/dL, do one of the following immediately:

  •  Drink four (4) oz. of fruit juice
  • Drink four (4) oz. of regular soda
  •  Chew four (4) hard candies
  • Chew four (4) glucose tablets

After taking one of these, recheck your blood sugar after 15 minutes. Repeat eating any one of the mentioned until your blood sugar is above 70 mg/dL. After your blood sugar has reached over 70 mg/dL, you should grab a snack if the next meal is one hour or more away.

When you have high blood sugar (typically above 180mg/dl), signs and symptoms may include:

  • tiredness
  •  thirst
  • have the urge to urinate frequently, especially at night

What to do when your blood sugar gets too high

Having blood sugar that’s beyond your target levels (typically over 180 mg/dL) over time can lead to serious health complications. After having a high reading accompanied by feelings of tiredness, thirst, frequent urge to urinate, or blurry vision, you may have a blood sugar spike. One way to lower this is to drink lots of water and have a brisk walk or exercise. Contact your healthcare provider if this becomes a trend for more than three times in two weeks, and you have no clue why.

When to test blood sugar: The different types of tests 

1. Fasting Blood Sugar (FBS) – this measures blood sugar after you have not taken any meals for at least eight (8) hours. FBS is the first test often requested by your healthcare provider to determine whether you have pre-diabetes or diabetes.

2. Two (2)-hour postprandial blood sugar – this measures blood sugar exactly two hours after you have started eating a meal. This test is not used to diagnose diabetes.

3. Random blood sugar (RBS) – this measures blood sugar regardless of when you last ate a meal. Several random measurements may be checked throughout the day. RBS is useful because sugar levels in healthy people do not change widely throughout the day. Whereas, blood sugar levels that fluctuate widely may indicate a problem.

4. Hemoglobin A1c (also called glycohemoglobin A1c orglycated hemoglobin) – this measures the sugar stuck to your red blood cells, and is also used to diagnose diabetes. If you already have diabetes, this test may be ordered by your doctor to know how well your condition has been controlled in the last two to three months. This is also called your estimated average glucose or eAG.

5. Oral Glucose Tolerance Test (OGTT) – this is used to diagnose pre-diabetes and diabetes. This refers to a series of blood sugar measurements taken after you drink a sweet glucose liquid. OGTT is commonly requested by the doctor to diagnose gestational diabetes (diabetes during pregnancy)

Factors that affect blood sugar values

Several factors can influence how your blood sugar levels spike or drop. Knowing these factors can help you prevent wide swings in your blood sugar values.

What makes my blood sugar rise?

  • a snack or meal
  • sedentary lifestyle or inactivity
  • stress
  • insufficient diabetes medication
  • side effects of other drugs
  • illness or infection
  • hormonal changes (e.g., during menstrual periods)

What makes my blood sugar fall?

  • a snack or meal with less food (fewer carbohydrates) than usual
  • skipping a snack or meal
  •  rigorous physical activity
  • too much diabetes medication
  • side effects of other drugs
  • drinking alcoholic drinks, especially with an empty stomach

Summary

With diabetes, knowing when to take your blood sugar is vital. However, it’s normal to feel frustrated or even guilty when you see that your blood sugar is beyond the targeted range. Try to think of your meter readings as helpful information that can help you and your healthcare provider manage your condition better. Whether too high or too low, you can use the results of your blood sugar to your advantage in making decisions about medication, food, and physical activity. These informed decisions should help you feel your best daily and prevent or delay unwanted diabetes complications.

Are Yams Low Glycemic? 8 Yams For Diabetics

8 Healthy Yams For Diabetics 


Many persons serve white rice or white potatoes as the main starch in their dinners since they’re easy to prepare and cheap. If you’re one of those persons then your diabetes diagnosis may have left your scratching your head when it’s time to serve your meat.

What could you possibly pair your baked chicken or steamed fish with if you can’t eat rice or mashed potatoes? Forget pasta since that’s a no-go and bread isn’t really suitable. Should you just eat it alone? Well, that won’t be too filling. How about substituting them for yams? Yams can be a good option but first you have to know how quickly the raise your blood sugar aka as the glycemic index.

You want a yam that raises you blood sugar slowly.

What is the Glycemic Index?

As you may already know, the foods you eat after being diagnosed with diabetes have a huge impact on your quality of life. This is because certain foods release sugars into the blood faster than others and can sometimes cause a spike in blood glucose. A sudden spike can cause a number of things to happen. This includes things like:

Headache
Confusion
Nausea
Fatigue
Frequent urination
Extreme thirst
Dry mouth
Difficulty breathing
Blurred vision
Coma

If untreated, there could be irreversible organ and nerve damage, or worse, death.

Scientists had to figure out which foods cause blood sugar spikes and which released sugar into the body gradually, so they develop what is called the Glycemic Index . As a diabetic, this is something you have to be familiar so you can put together meals wisely and enjoy an incident-free life.

The Glycemic Index is a ranking system of foods relative to each other in terms of carbohydrate content and how quickly they are absorbed and metabolized. It is based on a scale of 0 to 100 and is placed in 3 broad categories:

Low Glycemic – 0 to 55
Moderate Glycemic – 56 to 69
High Glycemic – 70 and over

Not all foods are given a glycemic index simply because they aren’t carbohydrates. For example, herbs and spices, meats such as beef, chicken, fish, and dairy such as eggs.

The Glycemic Index for a specific carb is determined by certain factors . This includes:

The type of sugar- Maltose has a higher Glycemic Index than fructose
The structure of the starch- Certain starches are easier to digest than others. Foods with higher amylose content will have a lower Glycemic Index since it is harder to digest than amylopectin that is easily digested.
The amount of dietary fiber present- Fiber slows down the absorption of sugar in the  body and is less likely to cause blood sugar spikes
The refinement of the carbohydrate- The more processed a food is, the higher the Glycemic Index since certain processing methods disturb amylose and amylopectin molecules.
The nutrient composition- Fats and acids lower the Glycemic Index of foods we eat by reducing the rate at which they are digested and absorbed.
The cooking method- The duration food is cooked increases the digestion and absorption rate of sugars.

The ripeness- As a fruit ripens, the carbohydrates turn into sugars . A green banana lower Glycemic Index than a ripe,yellow banana.

Why Yams Should Be In Your Diet

Yams have been used throughout human history as a primary food crop and have even been used to address certain illnessessuch as hypertension, chronic diarrhea, cancer, asthma, and as you’ve probably gathered by now, diabetes.

Several studies have been conducted on yams to determine the correlation between yams and lowered blood glucose and the general consensus is that it has the ability to improve glucose metabolism in the body and decrease insulin resistance.

Yams are generally low glycemic and can easily be incorporated into meals. They can be boiled in water, roasted, baked, grilled, and served as is, mashed, diced or sliced. Yams may also be ground into a flour and turned into pancakes, caked and other desserts.

Sweet Potatoes Aren’t Yams

Maybe you’ve been eating sweet potatoes this entire time thinking they were yams. Maybe you’ve never even had a yam.

This is a common misconception and it’s not your fault. They look quite similar, but they are quite different.

Yams are native to Asia and Africa. The Yams we get today are generally from the Caribbean and Africa while sweet potatoes are generally from North Carolina . Yams have a rough, tree-trunk like texture, unlike sweet potatoes which are smooth to touch.

Yams are light to dark brown in color and its insides are usually white, yellow, pink or purple. These grow in a variety of sizes and can be a few feet in length and can weigh as much as a skinny teenager. Sweet potatoes are reddish-brownish, sometimes purple and can have a light to bright orange flesh, cream flesh or purplish flesh.

Yams are bitter to taste and are starchy or dry. Sweet potatoes are actually sweet and have more sugar than yams.

Yams have more fiber, carbs, potassium, and manganese than sweet potatoes which make them great for bone health, reducing bad cholesterol and have the potential for reducing symptoms of menopause.

Sweet potatoes, on the other hand, are richer in Vitamin A, certain antioxidants, and B Vitamins which are vital to creating DNA, lower the risk of heart disease and cancer and improve the regulation of blood sugar.

Both Yams and Sweet Potatoes are nutritious and should be considered for diabetics, however, for this article, we will be focused on yams.

8 Low Glycemic Yams to Try Today

1. Japanese Mountain Yam

Dioscorea japonica, sometimes called East Asian Mountain Yam, Yamaimo or Japanese Mountain Yam is native to East Asian countries like Japan, China, Korea, Taiwan and Assam (India).

This is a slippery yam that can be eaten raw or cooked since it slides down the throat and is digested easily. Japanese Mountain Yam is typically used in soups or grated over noodles and is sometimes sold by itself as a ready-to-eat item at convenience stores. It may also be thinly sliced and added to salads to make it more filling.

Japanese Mountain Yam is also said to have anti-cancer properties and is good for intestinal health.


2. Okinawan Yam

Okinawan yams, sometimes called purple potatoes or Okinawan sweet potatoes, have a vibrant purple flesh which makes them an attractive addition to any dish. These yams are rich in Vitamins A, C, and B6, along with other nutrients such as manganese, magnesium, calcium, and iron.

These yams are native to Eastern Asia as well, in countries such as China and Japan but soon made their way to Hawaii where it is now a staple crop. It can be cooked with or without its skin and its consumption is especially encouraged for persons with diabetes, hypertension, and anemia.

3. White and Yellow Guinea Yams

Dioscorea cayenensis (yellow)/rotundata (white)
, or guinea yam as it is more commonly referred to, is native to Africa and is also a staple crop. These are one of the most common yams grown in the world and can be found in other regions such as the Caribbean, South and Central America and India.

These are sometimes considered “true yams” and can be used as an alternative to rice in all meals. White yams are generally softer and can be crushed like potatoes while yellow yams are firmer and can be sliced and diced and served as a side.

4. Air Potatoes

While they are called air potatoes, they are actually one of few true yams found in the US, especially in Florida, and are considered a invasive species and garden pest as they contain toxins. It is largely used for pharmaceutical purposes .

In other parts of the world like Asia and Australia, air potatoes are cultivated for human consumption. They can grow up to 8 inches in a day and grow both below and above the surface.

Air potatoes are slimy which makes them great binders for pancakes and waffles, and works great in broth and stews.

5. Tropical Yam

As the name suggests, Tropical yams (Dioscorea trifida) are grown in the tropics and are cultivated and eaten widely in Latin America, Africa, Asia, and the Caribbean. This yam sometimes goes by different names such as true yam, Indian yam, yampi and kush-kush (cush-cush).

Tropical yams have bark-like skins and dry, firm, white flesh. They have a mild taste so they are usually placed in dishes with lots of spices and big flavors to balance out the meal.

6. Filipino Purple Yam

Filipino Purple Yam , or Ube , is another purple flesh variety of yam that adds vibrant color to any meal, especially deserts. It is sometimes confused with another yam variety that grows in Asia called Onikawa that also has purple flesh. This yam may also have a cream or white flesh, but the purple variety is bigger in the United States.

Many persons use the powdered form of this yam to give cakes a natural lavender hue or to make purple ice cream, puddings and paste since it has a slightly sweet, nutty taste. The yam can also be paired with meat or added to salads.

7. Chinese Yam

Chinese yam is sometimes called cinnamon vine because of its cinnamon-scented flowers. It has a long, tube shape and has a bright white flesh. This yam is grown in colder, elevated regions, which makes it unique since yams tend to prefer warmth. Though native to Asia, it is cultivated in Northern America as well.

This type of yam has a mild flavor and can easily be incorporated into flavorful meals. It can be crushed, diced and thinly sliced as preferred but that isn’t its only use.

Chinese yams are prized because of their medicinal value. They are used in Traditional Chinese Medicine to target stomach and spleen ailments and may also be used topically for skin disorders and to treat stings and bites. It is also rumoured that menopausal women may also find this yam useful as it contains phytoestrogens which may alleviate symptoms of menopausebut this has yet to be confirmed.

8. Lesser Yam

Last on our list is Lesser Yam   or Dioscorea esculenta. It is especially popular in Vietnam and India, along with other Southeastern Asian countries such as Myanmar, Nepal, Bangladesh, Thailand, and Indonesia.

Lesser yam is a sweet yam with a pale yellow or white flesh and hairy brown skin. It is enjoyed similar to white or sweet potatoes and can be boiled and mashed or sliced, baked whole and seasoned, roasted or turned into desserts.

Glycemic Index of Yams Compared

Filipino Purple Yams- 24
Air Potatoes- 34
Chinese Yam- 52
Okinawan Yam- 55
Sweet Potatoes- 61
White and Yellow Guinea Yams- 66

Final Thoughts


Yams of different varieties are used all over the world in different cultures as food and for medicine. Diabetes should seriously consider replacing certain high glycemic starches with yams which are low glycemic to help manage their diabetes.

There are many yams to choose from and the one you choose ultimately depends on the availability and what you plan to make. When you eat yams, you can rest assured that these delicious, nutritious tubers will not cause blood sugar spikes and you will have less diabetic episodes.