​​ Which Cheese Is Right for Me?

If you visit a grocery store or deli to looking for cheese, you’ll be spoiled for choice. Cheeses don’t just vary widely in their taste and texture though, as these dairy products also differ significantly in their nutritional profile. From their calorie and fat content to the amount of calcium they contain, no two cheeses are the same nutritionally. If you aren’t sure which cheese is your best bet for weight loss, or you want to achieve healthier bones or blood pressure, read on to find out the most suitable choice for your needs.

Lactose Intolerance

Around 25% of Americans have a degree of lactose intolerance, which causes stomach pain, bloating, gas and diarrhea within two hours of eating foods that contain lactose. If you are affected by this unpleasant condition, you needn’t avoid cheese altogether. Luckily, hard cheeses that are aged, such as Cheddar, Swiss and Parmesan, contain very little lactose. However, if you have severe lactose intolerance, brands of cheese that advertise they are lactose-free may be necessary, as even the small amounts of lactose in low-lactose cheeses may bring on your symptoms.

Diet For Weight loss

An estimated 69% of adults in the United States are overweight or obese. If you weigh more than advisable, you may decide to avoid cheese altogether, as this dairy item is often assumed to be too high in fat and calories to fit in with a diet for weight loss. However, not all cheeses are calorific. For instance, an ounce of low-fat cottage cheese provides just 29 calories and a similar quantity of low-fat soft cheese contains 40 calories. This compares to 113 calories in an ounce of Cheddar. If you aren’t a fan of cottage cheese or spreadable cheese, feta, mozzarella and Camembert are all lower fat options to hard cheeses.

Higher Protein Requirements

Although most people get more protein than they need, if you are an older adult, an athlete or you are recovering from ill-health or surgery, you may need more protein. The best cheeses to opt for when you need to up your protein intake are those with a lower water content. Parmesan is ideal, providing around 10g of protein per ounce, while a similar serving of other hard cheeses give you around 6g. The likes of Cheddar and Swiss cheese are still preferable for protein intake than softer cheeses.

Low-Fat diet

A low-fat diet may aid weight loss, reduce your risk of heart disease, diabetes and certain cancers, and help to control symptoms related to gall stones. Quark, which is similar to farmer cheese, is a relatively new cheese in the US, but it is virtually fat-free. Low-fat cottage cheese is another good contender for a low-fat diet. If you still want to eat hard cheese, just limit your portion size to an ounce.

Reduced Salt Diet

Surveys show that 90% of Americans eat too much salt. Diets high in salt are linked to an increased risk of raised blood pressure, which makes you more likely to experience a heart attack, stroke or kidney damage. Eating too much salt may also be detrimental to your bone health, making you more prone to osteoporosis. Even if you don’t add salt to your cooking or at the table, to cut your salt intake significantly, you need to reduce your intake of foods high in salt. Many cheeses have a high salt content, but quark, cottage cheese and cream cheese are all low-salt options.

Increased Calcium Needs

More than 50 million US adults have low bone mass or osteoporosis. Upping your calcium intake can help slow further bone loss, with dairy produce offering one of the best sources of calcium in your diet. After Parmesan, Swiss and Gruyere are your best option for calcium, though Cheddar is also a good bet.


Dairy-Free Diet

Up to 3% of infants are intolerant to dairy proteins, though 75% outgrow it by the age of three. If your kids cannot tolerate dairy produce or you have a dairy intolerance yourself, there are various dairy-free cheeses to choose from. Cheeses based on soy, rice, nuts and nutritional yeast are available, and although they are noticeably different from cheese in taste and texture, these dairy-free products make a good substitute.


If your cheese selection needs to consider more than just your flavour preference, you can now choose the right cheese with confidence. Thankfully, you can usually substitute one cheese for another in dishes, so there’s no need to compromise on your enjoyment when prioritizing your nutritional requirements.

Chair Exercise Routines For The Chair Bound

Group Of Seniors Enjoying Fitness Class In Retirement Home

Everybody loves to sit, especially after a long day at work or school. If you are like me, you feel bad sitting down without having hit the gym first. No matter how rough the day was, but what if I told you that you could do both. We are going to introduce you to some exercise techniques that you can do on a variety of chairs. Whether you are stuck in the office or you need to catch up on your favorite television program, these will be perfect for you. No gym membership, no problem. We will start with a few stretches, then move on to exercises done on a traditional chair, after that are office chair exercises and then finally exercises for people in a wheelchair. We have a little something for everybody, so let’s get you into proper shape.

Stretches

1. Chest Stretch

This is a pretty basic stretch to warm up. To do this stretch, lean back and open up your chest. Raise your arms up and out to the side, fully extended. Hold this position for about 15 seconds.

2. Twist Side Stretch

For this stretch, take your right palm and place it on your left knee. Now, push down with your right hand and look behind you to the left. Hold this position for about 10seconds and then do the same on your right side.

3. Arm Crosses

For this stretch, grab your right elbow with your left hand, and push your elbow to where your right arm is stretched across your chest. Hold this position for about 10 seconds and do some deep breathing, while you are there. Then you want to switch sides and do the same thing with your left arm.

4. Shoulder Shrugs

For this stretch, shrug your shoulders up and down. You want to be sure that your arms are extended straight down to the side of your chair as you do this. I recommend doing this stretch for about 15 seconds.

5. Downward Reach

For this stretch, make sure you’re are in a straight up position in your chair. Now, simply reach down towards the ground, with one arm after the other. Do this for about 20 seconds as quickly as you can.

Chair Exercises

1. The Running Man

We are going to use this exercise as a warm up to get things started. Sit in the chair towards the edge with your knees in a right angle. Put your elbows in a right as well. After that start with a nice jog, while still in sitting position. Then start to speed up into a sitting sprint. Do this for about 20 seconds to start off your workout. This is mainly a cardio exercise to get your heart rate going.

2. Flutter Kicks

To do this exercise continue sitting on the edge of the chair. Then place your palms on the front corner of the chair to help you balance. Then lift your legs up and lean back. Now just flutter kick in the air up and down, but not too wide. Do this for about 30 seconds and that should do the trick. If you want to make it a bit more challenging, then lift your arms straight into the air during the set. This exercise is very beneficial to your core.

3. Chair Jumping Jacks

To begin this exercise, get to the edge of the chair and then push your legs out to the side. Once you get a good rhythm then add your arms, rising them up. Then simply coordinate your jumping jacks. As well as elevating your heart rate, there is a variation that is great for your obliques. Just be sure to touch your elbows to your knees as you do each rep.The alternate technique are known as wacky jacks.

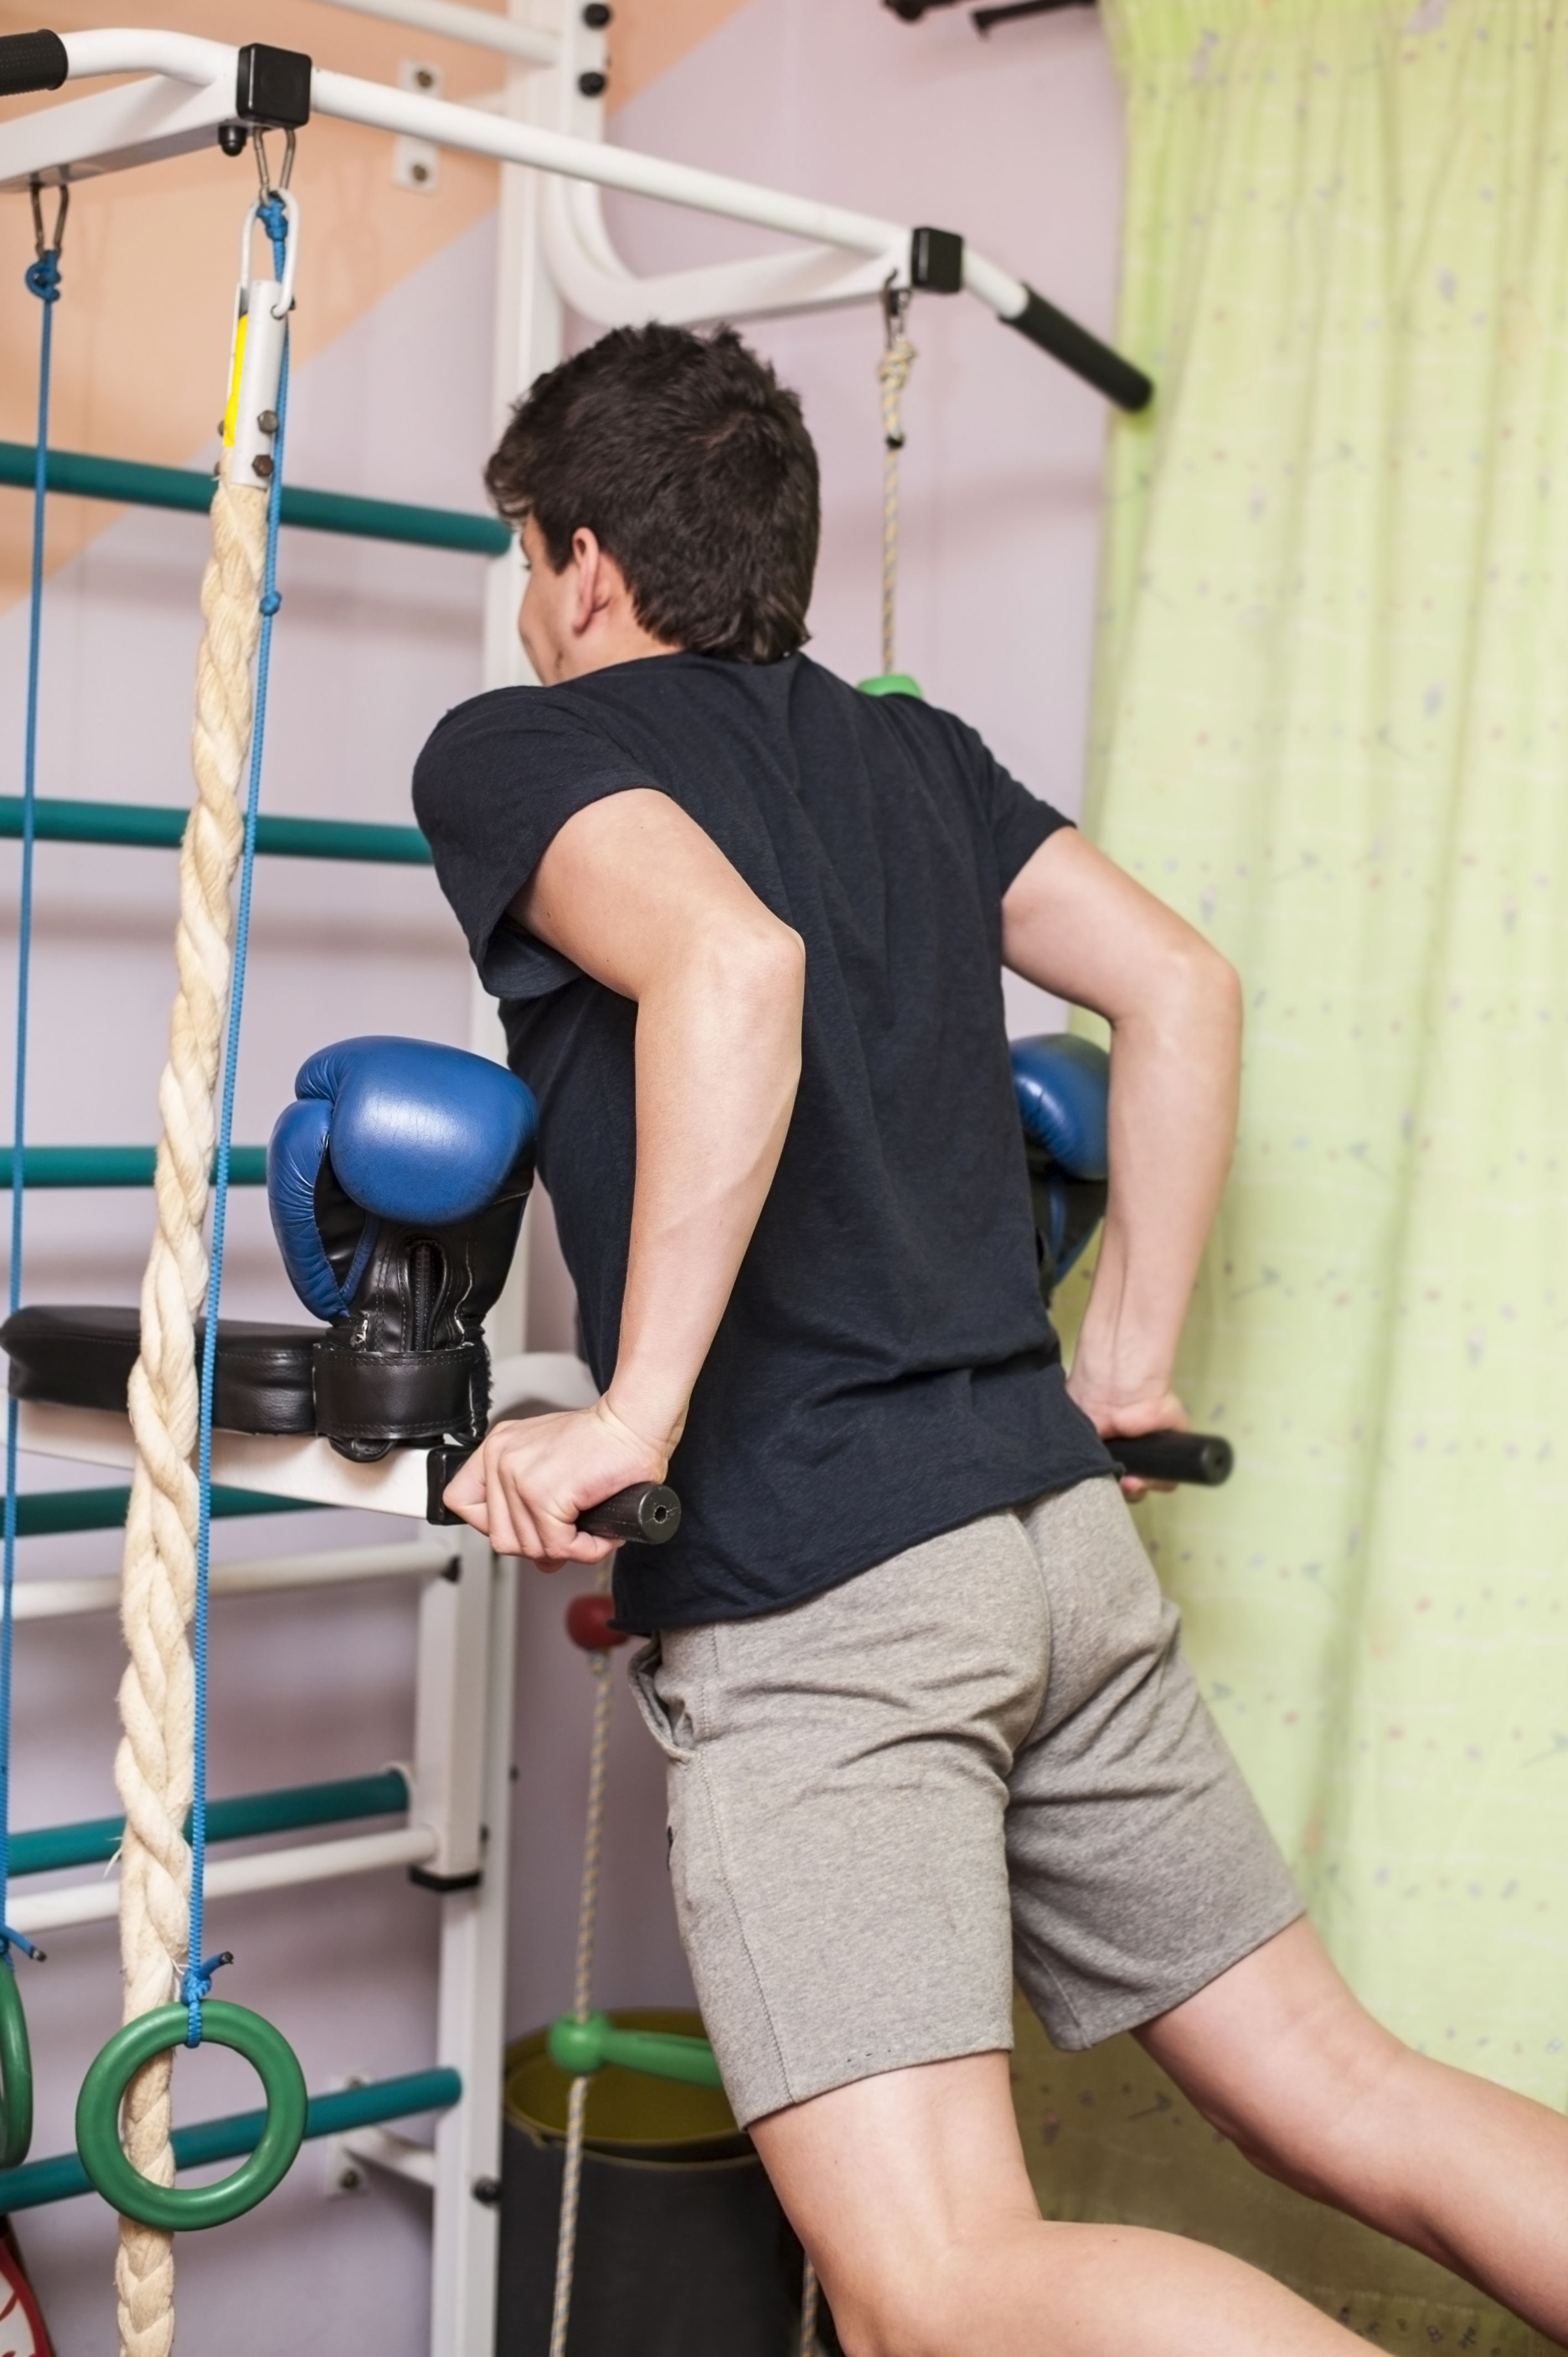
4. Triceps Dips

To do this exercise sit on the chair and place your palms at the edge of it, with your fingers pointing down. Start off with bent knees if you are just beginning and then advance to keeping your legs straight out. Lift your butt off of the chair and then dip your body towards the ground, but don’t quite touch it. You want your elbows to be at about a 90-degree angle. After that extend your arms back to their normal position and then you have one rep. I recommend doing this exercise in sets of about 10 to start off. This exercise is primarily beneficial to your triceps and boy can it be a killer.

5. Incline Push-Ups

To do this exercise, place your feet on top of the chair and get into a plank position with your hands on the ground. Now simply do push-ups. This version is much more difficult than a traditional push up, but also much more rewarding. If you still want to step it up a bit, raise one of your legs in the air while doing the reps. I would recommend starting out with sets of 10 in this exercise and then work your way up. This exercise will benefit your arms, chest and shoulders.

Office Chair Exercises

1. Chair Squats

To start this exercise, you will stand with your chair behind you and your legs about hip-width apart. Now, simply sit down and get back up. Make sure that you are squeezing your gluts and your core in order to get the best results. I would recommend doing this exercise for about 1 minute a set. These are almost like beginner squats, but if you want to make them a little more challenging; try adding weights of some sort or getting rid of the chair. This exercise benefit your abs, butt, legs, hips, calves, shins and thighs.

2. Leg & Arm Crosses

To start this exercise, begin at the edge of the chair with your knees in a right angle. Put your elbows in a right as well. Now stretch your right arm out diagonally upward and your left leg diagonally downward. Then you bring both the leg and arm back in the middle to meet your elbows and knees. Now you have achieved one set. Do about 10 of those and then switch over to the opposite sides. This exercise is really great for improving your core.

3. Lateral Raises

To start this exercise, hold your arms down at your side. Then lift them up and out to the side of your body with your forearms pointing forward and your elbow at a 90-degree angle. Make sure that you are at about shoulder level. After that lift your arms up and down at your side. This exercise is great for deltoids, which are at the top of your shoulder. I would do this exercise in 20 second intervals.

4. Bicycles

For this exercise start off sitting on the chair. Place your palms on the edge of the chair and then slowly raise up your feet. Get your legs to a 90-degree angle and then keep it there. Then simply kick your feet out as if you were riding a bicycle. I recommend starting off with 30 seconds a set and working your way up. If you want to increase the intensity, then put your palms on the back of your head and touch your left elbow with your right knee when it comes towards you; and vice versa. This exercise is great for working on your core.

5. Shoulder Press

To do this exercise, start off by having your arms out to the side at about a 90-degree angle, with your fist facing up. Now, raise your arms up over your head towards each other. After that you simply want to pump your arms up and down; each time you come down coming back to the 90-degree angle. If you are able, then you can add dumbbells or resistance bands to this exercise. I recommend starting off with reps of 10 in this work out technique.

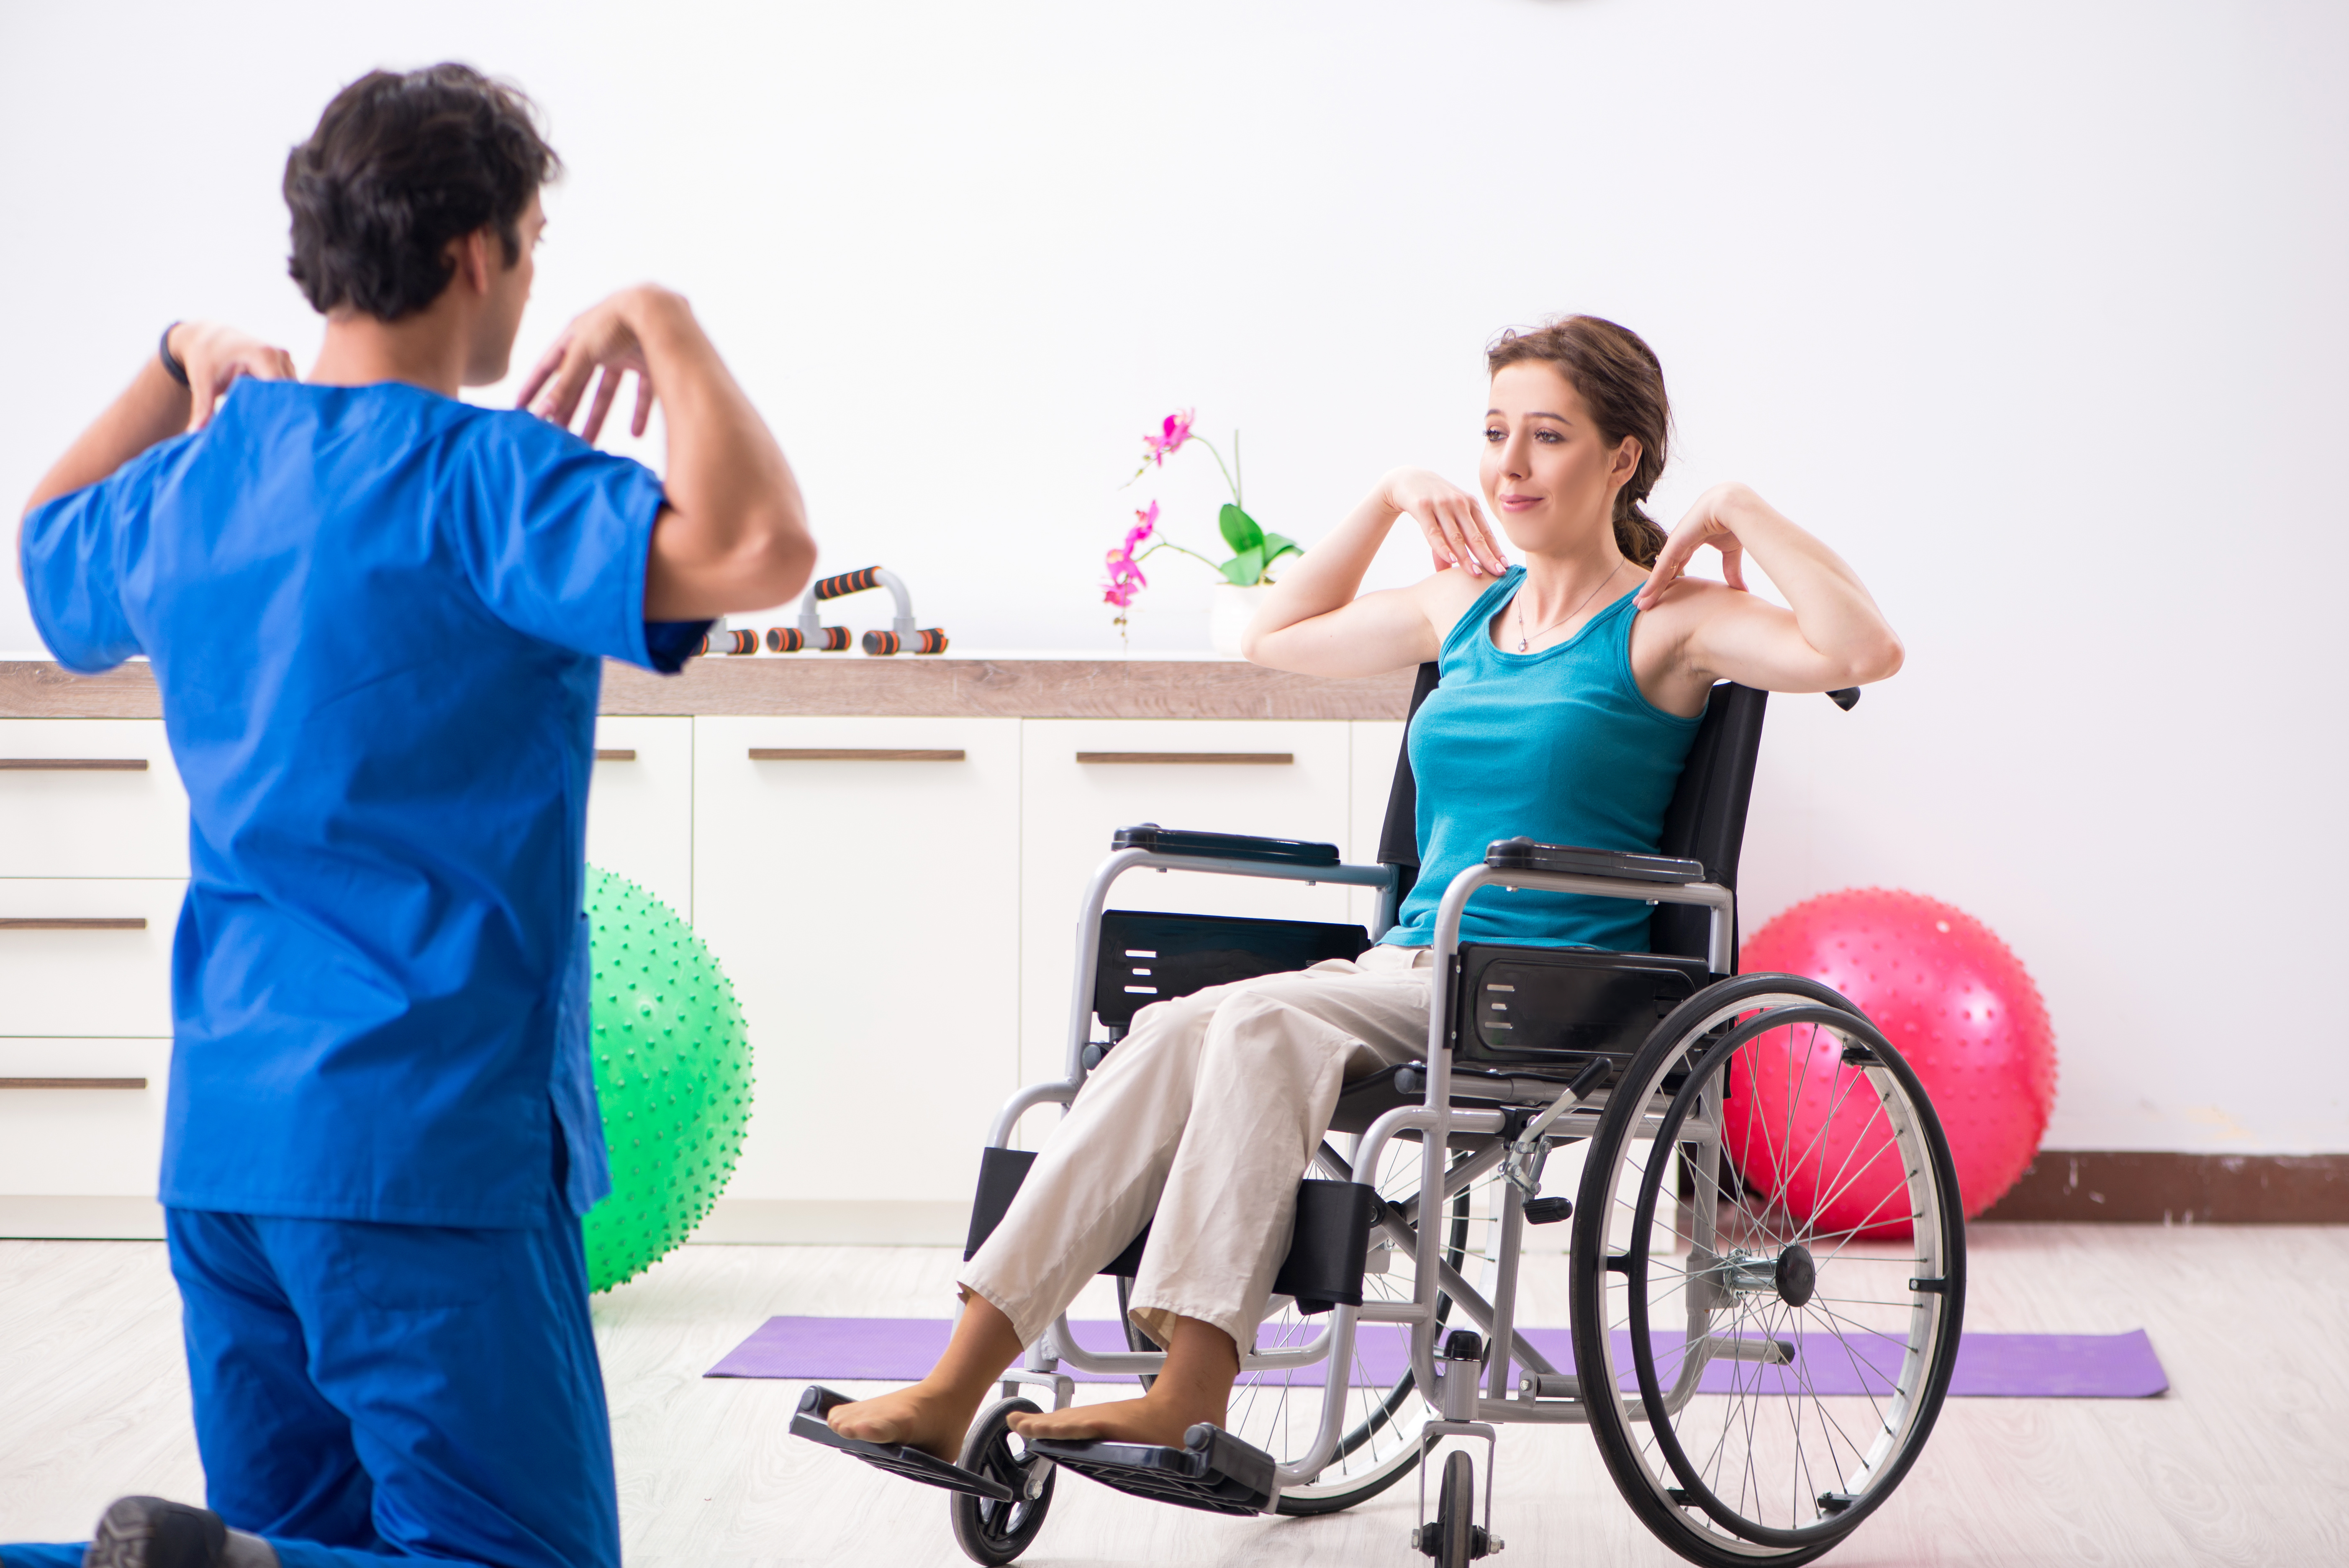
Wheelchair Exercises

1. Touch the Sky

For this exercise, you are going to raise your arms up on both sides as if you were trying to touch the sky. You want to inhale as you are going up and exhale as you are coming down. Continue to do this for about 15 seconds.

2. Cross Punches

To begin this exercise, get your arms up, keep your elbows bent and your hands right under your chin. Then use your left hand to do a jab right in front of you at about shoulder height. After that, immediately do a right punch across to your left side. Then use your left hand to do the same thing and punch towards your right side. Continue doing this for about 30 seconds and you will be good to go. This exercise benefits your heart rate as well as your abs and obliques.

3. Wheelchair Push-Ups

To do this exercise, place your arms to the side and your hands on either your wheel or your arm rest. Double check that your wheels are locked by the way. Now, slowly push up, raising your butt off of the chair and sit there for a few seconds. Go back down to the sitting position and then do it again. I recommend doing this exercise 10 reps per set. You may need to start a little bit lower at first.

4. Arm Circles

To do this exercise, begin by reaching down with your right arm. Then just move it around in a circle, while leaning to your right side. Then stop and begin doing circles again, but this time counterclockwise. Do not overdo it, lean as far as you can. Do this for about 10 seconds on each side.

5. Forward Reach

For this exercise, stretch out your right arm as if you were reaching for something. Reach out as far as you can, then quickly switch to your left. Now, you want to go back and forth between arms as fast as you can. Do this exercise for about 20 seconds in order to really feel it.

With this variety of exercises, whether you have a home office or just don’t feel like leaving today; you can still get in a good workout. I hope we proved to you that chairs are not just for relaxing. Now cheers to a great workout!

Exercise On The Bed While You Watch TV

A lot of us struggle with  getting out of bed in the morning. This is especially true when our first activity of the day is to exercise. So, if you refuse to get out of bed but you need to workout. Don’t  worry this routine is perfect for you. You can workout in your pajamas. Do you have morning breath? Not a problem. You won’t be talking anyone any so who cares.

This routine can be a problem if someone else is in the bed with you. But  I am sure you can find away to make it happen. The best part is you can do the workout anytime. Mornings are best because it gives you an energy boost. If you like to watch you favorite shows while in bed, this will also be a good time to bust a move while you watch TV.

First, we will go over some ab exercises and stretches that will definitely wake you up. Then, we will go on to a bit more challenging exercises that all can be done in the comfort of your own room, using only your bed. You don’t need a king-sized bed either; these can be done on even a twin mattress. It may take only a few of these exercises to motivate you to get up and go to the gym, or you may decide to do the entire routine. Either way, no excuses. Let’s get your morning started right.

Full Body Crunch

​First you want to lie flat on your back on the bed and extend your arms all the way back. Then you want to crunch up. As you do bring your legs up to a right angle and hug them with your arms. After that, extend back out, and you have one rep. I would recommend doing this exercise in either sets of 10 or for 45 seconds. Whichever you feel more comfortable with starting off. This workout will do wonders for your abs.

Criss Cross

​For this exercise, continue to lie flat on your back. However, this time keep your arms rested at your side. This will help you keep your balance. Now, raise your legs up straight to about a 45 degree angle off of the bed. Finally, you want to crisscross your legs. Move your right leg over your left and then left over right. I would recommend doing this exercise for about 30 seconds per set. This is also a great exercise for improving your core.

Bicycles

For this exercise start off by sitting at the edge of your bed.Place your palms on the edge of the mattress and then slowly raise up your feet. Get your legs to a 90-degree angle and then keep it there. Then simply kick your feet out as if you were riding a bicycle. I recommend starting off with 30 seconds a set and working your way up. If you want to increase the intensity of this workout, then put your palms on the back of your head and touch your left elbow with your right knee when it comes towards you; and vice versa. This exercise is great for working out your abs, legs and thighs.

Wide Leg Cross Sit-Ups

​For this exercise, start off with your legs stretched out to each side and your arms extended straight back. Now, crunch up and reach out to touch your left toes. After that, go back down to your starting position and then crunch back up to touch your right toes. Do this for about 45 seconds. This exercise will benefit not only your abs, but your hamstrings as well.

Leg Raises

​To do this exercise, lie on the bed with your legs stretched straight out. To make it a bit easier, you can position yourself to where you can grab the corner of your mattress behind you with your arms. Then you want to simply raise your legs up and down. However, when you come down, do not touch the bed with your legs. If you want to make this more challenging, then have somebody push your legs down as they come up. This will make it much more difficult for you not to touch the bed. You can do this exercise with repetitions or timed, but beware that this is a difficult one.

Leg Extensions

For this exercise, start off seated upright on the edge of your bed with your legs bent in front of you. Now lean back a bit and lift your legs up off of the ground. Keep your arms by your side holding the mattress for balance. Then pump your legs in and out, while keeping your legs together. Exhale when your knees come towards your chest and inhale when your legs go down. I recommend doing this exercise for either 30 second intervals or 20 reps. This exercise is beneficial to your abs, lower back, hip flexors and quads.

Wide U

​Start this exercise by sitting in and upright position, with your legs extended out. Then you want to lift your legs off of the bed and hold them there. Now, crunch your abs in order to lift your legs into the air on one side. Then come back down and swing them to the other side as This is another exercise that is fairly difficult, but equally beneficial. This workout is great for exercising your abs and obliques.

Hand & Toes Touch

​For this exercise, lie flat on your back with your legs extended out and your arms extended out behind you. Then crunch your abs as you lift your left leg straight up into the air. As you lift your left leg, raise your right arm up to where your fingers touch your toes. Then come back to the original position and do the same with your right leg and left arm. Alternate between legs for 45 seconds to get the best results.

Leg Lifts

​To do this exercise, start off flat on your back with your arms at your side. If you want to make it more challenging, put your hands under your butt, so that you cannot depend on them for support. Now, lift your legs slightly off of the bed. After that, lift on leg straight up, followed by the opposite leg. Then when they are both in the up position, lower one leg down to the beginning position and then follow it with the other leg. Be sure not to touch the bed when lowering your legs. Then raise up again, one leg at a time. I recommend doing this exercise for about 30 seconds per set to start off. This is another excellent ab workout.

Scissor Kicks

To do this exercise start by sitting on the edge of your bed. Then place your palms on the corner of your mattress to help you balance. Then lift your legs up and lean back, but don’t let your back touch the bed. Now just flutter kick in the air up and down, but not too wide. Do this for about 30 seconds and you’re off to a good start. If you want to make it more challenging, then lift your arms straight into the air during the set. This exercise is very beneficial to your core.

V-Kicks

​To do this exercise, begin on you back with your arms at your side. Then raise your legs up with your knees pointing towards you. Now, simply kick your legs up one at a time with as much force as you can. The harder you kick, the better the results. Alternate between legs for about 45 seconds. This exercise is primarily beneficial for your thighs.

Fire Hydrants

​For this exercise, you will need to begin by getting on all fours on top of your bed. Then, you want to start with one leg and raise it to your side, while maintaining the right angle. You want to continue until your leg is parallel to the bed. Continue going up and down with that leg for 30 seconds and then switch over to the opposite side. This technique is beneficial to your gluts and thighs.

Donkey Kicks

​To do this exercise you will need to stay in your position on all four. Then you want to kick back as far as possible towards the ceiling with your left leg. As you come back down to the bed, do not touch it with your leg or knee. Then you want to kick back out with the same leg. Do this for 30 seconds of each side. This technique is beneficial to your legs and gluts.

Ballet Kicks

​To do this workout begin on your right side with both of your legs extended out. Use your right arm for balance and place against the bed. Now, raise your left leg up and down, while keeping it perfectly straight. Each time you come down you should touch your right leg slightly, but don’t rest it there. Do this exercise for 20 seconds and then flip over and do it on the opposite side. This is exercise is primarily beneficial to your thighs.

Glute Bridges

​To do this exercise, start off with your back flat on the bed and your knees pointed towards the ceiling. Your legs should be hip width apart and feet facing forward. Now lift your butt up off of the bed until your body is straightly aligned. Your arms should be flat to the side of your body. Hold this position for 30 seconds. This workout is great for your thighs and butt primarily, but is also beneficial to the rest of your legs as well as your abs.

Frog Pumps

Start off on your back, with your knees facing the ceiling, just like the previous exercise. Put your feet about hip-width apart and place your extended arms to your side with your palms turned to the bed. Gently press your hips upward by squeezing your gluts. Continue to push upwards until your legs and hips are straight; and torso and legs are aligned. Now, slowly lower back down to your starting position and you have one rep. I would recommend doing these in sets of 15 to start out. This exercise is great for developing your hip, leg and thigh muscles.

Split Pulses

​To do this exercise, stay on your back and raise your legs straight up towards the ceiling. Your arms should be flat against the bed, with your hands under your butt. Now split your legs out to the side at the same time as far as you can go, and then back to the middle. Don’t worry if at first you cannot kick them out very far, it depends solely on your level of flexibility. The quicker you move them out the better the results. Do this for 30 seconds. This exercise is great for your thigh muscles.

Bed Squats

​For this exercise, you actually need to get out of the bed, but don’t worry you will not be going far. To start, you will stand with your bed behind you and your legs about hip-width apart. Now, simply sit down and get back up. Make sure that you are squeezing your gluts and your core in order to get the best results. I would recommend doing this exercise for about 1 minute a set. These are almost like beginner squats, but if you want to make them a little more challenging; try sitting down and standing up on one leg at a time. This exercise benefit your abs, butt, legs, hips, calves, shins and thighs.

Leg Circles

​To begin this exercise, you will need to get back onto your right side. However, this time your right leg will be bent back at a right angle. Use your right arm as support and then raise your left leg straight up. Then you want to move your left leg around in mini circles, making sure not to touch the bed. Do this for 30 seconds and then turn over and switch sides. This exercise benefits your thigh muscles.

Single Leg Hip Raises

​To begin, lie on your back with your knees pointed towards the ceiling. Then raise one of your legs up into a 90-degree angle. Then you want to push with your foot that is on the bed, while raising your butt up and down. Do this for 30 seconds on each side. This workout is great for your butt and thighs.

Bed Planks

To do this exercise technique, lie flat on your stomach on top of the bed. Now, extend your arms by pushing down on the bed. After that, get on your toes and make sure your entire body is straight. Hold this position for about 30 seconds. This exercise will benefit your abs, back and arms.

Push Ups

To do this exercise, place your palms on top of the bed and enter the bed plank position. Extend your legs out behind you or kneel if you are a beginner. Then simply do a push-up. This exercise is best done in reps. There is also another kind of push-up that you can do with the bed. For this one, place your feet on top of the mattress and get into a plank position with your hands on the ground. This is version is much more difficult than the previous kind. If you still want to step it up a bit, raise one of your legs in the air while doing the reps. This exercise will benefit your arms, chest and shoulders.

Triceps Dips

To do this exercise sit on the edge of the bed and place your palms at the corner of the mattress, with your fingers pointing down. Start off with bent knees if you are just beginning and then advance to keeping your legs straight out. Lift your butt off of the bed and then dip your body towards the ground, but don’t quite touch it. You want your elbows to be at about a 90-degree angle. After that extend your arms back to their normal position and then you have one rep. I recommend doing this exercise in sets of about 10 to start off. This exercise is primarily beneficial to your triceps.

​So, there you have it; a variety of exercises that can done on the bed. Of course, most of these exercises can be done pretty much any surface that you prefer. It will prove a bit more challenging on the bed, due to its soft surface. Nonetheless, I am glad that you didn’t lie in the bed lazily and do nothing. Now go hop in the shower and then hop back in bed.

How Does Cinnamon Lower Blood Sugar?

The Effects of Cinnamon on Diabetes

Type II Diabetes usually occurs in middle aged people when their body develops resistance to insulin. This type of diabetes usually requires medication to bring the blood sugar under control. If you have been diagnosed DM II, this might be you. An exciting household remedy which has been under investigation for the past few years is the use of cinnamon in the control of diabetes. The initial studies have not been conducted on large groups of people but it has been seen that the blood sugar levels of persons who take about a gram of cinnamon a day drops by an average of 20%.

At one time cinnamon was a precious spice that was thought to have great medicinal properties. Ancient civilizations knew that cinnamon could retard bacteria growth. It was used for embalming purposes in early Egyptian times and it was mixed with warm water and cloves during the middle ages and placed in the rooms of those suffering from the Bubonic Plague.

Fast forward to now, recent scientific studies have proven that cinnamon does indeed have medicinal qualities and that it favorably affects function of the brain. The big news is that researchers in Maryland were testing foods to see what effect they had on blood glucose levels. What they discovered was amazing. They found that cinnamon flavored apple pie actually decreased blood glucose levels.

When the scientists discovered this, they decided to research the effect of cinnamon on diabetics further. They tested 60 people in Pakistan. All of those who took part in the study were type 2 diabetics and they were all on medication to lower their blood sugar levels. None were taking insulin. These people were administered small doses of cinnamon – between ¼ teaspoon and 2 teaspoons daily – for forty days. Researchers concluded that cinnamon increased the natural output of insulin, lowered blood sugar levels and also lowered LDL (bad) cholesterol. HDL (good) cholesterol was not reduced.

Cinnamon, which is commonly used as a spice in Indian cooking, baking and can be splashed on your favorite latte, is the bark of the Cinnamon cassia tree. It is sold as pieces or rolls of bark or as cinnamon powder and has a sweetish spicy taste. Research has established that the blood sugar lowering property of cinnamon is found in its water soluble components and not in cinnamon oil. Further, heat does not affect the blood sugar lowering properties of cinnamon. This makes it easy to reap the benefits of the spice by having it in the form of cinnamon tea or using it in cooking.

Cinnamon powder can also be consumed directly by itself though the taste can be a little sharp. At breakfast time cinnamon powder can be added to orange juice, coffee before it is brewed or to oatmeal. Introduce cinnamon during lunch by adding it to meats and salads. Half a spoon of cinnamon powder or a few cinnamon sticks can be either soaked in tea or coffee or boiled in water. After boiling the water for a few minutes, the solids are allowed to settle at the bottom and the liquid makes a delicious, clear tea.

Research has shown that half a spoon of cinnamon powder, which is equivalent to one gram, can significantly lower the blood sugar levels of diabetic patients. Its active ingredient known as hydroxychalcone is believed to enhance the effect of insulin. It is also supposed to help promote glucose uptake into cells and tissues of the body, thus lowering the level of glucose circulating in the blood. Further, it may even promote the formation of glycogen, which is the form in which glucose is stored in the body.

In addition to lowering blood sugar levels, cinnamon also reduces the Total Cholesterol, LDL Cholesterol and Triglyceride levels in the blood, all of which are often raised in Type II Diabetes and certain heart conditions. However, it has no effect on the blood sugar levels or cholesterol levels of post-menopusal women. It is also not advisable for pregnant women to take cinnamon in excess.

While cinnamon has been seen to lower the blood sugar levels of persons who take oral hypoglycemic medication and those who take insulin injections, it surprisingly has no effect on the Glycosylated Hemoglobin or HbA1C level.This a test which indicates how well blood sugar has been controlled over a period of three months. Research has also shown that the quantity of cinnamon taken does not alter its sugar lowering effect significantly. The effect is the same for 1 gram or 3 grams of cinnamon.

The findings of this study brings great news to people who are susceptible to insulin resistance. Improving cholesterol ratios and lowering blood glucose levels can often reverse insulin resistance, which in turn can assist in weight loss. Diabetes is often associated with excess weight and obesity.

If you suffer from type 2 diabetes, insulin resistance or high cholesterol, talk to your doctor before taking cinnamon capsules or introducing high amounts of cinnamon into your diet. If you are taking medication for type 2 diabetes, ask your doctor how to safely incorporate cinnamon into your diet to naturally decrease blood sugar levels.

If you are on any medication for diabetes or other ailments you should not take large amounts of cinnamon without consulting your doctor. The dosage of medication may have to adjusted in these cases. Further, in certain medical conditions the chemicals present in cinnamon may even interfere with the prescribed medication.

Does High Cholesterol Cause Clogged Arteries?

How High Cholesterol Impacts Your Health

According to the American Heart Association high cholesterol levels can increase your  chance of having a stroke or heart attack. This is especially true and increases your chances even higher if you are overweight, have diabetes or have high blood pressure. When it comes to the health of your heart and blood vessels, your cholesterol level matters too.  Unfortunately most people do not understand what the numbers means. And if you don’t know how high cholesterol will impact your health, you will not know what to do or not to do to keep your heart disease free.

Cholesterol is produced in the body majorly by the liver, but can also be taken in through eating food like meats, butter, and egg yolks. It helps carry the digested fat from the liver to the different cells of the body; with the blood vessels serving as the “highway.” After performing its function, cholesterol returns back to the liver, and the process repeats all over again.  When you eat food or fats, this goes through your stomach, is digested and absorbed in your small intestines, and then is sent to your liver. The liver processes and ships the fat for distribution to your body.

Stuck In the Walls

Your arteries carries blood all around your body the same way pipeline carry water around the various pipes in your house. Food and other particles that do not belong in the drain can clog the pipes. This same process occurs in your body. Imagine in your mind small particles floating in your bloodstream. Some of these elements are good, while some are bad. The bad ones will work their way to the linings of your blood vessels (the arteries), and get stuck in the walls, causing a reaction where fluid and cells mix. This is your body’s natural reaction in an attempt to get rid of the bad particles which it considers as foreign invaders. Over many decades, this “battle” between the bad particles and your body’s natural defenses will result in “plaque” build-up (fatty deposits) or a rupture in the affected blood vessels, your arteries.

Slayed by High Cholesterol

If you have been told that your cholesterol is high then you also know that you had no symptoms.  This is because the slow formation of plaque in your blood vessel occurs quietly without you knowing.  It only becomes apparent when you start to have  chest pain. It doesn’t cause you pain, give you a headache, or trigger discomfort on your chest until it starts to block the blood vessels. It works quietly while you order extra cheese on your burger, while you’re choosing large french fries instead of the regular one, or when you’re consuming the big box of left over doughnuts, you brought home from the office.

Why Your Numbers Matter?

Think about your blood vessels as pipelines that delivers oxygenated blood and nutrients to your organs. The same way you pipe get clogged up if you throw all kind of food particles down your sink requiring you to get a plumber, when the same thing happens to the blood vessels in your heart. You will need an intervention done by a cardiologist to unclog the arteries in you heart. It best that your lifestyle supports clean and clear blood vessels. When neglected you will certainly pay a serious price leading to death or disability. Sometimes both.

Heart and blood vessel disease is one of the top killers globally, ranking first place (ahead of all sorts of cancers and medical conditions). High cholesterol is  a prominent and modifiable risk factor for the most common forms of heart conditions such as heart attack.

Hundreds of studies for many years have shown the negative impact of high cholesterol, particularly the bad cholesterol, on an individual’s heart health and overall well-being.

Facts About High Cholesterol

  • With every 1% drop in your total cholesterol, you’ll have a 2% decrease in the risk of having a heart attack.
  • When HDL (the good cholesterol) levels are increased by 2%, the risk of having a heart attack drops by approximately 4%.
  • Humans manufacture 2/3 of cholesterol in their body, and only 1/3 comes from the food they eat.
  • Most Asian countries,  have lower mean levels of total cholesterol than those found in western countries.

What are Lipoproteins? Good Vs Bad

The liver packages cholesterol into “lipoproteins” made from lipids (cholesterol and fat) and protein. These are the different types of cholesterol:

HDL cholesterol– high-density lipoprotein or the “good cholesterol”- The good cholesterol travels in the bloodstream from the peripheral parts of the body, bringing cholesterol back to the liver where it is again broken down.

LDL cholesterol– low-density lipoprotein or the “bad cholesterol”- Transports cholesterol from the liver to different cells in your body. If high amounts of cholesterol (more than what is required) are available, LDL will end up circulating in the bloodstream and be deposited on the inner walls of the arteries. This bad cholesterol can cause blockage, after some time, and result in a lack of blood supply.

VLDL cholesterol– very low-density lipoprotein cholesterol- This is used for fat deposition and energy, and are formed by large, fat particles called “chylomicrons” and “fatty acids.”

Triglycerides– a form of ingested fat- This type is also produced by the liver. In humans, more than 95% of the fat being ingested is in the form of triglycerides.

Lipoprotein (a)– this is the worst kind of cholesterol- also labeled as “Lp(a)”; this type is linked with coronary artery disease (narrowing or blockage of the blood vessels that supply blood into and out of the heart) and atherosclerosis (clogging or hardening of the arteries).- According to studies, Lp(a) is associated with genetic factors more than diet. Screening is, thus, recommended to check for a person’s chances of getting heart disorders, and help prevent the other risk factors which can lead to heart problems.

Knowing the Fatty Figures

​It is important to know how much cholesterol is in your blood, to see if you need to take specific steps to lower your risk for certain medical conditions. Talk to your doctor if you have high risk, especially if you have family members with high cholesterol or heart problems. Your doctor will probably order  blood test such as a lipid profile.

Don’t be scared if you results show that you have  high cholesterol. Your doctor will give you a treatment plan on how to lower it or at the least, prevent it from getting higher.  As a guide, the National Cholesterol Education Program released a report stating that:

  • A total cholesterol higher than 240 mg/dL suggests  ‘high risk’ for heart disease
  • A total cholesterol between 200-239 mg/dL places an individual at ‘moderate risk’ for heat conditions
  • A total cholesterol lower than 200 mg/dL is considered ‘desirable.’

Additionally, the risk of a heart attack is highest for females with HDLs below 47 mg/dL and males with HDLs below 37 mg/dL. Conversely, the risk is lowest for females with HDLs higher than 60mg/dL, and males higher than 53 mg/dL.

Health Conditions Linked with High Cholesterol

​It is a fact that cholesterol plays a significant role in protecting the cells of the body, keeping the brain in top condition, helping the body make vitamins and hormones, among many other benefits. However, in certain situations, high cholesterol blocks the arteries and may cause a person to have a heart attack.

Here are some of the adverse effects of high cholesterol in your body:

It may result in a heart attack or other heart conditions.  LDLs also known as the “bad cholesterol,” can squeeze within the walls of the heart. Once inside, these particles mix and snag other elements; creating plaque deposits that, in time, may impede blood flow through the arteries. A plaque may also just break off and cause a blood clot (a gelatinous mass of blood cells and proteins that are incapable of being dissolved) that may block your arteries.

It may clog your brain. High cholesterol increases your risk of plaque deposits in the blood vessels (the cranial arteries) that supply blood to the brain. Just like in your heart, it can block blood flow into your brain, causing a sudden, disabling condition called a “stroke.”

It can result in stones in your gallbladder. Cholesterol contributes to the formation of gallstones (rock-like lumps composed of 80-95% cholesterol) in your gallbladder (the organ which stores bile), that may cause blockage and severe pain.

Myths & Facts

Myth: HDL or good cholesterol can only be raised by specific medications.• Fact: Good cholesterol can be raised by exercising (about 30 minutes daily), losing weight, and giving up smoking. But even after practicing these mentioned habits, your HDL remains low, then medication may be recommended by your physician.

Myth: All fatty food will raise your cholesterol levels.

Fact: No. Dietary fats are not all the same. Saturated fatincreases the amount of fat in the blood. This includes LDLthat brings cholesterol into your blood vessels. On the other hand, polyunsaturated and monounsaturated fatty acidshelp reduce the fat in your blood, decreasing your bad cholesterol levels.

Myth: Women are free from cholesterol worries.

Fact: From adolescence to middle age, the ladies tend to have lower cholesterol than men. According to evidence, the woman’s body is protected by the continuous flow of estrogen. However, starting menopause, the production of estrogen slows down, so older women tend to have higher cholesterol than men.

High cholesterol need not be a curse. It can be lowered with the right plan. Most people start taking cholesterol lowering medications like statins because the don’t change their diet, lose weight or exercise.  With proper exercise, careful food choices, and a lifestyle that promotes wellness  which includes enough sleep, ditching the harmful vices, and managing stress, high cholesterol can be lowered to acceptable levels without medications.

Lunchtime Workout In Your Office Chair

Who has time to get in shape these days? Between kids, work and all the other more fun things to do; why would you spend unnecessary time to work out. Well you definitely want to get some exercise in, otherwise your entire quality of life will slowly go down the drain. With this said, we have developed some exercises that can be done in your office chair at your desk. This way you can get a decent workout in without committing any additional free time. You can do these exercises during down time at work or in between scrolling down your social media timelines. Either way these office chair workouts are sure to get you off of some undesired weight. Now let us get started.

Downward Reach

For this exercise, make sure you are in a straight up position in the back of your chair. Now, simply reach down towards the ground, and hold for about 10 seconds. Come back up and then switch to the other side for another 10 seconds. This exercise is great for stretching your muscles and warming them up.

Shoulder Curls

For this exercise, shrug your shoulders up and down. You want to be sure that your arms are extended straight down to the side of your chair as you do this. I recommend doing this exercise for about 15 seconds and then switch to shrugging your shoulders backward for another 15 seconds. This exercise is great for stretching your shoulder muscles and warming them up.

The Running Man

To start this exercise, put your elbows in a right angle and then go to the edge of your chair. After that start with a nice jog, while still in sitting position. Add your legs and move them up and down as well, as if you were running. Do this for about 20 seconds. This is mainly a cardio exercise to get your heart rate going.

Arm Circles

To do this exercise, begin by reaching down with your right arm. Then just move it around in a circle, while leaning to your right side. Then stop and begin doing circles again, but this time counterclockwise. Do this for about 10 seconds on each side. This another great exercise for warming up.

Legs & Arms Cross

To start this exercise, begin at the edge of the chair with your knees in a right angle. Put your elbows in a right as well. Now stretch your right arm out diagonally upward and your left leg diagonally downward. Then you bring both the leg and arm back in the middle to meet your elbows and knees. Now you have achieved one set. Do about 10 of those and then switch over to the opposite sides. This exercise is really great for improving your core.

Forward Reach

For this exercise, stretch out your right arm as if you were reaching for something. Reach out as far as you can, then quickly switch to your left. Now, you want to go back and forth between arms at a fairly quick pace. Do this exercise for about 10 seconds.

Arm Crosses

For this exercise, grab your right elbow with your left hand, and push your elbow to where your right arm is stretched across your chest. Hold this position for about 5 seconds and do some deep breathing, while you are there. Then you want to switch sides and do the same thing with your left arm. This exercise is great for stretching out your arms.

Back Twist

For this exercise, take your right palm and place it on your left knee. Now, push down with your right hand and look behind you to the left. Hold this position for about 5 seconds and then do the same on your right side.

Shoulder Press

To do this exercise, start off by having your arms out to the side at about a 90-degree angle. Now, raise your arms up over your head towards each other. After that you simply want to pump your arms up and down; each time you come down coming back to the 90-degree angle. If you are able, then you can add dumbbells or resistance bands to this exercise. I recommend starting off with reps of 10 in this work out technique.

Bicep Curls

To begin this exercise, put your arms in front of you in a 90-degree angle and then lift them up towards your chest. You can do this one arm at a time or with both. You can also add dumbbells to this exercise as well to raise its intensity. You should do this exercise in sets of 10. This exercise is great for your bicep strength.

Triceps Dips

To start this exercise, you want to hold your elbows up high to your side. Then push down with your arms, extending them towards the floor. After that, lift them back up to the original position. Do this for about 15 seconds and you should feel it in your triceps.

Bicycles

For this exercise start off sitting on the chair. Place your palms on the edge of the chair and then slowly raise up your feet. Get your legs to a 90-degree angle and then keep it there. Then simply kick your feet out as if you were riding a bicycle. I recommend starting off with 30 seconds a set and working your way up. If you want to increase the intensity, then put your palms on the back of your head and touch your left elbow with your right knee when it comes towards you; and vice versa. This exercise is great for working on your core.

Chest Stretch

To do this exercise, lean back and open up your chest. Raise your arms up and out to the side, fully extended. Hold this position for about 10 seconds. This exercise is great for stretching out your arm and chest muscles.

Touch the Sky

For this exercise, you are going to raise your arms up on both sides as if you were trying to touch the sky. You want to inhale as you are going up and exhale as you are coming down. Continue to do this for about 15 seconds.

Lateral Raises

To start this exercise, hold your arms down at your side. Then lift them up and out to the side of your body with your forearms pointing forward and your elbow at a 90-degree angle. Make sure that you are at about shoulder level. After that lift your arms up and down at your side. This exercise is great for deltoids, which are at the top of your shoulder. I would do this exercise in 10 second intervals.

The Heisman

To do this exercise, begin by extending your right arm straight out to your side. Now, lift your left arm and extend it across towards your right side as far as you can. After that you want to swiftly move your arms from the right to the left; back and forth. Do this as quickly and smoothly as you can for about 10 seconds.

Row Boats

To do this exercise, start by having your arms extended out in front of you. Then, you want to pull back, bending at the elbow and squeezing your shoulder blades together. Your elbows should be at about shoulder height. You are also able to add a resistant band to this exercise to make it more difficult. This exercise is very beneficial to your upper back, shoulders and biceps. I recommend doing these in sets of 10.

Chair Squats

To start this exercise, you will stand with your chair behind you and your legs about hip-width apart. Now, simply sit down and get back up. Make sure that you are squeezing your gluts and your core in order to get the best results. I would recommend doing this exercise for about 1 minute a set. These are almost like beginner squats, but if you want to make them a little more challenging; try adding weights of some sort. This exercise benefit your abs, butt, legs, hips, calves, shins and thighs.

Chair Jumping Jacks

To begin this exercise, get to the edge of the chair and then push your legs out to the side. Once you get a good rhythm then add your arms, rising them up. Then simply coordinate your jumping jacks. As well as elevating your heart rate, there is a variation that is great for your obliques. Just be sure to touch your elbows to your knees as you do each rep.

Cross Punches

To begin this exercise, stay seated and get your arms up. Keep your elbows bent and your hands right under your chin. Then use your left hand to do a jab right in front of you at about shoulder height. After that, immediately do a right punch across to your left side. Then use your left hand to do the same thing and punch towards your right side. Continue doing this for about 30 seconds and you will be good to go. This exercise benefits your heart rate as well as your abs and obliques.

Flutter Kicks

To do this exercise continue sitting on the edge of the chair. Then place your palms on the front corner of the chair to help you balance. Then lift your legs up and lean back. Now just scissor kick in the air up and down, but not too wide. Do this for about 30 seconds and that should do the trick. If you want to make it a bit more challenging, then lift your arms straight into the air during the set. This exercise is very beneficial to your core.

These are a few exercises designed to help pass the time at work, while getting you into shape at the same time. Feel free to up the intensity on any of the techniques with weights or resistance bands. So now let’s get to work, but don’t get yourself in trouble at the office.

​​Seniors Can Improve Balance and Coordination With Cone Exericses

Working out does not have to be expensive. There are many affordable items you can add to your home gym. It is not necessary to have an entire room for working out. Small or portable items are available. With a little education and creativity, you can turn any room or outdoor area into a gym. Cones work with a variety of workout programs. If you have kids in sports, you may already own a few. Head to your local sporting goods store or dig your cones out of the garage for a new workout adventure.

I Wanna Have Some Fun

It is easy to get into a serious mindset when you are trying to get stronger or lose weight. We often forget that working out should also be fun. Kids usually get this part right, as they run and play games together. A few traditional cones can make you feel like a kid again as you set up your exercise course. Cone exercises can be fun for the entire family. Get out in the backyard or go to the park with your kids. Set up a mini-course for you kids and sneak in your workout while they are having fun too!

Benefits

Cone drills are popular with sports teams because they help with coordination and speed. You don’t have to rely on a coach, however, to benefit from a cone workout. When you learn to move in different ways and move quickly, you can be more successful with other parts of your workout.

Strong Mind

Exercising is not only for your body. It can immensely help your mood. Your body releases endorphins, often improving the symptoms of anxiety and depression. Cone workouts take this a step further by improving the way your mind and body work together. You must respond quickly to do intense drills. You can acquire better response times as you practice with cones.


Coordination

Cone drills often consist of repetitive moves. This helps you work on muscle memory. When you do the same drills over and over, you can eventually do them without thinking as much. You also build strength that helps you be more coordinated when doing other tasks. Cone workouts may help individuals that are naturally clumsy.


Decreased Risk of  Injury

As you get older you are at risk for injuries related to fall. You are not as agile as you used to be. But have no fear. You can improve you agility with cone drillings. A lot of injuries happen due to improper form and weakness. Cone exercises helps with agility so can quickly hop over or dodge an object that suddenly appears out of nowhere.


Increased Muscle Involvement

Cone routines count for both cardio and strength training. Try a couple of different routines to keep things interesting and to use different muscles. Cone workouts give you a thorough workout in less time. For example, if you go for a run in a straight line, you limit the number of areas that build strength. When you run in your cone routine, you run in many different directions and put your body in several different positions.


Helps with Motivation

Doing the same routine over and over again become boring. Adding cones to your routine can change it up. You can create games with the cones and involve your family for healthy and fun competition.

Equipment

You can choose any type of cone to set up your course. Most cones come in bright colors so you can see them easily from a distance; this allows you to hit each mark on time. Cones are one of the most affordable pieces of a home gym, and you may have some classic orange cones around your house that you can use. While all cones are stacked together, some are more like raised disks. These take up minimal space, and you can easily throw them into your backpack for a trip to the park. There are even some weighted versions in different shapes. These work without anchors, even on a windy day. Do a little research online to find drills that you like before you go shopping. This way, you know how many sets of cones to purchase.

Beginner Tips

It is important to build up your strength and resistance with simple moves. You can also do easier versions of detailed courses. One drill involves weaving in and out of cones that are set in a straight line. You can set the cones far apart until you build up better strength, coordination, and speed. When cones are close together, you must make more intricate and quick movements. Gradually decrease the distance between the cones. You can also focus on forward movements until you feel comfortable. Later, you can go backward, sideways, and diagonal. Modify your workouts so you can move slowly while learning new moves. Work with a trainer or experienced individual to learn proper body positions.

Popular Moves 

Cone drills are interesting because they involve so many different positions. You are not just running back and forth. You must lean from side to side and even lunge, at times. How you move depends on the formation of your course and what you want to accomplish.

•​Sprinting– Sprinting is the best way to fit cardio into your cone routine. You can go to several cones and back to the first one each time. The distance of the sprint increases throughout the routine. Set your cones further apart to keep going in one direction longer.


•​Side and Diagonal Movement– You can step sideways or diagonal between certain cones and sprint forward between others. Set up the cones so you can go in many different directions. Look at some videos for inspiration on different patterns.


•​Backward – For a bigger challenge, you can also run backward from one cone to the other. Once you reach your destination, go forward again.


•​Lunges and Touches– When you reach each cone on your course, you can go into a lunge position and touch the cone. Pay attention to your body formation when doing these to avoid injury. Do them slowly until you learn the proper posture.


•​Weaving– Weaving in and out of cones works different parts of your legs and buttocks. It is important to build up strength in your ankles and lower legs before you move the cones too close together. Weaving movements build great coordination over time.

Cones work great for both beginner and advanced workouts. If you play sports, you may already be familiar with popular drills. They are incredibly affordable and store easily in small spaces. You can use them in your own backyard with your family or take them to the park. You can easily accomplish your cardio and strength workout with cones. Consider a set of cones for a convenient workout without going to the gym.

Are You Wheelchair Bound ? Easy Wheelchair Exercises You can Do While Sitting

Being in a wheelchair does not mean you have to active. Even if you are in a wheelchair, if you have the will to stay in shape, then we’ve got the routine for you. Not all of these techniques are suitable for everyone. So, pick and choose or adjust them a little depending on your personal functional ability. This article is not to be used as a replacement for any medical advice from a physician. These are just some tools to ensure that you maintain your strength, endurance and overall functionality. Everybody has a unique situation and you never want to over exert yourself; it can result in further injury. However, there is a little something for everybody in this routine, so don’t fret. If you incorporate these exercises into your routine 3 to 5 times a week, you will get the hang of it in no time. Be sure to pump your brakes, stay seated and stay tuned.

Stretches

​First, we will be going over a few stretches. These are perfect for warming up for a work out or just casually throughout the day to stretch your muscles.

1. Downward Reach

For this stretch, make sure you’re are in a straight up position in your chair. Now, simply reach down towards the ground, with one arm after the other. Do this for about 10 seconds to start off.

2. Shoulder Shrugs

For this stretch, shrug your shoulders up and down. You want to be sure that your arms are extended straight down to the side of your chair as you do this. I recommend doing this stretch for about 15 seconds.

3. Arm Crosses

For this stretch, grab your right elbow with your left hand, and push your elbow to where your right arm is stretched across your chest. Hold this position for about 5 seconds and do some deep breathing, while you are there. Then you want to switch sides and do the same thing with your left arm.

4. Twist Side Stretch

For this stretch, take your right palm and place it on your left knee. Now, push down with your right hand and look behind you to the left. Hold this position for about 5 seconds and then do the same on your right side.

5. Chest Stretch

To do this stretch, lean back and open up your chest. Raise your arms up and out to the side, fully extended. Hold this position for about 10 seconds.

6. Touch the Sky

For this stretch, you are going to raise your arms up on both sides as if you were trying to touch the sky. You want to inhale as you are going up and exhale as you are coming down. Continue to do this for about 15 seconds.

Depending on how you feel, you may want to do a bit more stretching. That isn’t a problem. Just go through the list another time or as long as it takes. Next, we will give you some exercises that you can do, while remaining in your wheelchair.

Arm Circles

​To do this exercise, begin by reaching down with your right arm. Then just move it around in a circle, while leaning to your right side. Then stop and begin doing circles again, but this time counterclockwise. Do not overdue it, lean as far as you can. Do this for about 10 seconds on each side.

Forward Reach

​For this exercise, stretch out your right arm as if you were reaching for something. Reach out as far as you can, then quickly switch to your left. Now, you want to go back and forth between arms at a fairly quick pace. Do this exercise for about 10 seconds.

Shoulder Press

​To do this exercise, start off by having your arms out to the side at about a 90-degree angle. Now, raise you arms up over your head towards each other (when they are up it should look like you are a super hero). After that you simply want to pump your arms up and down; each time you come down coming back to the 90-degree angle. If you are able, then you can add dumbbells to this exercise, but be careful. I recommend starting off with reps of 10 in this work out technique.

Bicep Curls

​To begin this exercise, put your arms in front of you in a 90-degree angle and then lift them up towards your chest. You can do this one arm at a time or with both. You can also add dumbbells to this exercise as well to raise its intensity. If so, I recommend doing it one arm at a time, so that you can use one arm to stabilize yourself. You should this exercise in sets of 10.

Triceps Dip

​To start this exercise, you want to hold your elbows up high to your side. Then push down with your arms, extending them towards the floor. After that, lift them back up to the original position. Do this for about 15 seconds and you should feel it in your triceps.

Lateral Raises

​To start this exercise, hold your arms down at your side. Then lift them up and out to the side of your body with your forearms pointing forward and your elbow at a 90-degree angle. Make sure that you are at about shoulder level. After that lift your arms up and down at your side. This exercise is great for deltoids, which are at the top of your shoulder. I would do this exercise in 10 second intervals.

Sit Jogging

​To start this exercise, put your elbows in a right angle. After that start with a nice jog, while still in sitting position. If you can move your legs at all do so, but if not just move your arms. Do this for about 20 seconds. This is mainly a cardio exercise to get your heart rate going.

The Heisman

​To do this exercise, begin by extending your right arm straight out to your side. Now, lift your left arm and extend it across towards your right side as far as you can. After that you want to swiftly move your arms from the right to the left; back and forth. Do this as quickly and smoothly as you can for about 10 seconds.

Row Boats

​To do this exercise, start by having your arms extended out in front of you. Then, you want to pull back, bending at the elbow and squeezing your shoulder blades together. Your elbows should be at about shoulder height. You are also able to add a resistant band to this exercise to make it more difficult. This exercise is very beneficial to your upper back, shoulders and biceps. I recommend doing these in sets of 10.

Jumping Jacks

​To begin this exercise, extend your arms out to the side. Then simply do arm jumping jacks, going up and down at a steady pace. I would do this for about 20 seconds per set to get the best results.

Cross Punches

​To begin this exercise, get your arms up, keep your elbows bent and your hands right under your chin. Then use your left hand to do a jab right in front of you at about shoulder height. After that, immediately do a right punch across to your left side. Then use your left hand to do the same thing and punch towards your right side. Continue doing this for about 30 seconds and you will be good to go. This exercise benefits your heart rate as well as your abs and obliques.

Push Ups

​To do this exercise, place your arms to the side and your hands on either your wheel or your arm rest. Double check that your wheels are locked by the way. Now, slowly push up, raising your butt off of the chair and sit there for a few seconds. Go back down to the sitting position and then do it again. I recommend doing this exercise 10 reps per set. You may need to start a little bit lower at first.

​These are a range of great exercises that should be able to help anybody stay in shape. Whether you are in wheelchair permanently, or you need to keep your range of motion for when you are out of it. This routine gives a little something for everybody. If you feel too much pain during any of these exercises, then slow down or even stop if you need to. Just remember, it will get easier with time.

Home Workout Equipment for the Upper Body: Pull Up Bars

Home Workout Equipment for the Upper Body: Pull Up Bars and Dip Bars

Working out at home can save you a lot of time and money. It is difficult to commit to constant visits to the gym at times. Work, school, and parenting can all limit your exercise time. When you have equipment at home, you can easily sneak in a short workout between your daily activities. Pull up bars, and dip bars are great assets to add to your workout routine. Furthermore , they can be used in many living environments. They are small enough for use in an apartment, as well. You can build up strength in several upper body muscles making it easier to reach your workout goals. No gym membership necessary.

You can workout most of your major muscle groups at home without equipment and only your bodyweight. However, working out your back without any equipment can be challenging. This is where pull bars and dip bars come in handy. Although it is a piece of equipment, you will still be using only your bodyweight for resistance.

Convenience

When you have limited time or are on a budget, you must get creative with your workout routine. You can easily install most pull-up bars in a doorway. Others are portable and work in various outdoor areas, such as the park. If you travel for work, you can take your pull-up or dip bar with you for a workout on the go. Lastly, just in case your are shy,  a pull-up bar lets you get your upper body strength training done in the privacy of your own home, as well.

Varieties

There are some excellent new versions of the pull-up and dip bar. You can opt for the traditional one to put in your doorway or try out the new portable styles. If you have the space for larger equipment, you can choose a pull-up and dip station. To use the doorway pull-up bar, you need a sturdy door frame. Check to make sure nothing is loose; otherwise the weight can cause you to fall. You can hurt yourself and damage the door frame. So check for

Freestanding pull-up and dip bars are large pieces of metal equipment that simply sit on the floor in your home. These work well if you are building a large home gym for daily workouts. These usually have adjustable bars, making it easy to get a targeted and comfortable workout.

Portable pull-up and dip bars are perfect for individuals on the go. You can attach them to trees or poles outside. You can work out at home or add strength training to your outings. Fit your strength training into a family day at the park or pack your bar for a business trip. This ensures that you never miss a chance to work on your goals.

Your Body is Your Weight

Dips and pull-ups help you use your own body weight to get in shape. This means you need less equipment to get the same results. If you are not ready to spend a lot of money on equipment, a pull-up and dip bar is a great starter piece. It also takes time to build up your strength, making these bars a long-lasting part of your workout routine.

Getting Started

Many people shy away from bringing home workout equipment because they are not sure how to use it. You do not have to depend on a gym to get healthy. It can help to join a gym short term or take a few sessions with a personal trainer, however. This gives you a chance to learn how to use your equipment safely and efficiently. There are many helpful guides online to help you learn about the use of a pull-up bar, as well. Pull-ups and dips fall into the category of weight training. Most beginners add this to their exercise schedule two or three days per week. It is important to learn how to position your body for a proper pull-up or dip. You may not be able to do full exercises at first. Focus on using your arms and upper body muscles, only. Refrain from jumping up to the bar. You can use these beginner moves as you learn and build strength.

•​Lowering your Body- it can be easier to lower your body than to lift it. You need a stable object to stand on so you can get in the proper position to practice this move. Do not use chairs or stools that can fall out from under you, only proper workout equipment. It is also best to have an experienced person nearby to spot you. Get to a height where your chin is above the bar and make sure you can hold on well. Your spotter can then move the object away and you can slowly lower yourself down to the floor.

•​Dead Hangs- Stand on a stable object for this one, as well. For dead hangs, you only need to raise yourself up where hands reach the bar. Face your palms away from your face and hold on to the pull-up bar. You can then pull your body up only an inch. Be sure that your elbows move out to the side when you do this. Bend your knees so you are no longer supported by your workout bench and hang there until you feel you can’t hold on anymore. This helps build strength to later do full pull-ups

•​Bench Knee Dips- You can start dips on a workout bench to build up your strength before you use the dip bars. Stand in front of the bench and place your hands on the bench behind you. Get your posture correct before you begin. Bend your and shoulders are back. Dip down until your elbows reach a 90-degree angle and rise back up.

Safety

At the gym, you have many professionals around to help if you have problems. You may also learn many safety techniques while learning about your new gym. At home, it is important to learn how to stay safe with each new piece of equipment. There are things to keep in mind when you start using pull-up bars and dip bars.

•​Never stand on chairs, boxes or other unstable items

•​Make sure to install the equipment properly and check for stability

•​Learn about proper techniques. Hiring a private trainer while you learn is the safest option. You can take a few lessons at the gym before using the equipment at home, as well.

•​Read the instructions and safety warnings thoroughly.

•​Do not overdo your workouts or try something you are not ready for.

Muscle Groups

You are sure to build an impressive upper body if you commit to a pull-up bar and dip routine. Pull-ups are one of the best ways to build up your latissimus dorsi. You can also expect to gain strength in your deltoid, trapezius, and pectoral muscles. Your triceps and biceps also show more definition when you work with a pull-up or dip bar. These exercises work some muscles in your upper body more than others. There are over 20 different muscle groups that benefit from this strength workout.

It is important to have a diversified workout schedule with proper equipment. A pull-up bar or dip bar is the best way to work out the entire upper body with minimal equipment. You can find different types of bars to fit your home and lifestyle. Like weights, pull-up and dip bars build up your strength over time. Instead of increasing the weight you are lifting, do more repetitions of the same exercises. Start out with beginner moves to build up enough strength to do full pull-ups or dips. Enjoy a workout at home or on the go with a quality pull-up bar.

What Causes Diabetes Mellitus and How Is It Diagnosed?

diabetes check

If some in your family has diabetes or your are overweight, you should want to know what causes Diabetes Mellitus and how it is diagnosed.  A family history of Diabetes Mellitus and obesity are to major risk factors for you to also become diabetic.

Diabetes mellitus (DM), typically referred to as just “diabetes,” refers to a group of chronic diseases that happen when the body does not effectively use or produce the crucial regulatory hormone “insulin.”

According to the CDC or the Centers for Disease Control and Prevention:

  • In the US alone, 30.3 million adults have diabetes, with one in four people unaware that they have the condition.
  • It is the 7th leading cause of deaths in the US, and the leading cause of kidney failure, adult blindness, and lower-limb amputations.
  • The number of adults diagnosed with DM in the past two decades has grown more than three times, with roughly 400 million people in the world afflicted with the disease today.

If you happen to be diagnosed with DM, you should understand how this condition results in abnormally high or low blood sugar levels, along with other vital information you need to know. You may have heard that it is essential for you to watch out for “hyperglycemia” (high blood sugar) or “hypoglycemia” (low blood sugar).

Understanding Diabetes Mellitus: Breaking the Code

            DM is linked with high blood sugar levels. It is a disease in which the body either does not efficiently utilize insulin or does not produce sufficient insulin. Insulin, once again, is the regulatory hormone that converts starches and sugars, and other food that we eat into energy needed to function. With DM, your body cannot efficiently use glucose (blood sugar) as an energy source, resulting in abnormally high blood sugar levels. Eventually, you may urinate sugar out of your body. Hence, the warning that diabetics can literally starve themselves to death!

How Diabetes Affects Your Body

DM can affect every organ in your body, and more especially the kidneys, the eyes, the nervous system, and the heart. These complications are mainly due to high blood sugar and occur only after years that the condition has damaged your body.

The good news is, most types of diabetes (that have turned into “epidemics,” sweeping millions in recent history) are preventable and can still be completely reversed. Type 2 diabetes, in particular, is a dietary illness and can be altered with essential diet and lifestyle changes. Robust evidence shows that medications may not be the only way.

Below are the four primary forms of DM:

  • Type 1– used to be called “juvenile” or “childhood-onset” diabetes, since type 1 is typically diagnosed in very young adults and children (commonly occurring before age 30). However, so many cases are found in adults, so that the term juvenile is no longer used. A person with type 1 DM virtually does not produces insulin anymore. Hence, insulin medication will be needed for the rest of the person’s life. This is the reason why this was also referred to as “insulin-dependent” diabetes.
  • Type 2 – previously, this was known as the “non-insulin dependent” or “adult-onset” DM since injecting insulin was traditionally not necessary; and this type occurred majorly in older adults (especially among people over the age of 30 years). Today, however, the condition exists with the younger populations, even among teens and children. It remains the most common type comprising 90% of all DM cases.
  • Gestational diabetes – develops during pregnancy, usually around the 24th week. This is not a chronic form of DM but can be considered a risk factor for developing chronic types in the future. This type affects roughly 18% of all pregnant women.
  • Medication-induced – also called “drug-induced” DM, is considered the fourth type of diabetes, associated with taking certain medications or hormonal treatments.

Let’s take a closer look at the variations among the four types.

Type 1

Your body needs a steady, constant supply of insulin. This regulatory hormone converts the food that you eat, particularly the sugar and starch into energy, and moves glucose (a simple sugar which is an essential energy source) into all the cells in your body for use. When your pancreas no longer produces insulin, then you may have type 1 diabetes.

This is classified as an “autoimmune disease,” which means that those who are afflicted have an immune system attacking the cells of his or her own pancreas (specifically, the “beta cells”) that are responsible for producing insulin.

If you have type 1 diabetes, serious symptoms would often appear swiftly because your body will make very little or no insulin. And without this regulatory hormone, the cells in your body wouldn’t be able to function properly. This explains why most people feel very sick and may need to be rushed to the hospital as emergency cases because of very high blood sugar levels in type 1 diabetes.

Approximately one in 20 people or about 5% who have DM suffer from this type of condition. Having this form of DM means you belong to the minority group in the population of diabetics.

Symptoms & Tests

Common Symptoms

  • Frequent urination – since your body tries to flush out excess sugar in your bloodstream (also called “polyuria” in medical terms)
  • Extreme thirst – due to dehydration (also called “polydipsia”)
  • Excessive hunger (or “polyphagia”)
  • Fatigue – because the necessary blood sugar (“glucose”) is not getting into your cells
  • Blurred vision – due to the build-up of fluid in your eyes or the elevated blood sugar levels
  • Weight loss – even if you have increased appetite

Tests

            To screen for type 1 DM, your doctor may order tests including:

  • HbA1c
  • Fasting blood sugar
  • Random blood sugar
  • Urine test for ketones – “ketones” are by-products of the body when breaking down energy or fats
  • Blood test for auto-antibodies – the presence of auto-antibodies can mean you have type 1 diabetes
  • C-peptide test – this measures the amounts of insulin being produced in the body

Causes

  • The exact cause remains unknown
  • Experts suspect the involvement of an individual’s genetic make-up, as well as the environment
  • The immune system attacks the insulin-producing cells of their own pancreas- an “autoimmune response” that can happen over months or years
  • Other experts believe that exposure to a virus that attacks the pancreas (and in effect diminishing the pancreas’s ability to produce insulin) may contribute to the development of the disease

Risk factors

Some risk factors linked with type 1 DM include:

  • Genetics & family history- if someone in your family has this type of diabetes, you may be at risk as this is believed to be passed down in the genes
  • Age- most cases of type 1 surface early in life between ages four to seven, and ages 10 to 14
  • Geographic location – it is also believed that the place where you live may actually put you at higher risk; in particular, those living farther from the equator have higher risk according to statistics than those who live closer to the equator

Precaution & Prevention

The biggest danger for this type of diabetes is the risk for “hypoglycemia” or an extremely low blood sugar level. This may occur when you have type 1 DM, and have injected excess insulin into your bloodstream–and can no longer take it back. This may occur with individuals who have not eaten properly or recently (after having insulin), or if a person afflicted has exerted too much energy rapidly. Talk to your doctor about healthy habits and practices to complement your medication regimen properly.

Unfortunately, there is no known way to prevent type 1 DM. Scientists at present are working to find ways to reduce the severity or delay this condition. Nonetheless, it can be treated effectively with regimen compliance and the following steps:

  • Blood sugar control
  • Insulin management
  • Proper nutrition
  • Regular exercise

Type 2

This type of DM is different. It is the type that eventually results from sugar and carbohydrate-heavy diets and a physically inactive lifestyle that has led to a state of “insulin resistance,” along with a list of all kinds of severe health problems.

Unlike in type 1 DM, the body’s response to type 2 DM is to produce abnormally high amounts of insulin, as an attempt to control all the ingested sugar. Also, this type has a gradual onset rather than the severe, emergency nature that is a characteristic of type 1.

Basically, a person with type 2 diabetes would have his or her body cells becoming “insulin-resistant.” This means that the cells no longer react to insulin because of its excessive proportions in the body. This is currently the most common type of DM, affecting roughly 95% of the diabetic population. This is not associated with autoimmunity issues.

Symptoms & Tests

Common Symptoms

Symptoms will be similar to type 1, but may be less severe; which is why it could take years or decades after its onset that complications arise and the condition is diagnosed.

The following manifestations are good indicators of type 2 DM. If you experience 2 or more, and you haven’t been diagnosed with the condition yet, it would be a brilliant idea to talk with your doctor.

  • Frequent urination since your body tries to flush out excess blood sugar in the blood (also called “polyuria” in medical terms)
  • Extreme thirst due to dehydration (also called “polydipsia”)
  • Excessive hunger (or “polyphagia”)
  • Extreme fatigue- you feel tired because your body’s cells are not getting the blood sugar fuel that you need
  • Blurred vision- as your blood sugar levels rise and fall, the lenses of your eyes swell and shrink; your eyes can’t adjust quickly to these lens changes which is the reason why your vision blurs
  • Unexplained bouts of itching (such as genital itching)- yeast infections love a high sugar environment, so DM is often accompanied by discomfort and itching
  • Weight loss
  • Bruises or cuts that are slow to heal
  • Numbness or tingling pain in the hands and feet – you may experience this because of “neuropathy,” a type of nerve damage, which is a common long-term complication of diabetes

Tests

  • HbA1C
  • Fasting blood sugar
  • Random blood sugar

Typically, a second screening test will be ordered by your doctor to confirm the diagnosis.

Causes

  • Experts don’t know the exact reason why the pancreas stops working properly
  • Some believe that progressively, the pancreas fails to make enough insulin or releases it too slowly; or that the pancreas simply “burns out” through the years
  • Others claim that the system that tells the pancreas to make more insulin is broken

Risk factors

Apart from obesity and lack of physical activity, which are associated with 95% of the cases in the US alone, other risk factors include:

  • Genetics- similar to type 1, if type 2 diabetes runs in your family, you may be at higher risk
  • Age- the risk increases after age 45, then significantly elevates more after age 65
  • Ethnicity- cases are prevalent among African Americans, Native Americans, Asian Americans, and Latinos
  • Alcohol intake- with heavy alcohol drinking, individuals may damage their pancreas, reduce their body’s sensitivity to insulin, and increase their chances of becoming overweight, which contribute to the development of DM
  • High blood pressure- two in three people who develop diabetes have high blood pressure


Precaution & Prevention

Unlike type 1 diabetes, this type is easily preventable with a healthy diet and lifestyle. Some people who have this type may also need insulin shots and other medications, which along with exercise and a healthy diet are the best treatment for the condition.

It may sound like a no brainer, but the best way to prevent this type of DM is to maintain a healthy weight and be fit. And that’s easier said than done. But it can be done! Evidence shows that individuals at high risk for diabetes may be able to prevent it with exercise, weight loss, and healthy eating.


Gestational diabetes

Just when you’re going through a rollercoaster of changes in your body during pregnancy (and even if you’ve never had diabetes before), it is possible for you to acquire a type of diabetes called gestational diabetes mellitus (GDM). This occurs without a prior incidence of diabetes in your life before pregnancy. It affects two to 10% of pregnant women and typically develops in the last part of pregnancy, commonly at about the 24th to 28th week.


Symptoms & Tests

            Often, pregnant women will show no symptoms or will not be able to identify the different symptoms that go with GDM because these manifestations would simply be associated with the common pregnancy woes. It is important, thus, for pregnant women to have prenatal screening, at the proper time in your pregnancy.

Common Symptoms

Typically this has the same presentation as other types of DM, and includes the following symptoms:

  • The three P’s: “polyuria” (frequent urination), “polydipsia” (extreme thirst), and “polyphagia” (increased hunger)
  • fatigue
  • dizziness or lightheadedness
  • vision problems

Before worrying that you have GDM, remember that all pregnant women will naturally experience symptoms of more frequent visits to the restroom and a bigger appetite. If you have risk factors for the condition or suspect symptoms different from the normal, however, it is best to work with your doctor for proper management.

Tests

  • Oral glucose tolerance test- if this screening test indicates GDM, the pregnant woman must start treatment immediately


Causes

  • The specific cause of gestational diabetes remains unknown


Risk factors

            The following risk factors are associated with the condition:

  • Hormones- these play a significant role in the baby’s growth, but may also be responsible for blocking insulin’s action in the mother’s body, thereby causing resistance to insulin
  • Genes & family history- individuals with a sibling or parent with DM are more prone to having this type of diabetes
  • Race and ethnicity- Hispanics, Asians, African Americans or American Indians, based on statistics, are more likely to develop gestational DM
  • Obesity & age- pregnant women who are overweight, or are 25 years or older, have a higher risk for the disorder

Precaution & Prevention

The good news is, GDM is typically a temporary condition occurring during pregnancy. Additionally, it is treatable; but remember that the condition must be treated without delay before any damage can be done to your baby. If no management or medical advice is done for the condition during pregnancy, this can lead to significant risks for you and your baby.

Once again, the best way to prevent the condition is to eat healthy food, maintain a healthy weight, and be physically active. The ultimate goal is to get your body in excellent shape before you get pregnant. Know that left uncontrolled, GDM can result in a large baby size, a difficult birthing experience, and potentially serious complications. Having the condition increases your risk of developing type 2 diabetes later in life.


Medication-induced

Medication-induced diabetes may come as a milder form, and initially can be reversible. However, if left uncontrolled, this will result in the chronic form of diabetes. If you’re taking medications such as “hydrochlorothiazide,” “Niacin,” and even the wonder drugs that lower cholesterol called “statins,” your blood sugar levels can go up. Certain “beta-blockers,” (medicines used to manage abnormal heart rhythms and high blood pressure), and some “antipsychotics” (given for individuals with personality disorders) are also linked with the development of diabetes.

Another known reason for developing the drug-induced type is when you are taking hormonal treatments for certain medical conditions. Common examples would include taking “hydrocortisone,” “prednisone,” and “dexamethasone,” which are drugs that prevent or treat inflammation-related diseases such as asthma or arthritis.

Symptoms & Tests

            One or more of these common early symptoms may be present in this type.

Common Symptoms

  • Frequent urination and thirst- the blood sugar in your urine draws more water from your blood, giving you the sensation or urge to urinate more often; you feel thirsty when the amount of water in your blood decreases
  • Extreme hunger- the inability of the body to get energy in the form of glucose (sugar) into the cells of muscles, contributes to a feeling of hunger
  • Fatigue- with ineffective or lack of insulin, sugar can’t enter body cells; as a result, sugar can’t be used as fuel to facilitate energy release, so a person with DM often complains of fatigue
  • Persistent vaginal infection
  • Weight loss

Tests

            To screen for this type of DM, your doctor may order tests including:

    • HbA1c
    • Fasting blood sugar
    • Random blood sugar
  • Urine test for ketones – “ketones” are by-products of the body when breaking down energy or fats


Causes

  • The exact cause remains unknown, but is associated with taking certain medications like steroids, statins, beta-blockers, and antipsychotics; also associated with taking medications like Cyclosporine, and Tacrolimus, among other drugs.

Risk factors

  • Glucose intolerance- this can be linked to borderline (100-125mg/dL) blood sugar levels even after fasting for a number of hours (usually 6-8 hours)
  • Age- most cases of this type of DM occur in individuals older than 45 years old
  • Family history- if a relative or family member has been diagnosed with DM, you may be at risk
  • Ethnic background- this type of DM is associated with Native Americans, African Americans, Hispanic/Latinos, Asian Americans, and Pacific Islanders

Precaution & Prevention

Some people will have elevated blood sugar levels only when taking any of the mentioned medications, among other drugs associated with this side effect. While others may need to monitor their blood sugar even after these medications are stopped.

Additionally, as with the other types of DM, it is recommended for individuals at risk or diagnosed with this type to limit the intake of fatty food and avoid gaining extra weight. It is likewise essential to avoid food and drinks that cause a rapid rise in blood sugar levels.

If possible, it is advised to check your blood sugar levels before, during, and after activity. Walking and biking will be beneficial physical routines to burn excess sugar in your bloodstream. Remember to consult with your physician at the early stages to know if it will be best for you to take diabetes pills or insulin that will keep you healthy, in control of your blood sugar, and prevent further complications.