20 Unique Fitness Group Ideas To Keep You Active

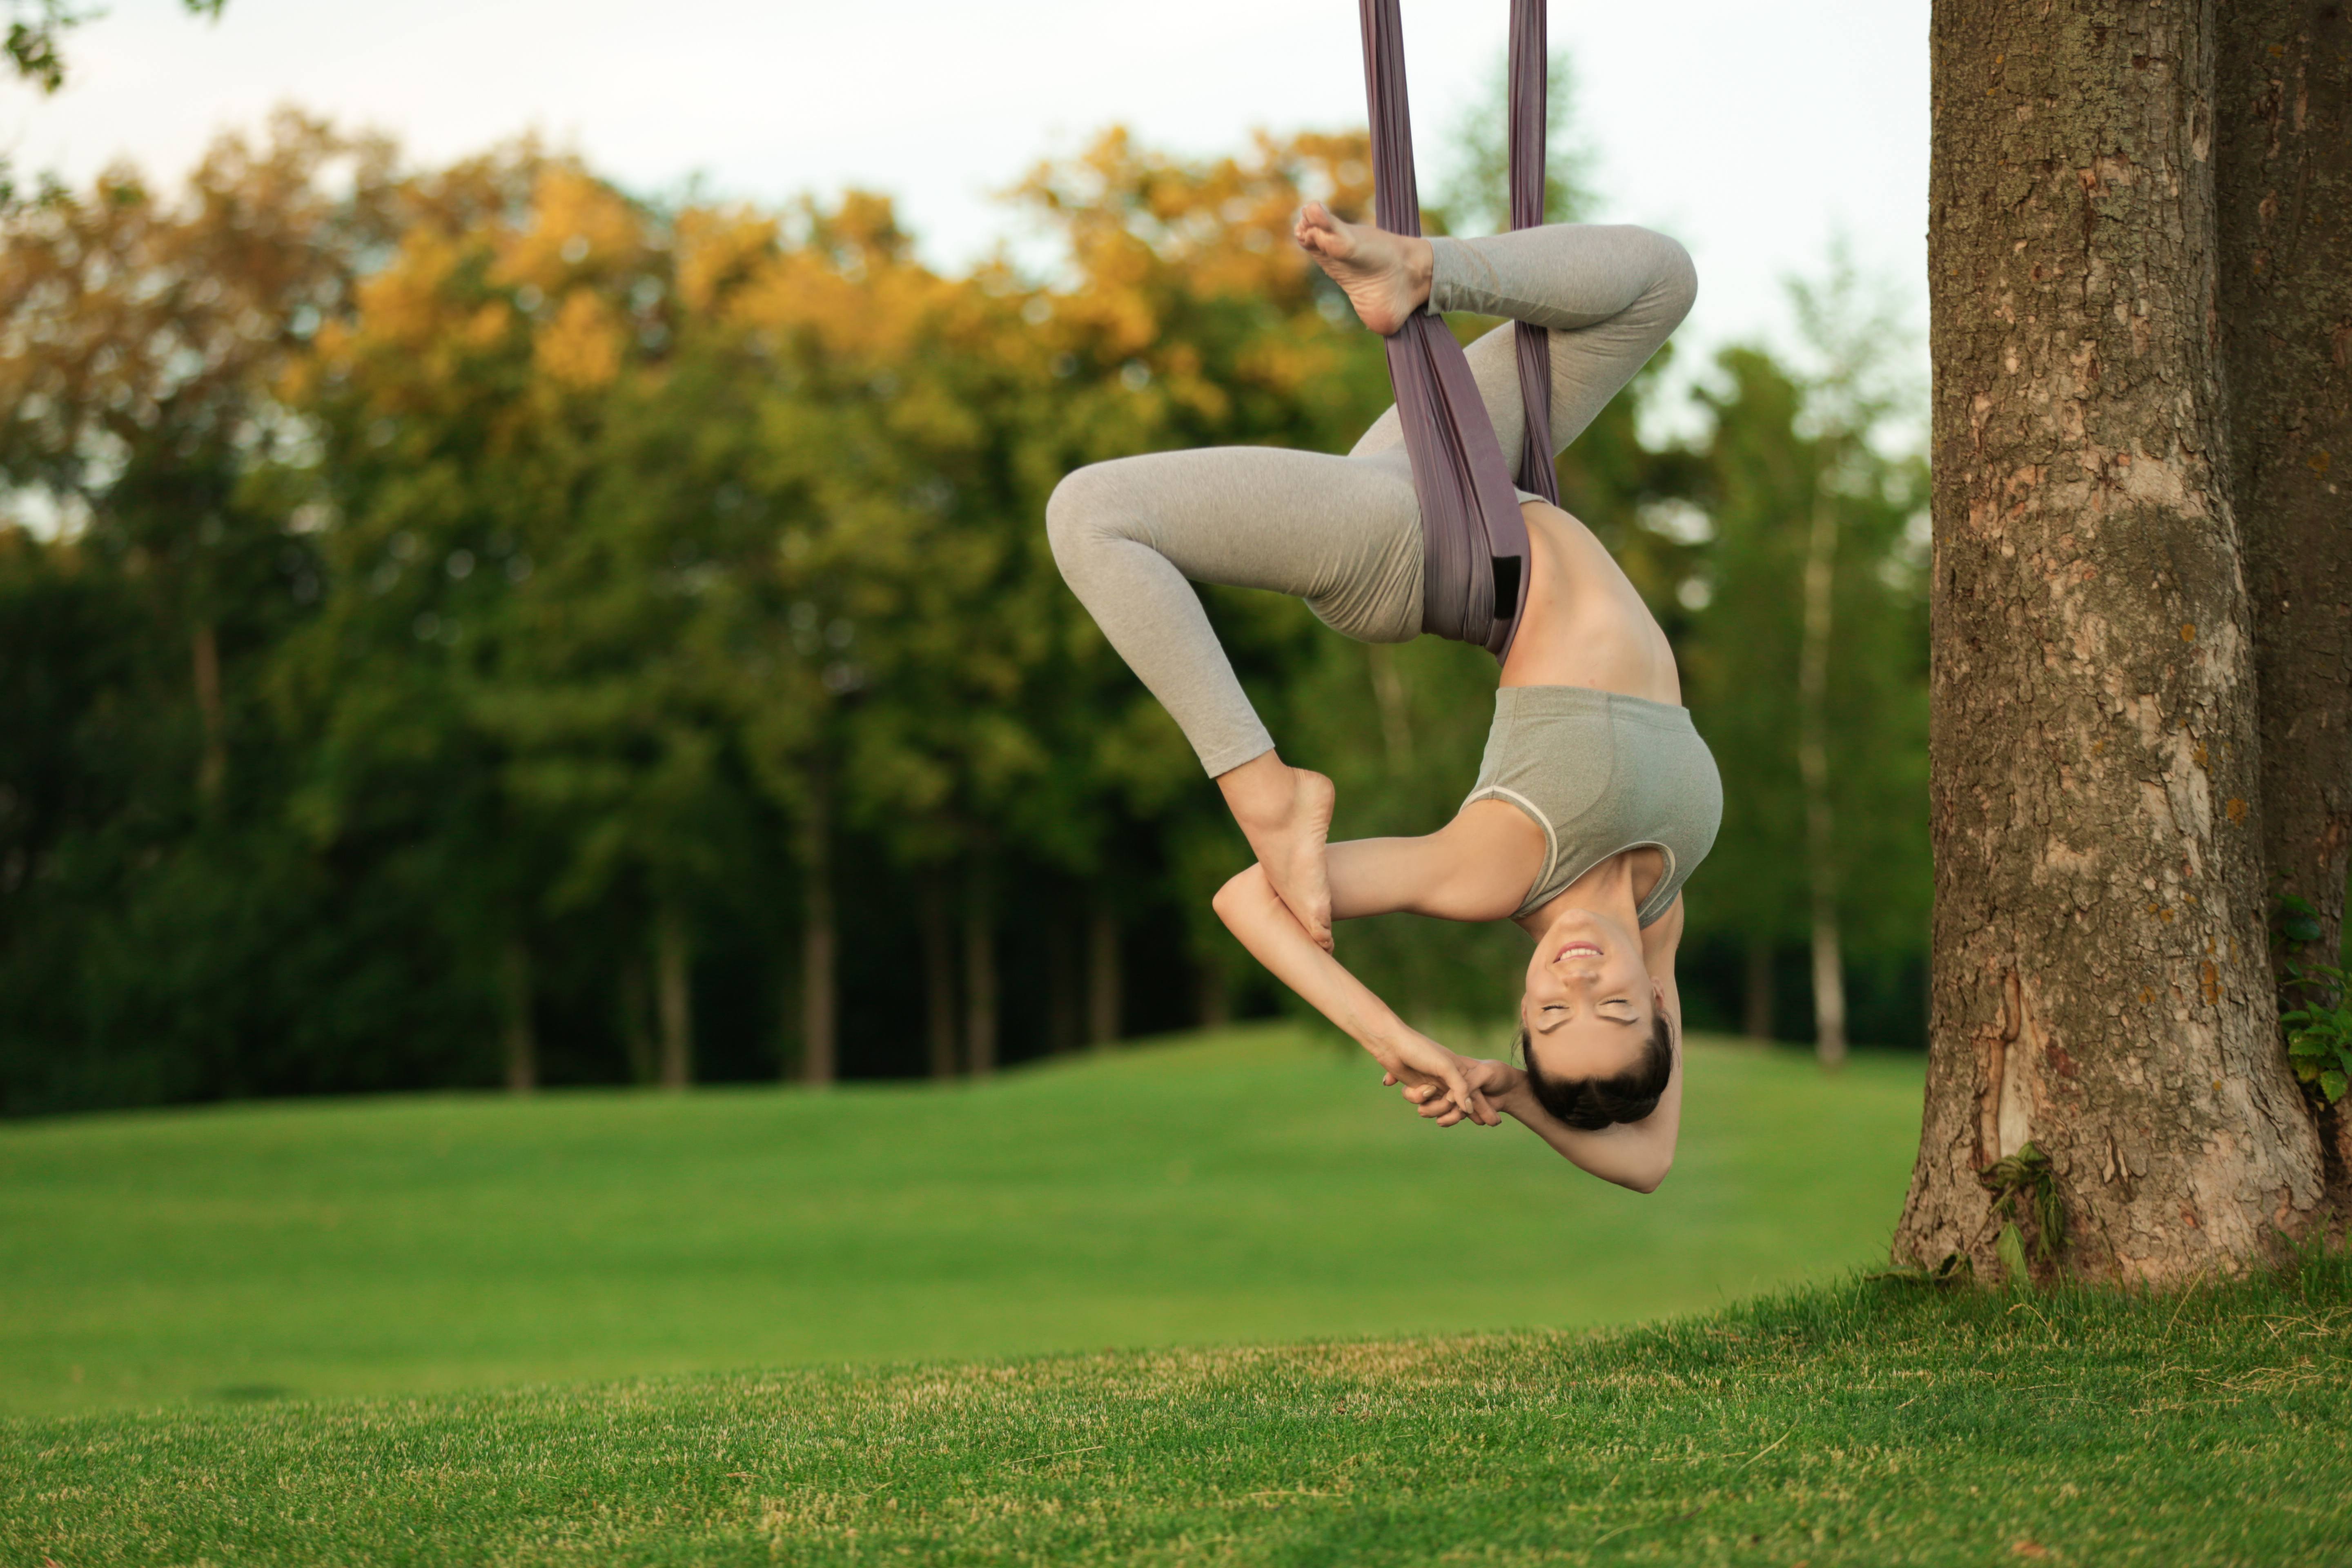
Young woman practicing aerial yoga on tree in park

Group exercise is all the rage, but sometimes those fitness classes can get boring. Fortunately, gyms all over the world are getting creative when it comes to working out in groups. Is one of these 20 unusual exercise classes the right fit for you?

Aerial Exercise

Does flying through the air sound like your idea of a good time? Join an aerial fitness class, and get your feet off the ground. In these classes, you will use large, stretchy hammocks suspended from the ceiling to pull and twist your body. You’ll gain strength while you soar around the room.

Aquaspin

If you’re bored with traditional spin classes, take it to the next level by putting your bike in the water. Aquaspin uses special bikes that can be ridden in a pool. The resistance of the water adds to the resistance of the bike, making the ride even more challenging.

Buti Yoga

Buti yoga combines the traditional stretching and strength training of regular yoga with tribal dance moves. This gives you a combination of cardio, strength, and mindfulness.

Capoeira

This class focuses on a Brazilian martial art that includes dance and acrobatics as well as fighting techniques. It began in slave communities in Brazil which needed a way of learning to fight without anyone knowing. This is the type of class that is fun for beginners but can also become an art form that takes years to perfect.

Drumming

Drum circles are a popular community-building activity, but drumming can be a form of exercise as well. These classes use heavy drums and encourage participants to bang their way to improved strength and stamina.

Firefighting

There is no actual fire involved in a firefighting fitness class. Instead, you will train in a variety of firefighting techniques including waving heavy hoses, climbing stairs, and running with weight over your shoulders.

Floating Yoga

Grab a floating yoga mat and join the fun. These classes are usually held in pools but can also take place in a lake or pond.  This class involves performing traditional yoga poses while balancing on a floating board.

Gravity

This class uses special machines that slide to invert your body at different angles. You use the force of gravity as resistance to strengthen your muscles.

Hulacize

Generations of kids have played with hula hoops, and now you can use them as part of a fitness class. This aerobics class challenges you to complete heart-pumping movements while keeping one or more hula hoops spinning around your waist, legs, arms, neck, or any other body part.

IMAX Cycling

This is a regular cycling class that is held in front of a giant IMAX screen. The screen wraps around the room and is so large that you’ll feel like you’re actually cycling in any number of scenic places.

Kangaroo Bounce

A kangaroo bounce class requires boots with a bouncy, metal curve at the bottom. These boots allow you to hop around like a kangaroo. This creates an aerobics class that is lots of fun and difficult as well.

Mini-Tramp

In this springy class, everyone gets a mini-trampoline. You’ll follow an instructor as you perform different types of jumps that make your heart rate soar.

Naked Yoga

Sometimes people who are into the spiritual benefits of yoga find that practicing without clothing brings them even deeper into a meditative space. Now you can do this with a group of your closest friends and yogis.

PE Class

This exercise class for adults brings back the days of physical education. Instructors act as coaches and organize popular school games like dodgeball, kickball, and scooter races.

Punk Rope

Jumping rope can be an intense physical endeavor, and it’s even more demanding when you are immersed in punk music. These classes turn up the volume and challenge you to jump hard.

Senior Exercise

Why should fitness be only for the young? These classes are for the over 55 crowd and include stretching, cardio, and strength training. There’s no time in life to stop moving, and this class proves it.

Roller Skate Aerobics

Pull on some skates and bring back your roller rink days with a class that will bring you fitness on wheels. This aerobics class makes use of roller-skating tricks to keep your blood pumping.

Skateboard Pilates

Traditional Pilates involves building strength in your core through intense exercises. This becomes even more difficult if you do it while balancing on a skateboard.

Sproing Machine

A Sproing is a treadmill with a soft, squishy base. It is easier on the joints than a regular treadmill but also requires more of your leg muscles. Classes have participants performing routines on the machines in groups.

Weapons Workout

Swords, poles, and knives are all weapons used in martial arts. In weapons fitness classes, participants lift, spin, and wave these weapons. This leads to greater core strength, balance, and overall body control.

No matter your age or fitness level, there is a unique workout class that is the right option for you. Use this list to get inspired to find a class that will motivate, stimulate, and challenge you in your fitness journey.


Best Compact Blood Pressure Monitor For Upper Arm in 2020

Best One-piece Upper Arm Compact Blood Pressure Monitors to Buy in 2020

Don’t let the bulky regular blood pressure monitors stop you from keeping tabs on your health.

Yes, we understand that most blood pressure monitors have wires and tubes. Add the extra-large LCD screen display to the kit’s design and what you get is an extremely bulky tool that is quite uncomfortable to use for checking your blood pressure at home.

The bulkiness of most blood pressure monitors can take the ease out of checking your blood pressure on a regular basis.

If you are on this table and is turned off by the bulky blood pressure monitors, you will be glad to know about the new design of BP monitors for home use that makes the regular models look archaic.

The new design features a one-piece, compact blood pressure unit that is so easy to use.

For instance, unlike the regular models that require the use of both hands to put on the blood pressure cuffs, the new design has pre-formed cuffs that you can easily apply correctly and comfortably using only one hand!

With one-piece compact blood pressure monitors, you can easily read and interpret the results of your blood pressure using your smartphone. Yes, the one-piece compact design eliminates the need for the large LCD display screens commonly found in older BP monitors.

What’s the advantage here?

Well, peep this: instead of waiting for your results to be published on the large display screens and then syncing it to your smartphone as it is the case with many regular models, the one-piece compact blood monitors upload results instantly on to your smartphone for you to manage efficiently! You’ll need to download a custom health app (Android/iOS) and install it on your phone to access your BP data.

Now imagine the amount of time you would save by using a one-piece compact blood pressure monitor to check your blood pressure at home instead of the regular BP models?

With the one-piece, compact blood pressure monitor designs, you will have an easy time monitoring your blood pressure from anywhere and anytime. Most of them come with rechargeable batteries that are powerful and long-lasting. In fact, with only one charge using a micro/mini USB cable, the new one-piece compact blood pressure monitors will afford you at least 80 blood pressure measurements before the next recharge is due!

Compared to the regular blood pressure models, the design of the one-piece compact BP unit brings a new meaning to convenience, especially on matters reliability and portability. The one-piece compact blood pressure monitor is one of those innovations that are a must-have, especially if you are keen on keeping track of your heart’s health at home or even while on the go.

If you’re interested in acquiring one of these amazing blood pressure home testing units, here are the best one-piece compact blood pressure monitors you should consider buying in the 2019 market.

Best One-Piece Compact Blood Pressure Monitors For Upper Arm

[table id=7 /]


#1 Best One-Piece BP Monitor with Dock Design: iHealth Ease Wireless BP Monitor

With the new one-piece compact design, your smartphone becomes part of the BP monitor. We recommend the iHealth Ease Wireless BP Monitor because its design provides stable docking space for your smartphone. Think about this: you won’t have to struggle holding your smartphone while measuring your blood pressure using this unit, because the dock design provides stable support for your iPhone, iPad and Android device!

iHealth Ease Wireless BP Monitor is FDA cleared, meaning the results you get are clinically accurate. In addition, the iHealth MyVitals app that connects to the kit via Bluetooth automatically logs and tracks your blood pressure readings. It also allows one-touch data sharing, and this speaks volumes about its ease of use.

iHealth Ease Wireless BP Monitor reads your diastolic and systolic pressures, your pulse rate, as well as detects irregular heartbeat really fast. The unit takes about 30 seconds to read your blood pressure and provide comprehensive results. The unit takes measurements as the cuffs inflate. The cuffs can comfortably fit upper arms of circumference size 8.7” to 14.2”. You won’t have any problems putting on the cuffs. You can easily wear them using only one hand. The traditional models would require the use of both hands to put on the cuffs.

If you are impressed by the compact one-piece design of iHealth Ease Wireless BP Monitor, the reliability of its rechargeable batteries will excite you. Peep this: with only one charge using a micro USD cable, you can use iHealth Ease Wireless BP Monitor for up to 500 times before the next recharge is due! Even though the charging session takes hours, you won’t have to recharge it frequently considering how long one charging session will last you.

If you consider the amazing features of iHealth Ease Wireless BP Monitor, it easily tops the list of the best one-piece compact blood pressure monitors. This unit is ideal for people who travel a lot because the unit is lightweight, portable and its battery power is extremely reliable. Anyone who takes the health of their heart seriously should consider buying this unit to conveniently check their blood pressure at home.

iHealth Ease Wireless BP Monitor Best Features:

  • Docking space for your smartphone
  • FDA Cleared
  • Fast blood pressure reading with comprehensive results
  • Compatible with both Android and iOS
  • Powerful rechargeable batteries

#2 Best One-Piece BP Monitor with Advanced Accuracy: OMRON Evolv Wireless BP Monitor

Here’s a little secret: the accuracy of blood pressure measurement depends on more than just proper cuff positioning. Even the slightest movement of cuffs during measurements can affect the accuracy of the results you get. Therefore, if your main interest is tracking the most precise, clinically accurate blood pressure readings, you need to consider acquiring the OMRON Evolv Wireless BP Monitor.

What makes OMRON Evolv Wireless BP Monitor a special kit is far much more than the mere fact that it is a product of a popular brand. Indeed, OMRON is one of the most trusted brands of blood pressure monitors. However, that is not the only thing that makes this particular model stand out.

Firstly, OMRON Evolv Wireless BP Monitor uses Advanced Accuracy, which is an exclusive heart health algorithm that enables the device to measure more data points and eliminate interference from body movement. The readings you get from this unit are precise and medically accurate.

Secondly, the one-piece design of OMRON Evolv Wireless BP Monitor includes pre-formed cuffs that can comfortably accommodate standard or large upper arm circumference size of between 9” and 17”. The pre-formed cuffs provide an easy blood pressure measuring process. For instance, to wear the cuffs, all you need to do is slide them in and then tighten them for a comfortable fit. Once you press the START button, the device will take accurate measurements of your diastolic and systolic pressures, the pulse rate, as well as, detect irregular heartbeat.

Thirdly, OMRON Evolv Wireless BP Monitor provides the OMRON Connect app that is compatible with both Android and iOS. The device can connect to your smartphone via Bluetooth, and it will sync the results of your blood pressure test to the OMRON Connect app installed on your phone. The app allows you to track the health of your heart and also provides for secure sharing options, enabling you to email your blood pressure data to your doctor.

This particular one-piece compact blood pressure monitor is among the best options you should consider buying in 2019. If you are obese, pregnant with blood pressure complications, or you have been diagnosed with Hypertension, you need a device that can provide you with precise and clinically accurate readings. OMRON Evolv Wireless BP Monitor is that device that should top your “the best one-piece compact blood pressure monitors to buy in 2019” list.

OMRON Evolv Wireless BP Monitor Best Features:

  • Compatible with both Android & iOS
  • Provide the most accurate blood pressure readings
  • Bluetooth Connectivity
  • Pre-formed upper arm cuffs
  • Portable device

#3 Best Multi-User One-Piece BP Monitor: QardioArm Smart BP Monitor

If you have a large family, it would be wise to acquire a blood pressure monitor that has multi-user functionality. With a device that supports multi-users, you will cut the cost of managing your blood pressure for your whole family, considering that you will use only one unit for all family members instead of buying a unit for each member. If this sparks your interest, then the QardioArm Smart BP Monitor would be a great unit to check out.

What makes QardioArm Smart BP Monitor a good unit to buy is that it supports up to 8 users. With this unit, you can connect up to 8 smartphones. What this means is that, if you have a large family of up to 8 people, anyone with a smartphone will be able to monitor the health of their heart using this one unit. If you buy the QardioArm Smart BP Monitor, you will not need any additional device to check the blood pressure for all members of your family.

The device enables you to keep track of your blood pressure efficiently through the Qardio app that runs on the Android and iOS platforms. QardioArm Smart BP Monitor connects to your smartphone via Bluetooth. Once you put on the cuffs that can comfortably fit upper arms of circumference size of between 8.7 and 14.6 inches, it will read your diastolic and systolic pressures, as well as, detect any instances of irregular heartbeat. The results are extremely accurate since the blood pressure monitor is FSA approved.

QardioArm Smart BP Monitor is a good blood pressure monitor to have in the home, especially if you have a large family.

QardioArm Smart BP Monitor Best Features:

  • Supports multi-user
  • Bluetooth connectivity
  • FSA Cleared

#4 Best One-Piece BP Monitor with Results on Device: Withings Wi-Fi Smart BP Monitor

Considering that the one-piece design works with smartphones, does it mean that you cannot take your BP measurements when you don’t have your smartphone with you? Well, with most models that project results on your smartphone, it would be difficult to check your BP if you don’t have your smartphone.

However, with Withings Wi-Fi Smart BP Monitor, you won’t need your smartphone to get results of your BP reading. Forget about the large display screens found in traditional BP models, Withings Wi-Fi Smart BP Monitor has a sleek LCD that is compact and gives you a readout of your diastolic and systolic pressures, as well as, your heart rate. What is more, the result is color-coded so you can easily understand and interpret the readings to know the status of your heart’s health anytime you use the device to check your blood pressure.

The results can also be accessed on your smartphone, where you can manage them efficiently. In fact, your blood pressure records are securely stored on the Health Mate app which also provides you with the option of sharing the data with close friends and your doctor. The device can connect to your smartphone via Bluetooth or Wi-Fi.

The FDA cleared Withings Wi-Fi Smart BP Monitor comes packed with standard upper arm cuffs of circumference size 9 – 17 inches, and it is so easy to use and operate. It takes measurements quickly and gives you results with clinically approved accuracy.

With this device, you will no longer have to worry about carrying your smartphone with you every time you need to take blood pressure measurements. Think of the convenience of being able to keep track of your blood pressure using the one-piece compact BP monitor but without necessarily requiring your smartphone. To enjoy this convenience, buy the Withings Wi-Fi Smart BP Monitor. It is the best one-piece compact design BP monitor that gives you results on the device.

Withings Wi-Fi Smart BP Monitor Best Features:

  • Sleek LCD that gives results on the device
  • Android/iOS compatibility
  • FDA Cleared
  • Color-coded results

#5 Best One-Piece BP Monitor with Color-Coded Feedback: Withings Bluetooth BP Monitor

Imagine being able to take your blood pressure measurement and receiving instant color-coded feedback showing you the status of your heart’s health…Wouldn’t it be nice being able to instantly know if your blood pressure is normal or is above/below the normal range with just a press of a button? Well, you can stop imagining and go buy the Withings Bluetooth BP Monitor to enjoy fast and easy blood pressure monitoring at home.

Not only does Withings Bluetooth BP Monitor deliver color-coded results and advice based on internationally-recognized standards, but it also lets you have your blood pressure reading history on hand. It uses the Health Mate app that runs on both Android and iOS platforms, to manage your BP data. Therefore, with this unit, you will be able to track your blood pressure over time, and this will give you a better understanding of your heart’s health.

Withings Bluetooth BP Monitor is FSA cleared, so you are guaranteed of receiving highly accurate results each and every time you use it to measure your blood pressure. The cuff fits arm circumference from 9 to 17 inches.

Have we mentioned that the results will sync to your smartphone automatically? The device connects to your smartphone via Bluetooth, granting you a fast and efficient way to keep track of your heart’s health. Indeed, you will have an easy time managing your blood pressure with this device, especially if you fancy quick and instant feedback.

If you are looking for that one-piece compact BP monitor that will give you instant color-coded feedback, then consider buying the Withings Bluetooth BP Monitor. It will be a good investment, although you have the option to go for a newer version (Withings Wi-Fi Smart BP Monitor) that has Wi-Fi connectivity.

Withings Bluetooth BP Monitor Best Features:

  • Bluetooth connectivity
  • Android and iOS compatibility
  • Trusted Brand
  • FSA Cleared
  • Clinically approved accurate results
  • Easy to use

#6 Best One-Piece BP Monitor with Comprehensive Reading: MobileHealth Wireless BP Monitor

For you to have a crystal clear picture of the condition of your heart’s health, you need a blood pressure monitor that checks for more than just the usual data points. Most blood pressure monitors check for the usual diastolic and systolic pressures and heart rate. However, for you to know how your heart is faring, you will want a device that effectively detects an irregular heartbeat, atrial fibrillation, and much more. The best one-piece blood pressure monitor with comprehensive blood pressure reading is the MobileHealth Wireless BP Monitor.

This device effectively screens for 5 major cardiovascular profiles, including Fast Heart Beat, Slow Heart Beat, Irregular Heart Beat, Atrial Fibrillation, and Cardiovascular Evaluation. These advanced measurements will give you a clear picture of the status of your heart’s health than those devices that limit their measurements to just the usual heart rate and systolic and diastolic pressures.

Considering how MobileHealth Wireless BP Monitor provides comprehensive blood pressure reading, you may be mistaken to think that it has limited memory storage. On the contrary, the device can record an unlimited number of readings and goes as far as capturing the time and date so you can efficiently keep track of past measurement history.

And when it comes to the accuracy of the readings gotten from MobileHealth Wireless BP Monitor, you can be sure that the measurements are accurate and clinically approved. Did we mention that the device is FDA approved? That should help cancel any doubts you may have regarding the accuracy of this device in measuring your blood pressure. Furthermore, with MobileHealth Wireless BP Monitor, you can see your average for the most recent 7, 14, or 30 days, or even opt to view the records as a chart for better analysis. The results are also color-coded so you can quickly know if your reading is above, below, or within the normal acceptable range.

And just like virtually all one-piece compact blood pressure monitors, the MobileHealth Wireless BP Monitor can connect to your mobile phone via Bluetooth. It comes packed with the MbH BP app that provides for easy and more efficient management of your blood pressure data. With the app, you can also share the blood pressure records with your closest family members or your doctor. MbH BP app is compatible with both Android and iOS.

MobileHealth Wireless BP Monitor has all the features you would want in a blood pressure home monitor. In addition, it has a compact design, making it extremely portable. You can take readings of your blood pressure anywhere and anytime you want. If this is something you need, don’t even think twice to purchase this amazing health device. You will not be disappointed.

MobileHealth Wireless BP Monitor Best Features:

  • Bluetooth Connectivity
  • Comprehensive reading
  • FDA approved
  • Memory storage for an unlimited number of readings
  • Compatible with both Android and iOS

Final Advice

One-piece compact blood pressure monitors for home use provide an enjoyable and easy BP reading process. Our selection contains the best products available in the 2019 market, and it should help you with your purchasing decision. Whichever product from the list that sparks your interest, buy it knowing that you will be able to keep track of your heart’s health at home more efficiently and conveniently.
 

Got 15 Minutes ? Sandbag Training for Upper Body

[embedyt] https://www.youtube.com/watch?v=FRUy4BIPo2A[/embedyt]

Get Strong and Lean in 15 Minutes with Sandbag Training for Upper Body

As a part of a strength training or resistance training program sandbag workouts can help you improve your health. Furthermore if your goal is it to get fit, this is the tool you need to take you to the next level and beyond.

However,  you need the right approach to begin your workout regime.

Don’t be misled by the looks of the sandbag. Once you master some of the basic moves, you are set to build your own workout in the comfort of your own home.

The exercise sandbag works as a great too to strengthen and grow your muscles. Any muscle will benefit from this muscle enhancing and performance improvement tool.

You can use the sandbag to strengthen and build muscles in your arms, shoulders, chest, biceps, triceps, and also your back .

Sandbags are used in the military as a basic training exercise tool. You will be happy to know that you don’t have to enlist in the military to gain access to a sandbag. You can buy your own.

How Does Sandbag Workout Really Work?

This sandbag exercise has 3 sections. Keeping in mind that it works the entire body, as most HIIT exercises do, it truly focuses on the arms, lats, and the entire upper body.

A sandbag is highly effective exercise tool. The load is unstable forcing you to use your core muscles to stabilize your body. The weight you lift is always moving as you work out with it. Working out with an unstable burden activates more muscles.

Sandbag workout requires only a pack loaded up with sand or even water. It is very cost-efficient. You can make your own sandbag with a duffel sack, conduit tape, and sand. However, homemade sandbags are limited in versatility. You will need very strong handles on all sides that can withstand heavy weights when performing rows, pulls and deadlifts. In addition, unless you make you own filler bags, you will be stuck to only one weight.

Why bother going through all that hassle when you can purchase a brute force sandbag.

or you can purchase a readymade one of your preferred weight category.

The best part is, it is very easy to add extra load as you get stronger. You don’t have to buy another piece of equipment.

Reasons Why Working Out with a Sandbag is Beneficial

  • Portable

Sandbags are easily portable which makes it easy to carry it outdoors and work out at a nearby park or a residential compound.

  • Takes Up less space

When the sandbag is not in use, you can easily squeeze it under your bed or in your workout closet.

  • Engages the bigger muscles

With the help of a sandbag workout, you can make your upper body muscle group stronger and leaner. It also helps burn calories faster.

Sandbag Upper Body Workout Exercises

Today we are going to find out how to get shredded with sandbag exercises for the upper body. We are going to focus on the biceps, triceps, chest, shoulders, and the back and core muscles.

Before we start, let’s remember a few basic things. Yes, we all know that already, but here’s a reminder because it is important.

  • Don’t get stuck in a rut. Challenge yourself a little further every day.
  • Do not overdo it. You are not a rookie. You know how much weight you should lift.
  • Take your protein supplements and stay hydrated all day long to avoid the cramps.
  • Slowly progress to heavier loads
  • Change your routine ever few months

Now we can move on to the fun part. Follow these instructions carefully. Check out some videos to make sure you are not doing it wrong.

Arms, Biceps and Triceps

Target your biceps and triceps specifically with these sets of sandbag arm exercises. The best sandbag exercises for your upper arms are listed here. Choose at least two workouts for each target muscle.

Go for two consecutive sets of the entire workout. Complete one set, rest for 30 seconds, go for the second set. Each set should have at least 8 workouts. You can do them all if you want to take up that challenge. Go for 20 reps of each workout. Increase it according to your capacity. But don’t get too comfortable.

  • Kneeling Preacher Curl- For the biceps (short head)
  • Single Arm Wide Curl: Biceps short head
  • Hanging Curl: Biceps Short head
  • Cross Body Curl: Biceps long head
  • Close Grip Curl: Biceps long head
  • Drag Curl: Biceps long head
  • Reverse Grip Curl: Biceps brachialis
  • Hammer Curl: Biceps brachialis
  • Single Arm Curl: Biceps
  • Plank Curl Kickback: Biceps triceps core
  • Overhead Triceps Extension: Triceps long head
  • Kickback: Triceps lateral head
  • Single Arm Overhead Extension: Triceps long head

Chest and Shoulder Muscles

If you want a quick workout that will help you build an impressive upper body, go for sandbag workouts that have a combined effect on the chest and shoulders.

Here are some simple sandbag workouts for the chest and shoulders. They only look simple. One or two reps are easy. But you are going to do way more than that. You are going to do 20 of each for an effective workout. You can only have a 10 second break after each set. You will then repeat the entire set once more.

The workouts are broken up according to the muscles it targets. You can pick just two workouts focusing on each target area.

  • One and off push ups- Chest
  • Lying Press- Chest
  • Push up on bag- Chest
  • Bag Squeeze push up- Inner chest
  • Lying bag squeeze press- Inner chest
  • Bag Squeeze Press Out- Inner chest, shoulders
  • Bag Squeeze Press up- Upper inner chest, shoulders
  • Push up plank single arm fly combo- Chest, core
  • Plank single arm fly- Chest core

This entire set should take you about 10 minutes. And then you repeat it for another 10 minutes. A total of 20 minute workout is enough to give you the shredded appearance. Get ready for it.

Back Muscles

For your back muscles, here are 5 best sandbag workouts that will take only 10 minutes.

Try all these workouts for 40 seconds and take a break for 20 seconds before moving on to the other.

1] Bag swing

2] Squat thrust pull up

Harness a sandbag to your back. You decide on the weight. Keep it comfortable. The intensity of the workout should depend on the speed of the pull ups. The sandbag should not feel heavy at the beginning of the workout. Especially if you have a back problem, go easy on this one.

3] Plank bag pull through

Go all the way. Don’t be lazy. Don’t cheat.

4] Renegade rows

Put 20 seconds into each arm.

5] Bent over row

Use 3 seconds each for up and down motions. Take it slow.

Repeat the entire set of 5 workouts twice. This 10 minute workout will work wonders for your back and core muscles if done right.

How to Make Sandbag Training Harder?

You can make your workout routine more difficult by speeding it up and increasing the number of repetitions. You already know that adding to the weight of the sandbag is not the best way to achieve your goal quicker, of course, unless you already have doubled the number of reps and sped up the workout to its limit.

Don’t make the breaks any longer just because your workout routine is longer. Stick to the same amount of break.

HIIT Workout with Sandbags

If you are going for a high intensity interval training routine, make sure you are doing it right. A little too much or a little wrong way can end up injuring you for weeks.

Here are some benefits of HIIT training with sandbags:

  • It engages your entire body. You get to exercise several joints and the bigger muscles in a short span of time.
  • You can take the sandbags anywhere, fit them into tight spaces.
  • You can easily adjust the weights by adjusting the number of filler bags.
  • You can customize the weights to go above 80 pounds if you are really going for it.

Sandbag HIIT Training Exercises

Also, the heavier sandbag or sack you carry the great impact it will have on your ‘High Intensity Interval Training’. But you might not always want that. Here are some things you must make full use of. A list of 8 HIIT exercises involving sandbags that you can incorporate into your workout routine.

  • Sandbag back squat: Keep your spine aligned straight and go as low as you can. Repeat this 20 times.
  • Single straight leg deadlift: Go for 10 reps for each leg.
  • Clean and press: This one’s pretty simple. Don’t forget to clench your butt as you stand up.
  • Push press: Only one warning for this one, mind your head. Make sure you have a lot of strength in your wrists. Or else you might end up injuring your neck by throwing the bag at it.
  • Push up Clean and press: This one is a combination workout. Check out some videos to make sure you are doing it right.
  • Overhead squat: This is an excellent core workout. Try your best to pull this off. Increase the number of reps on this one first if you really want to look like a million bucks.
  • Shoulder to shoulder press: The intensity of this exercise depends upon the speed.
  • Sandbag sprints: You can sprint or you can even walk if that suits you. But make sure your posture is correct and you go for equal number of steps or minutes on either side.

All these exercises are great for core strength and overall workout. Do HIIT workouts only 2 days a week. Give your body the time to recuperate. Follow the usual workout routine the other 4 days of the week.

Take one day a week to let your muscles relax. This would be a good day for a massage and a swim. Well, these exercises are exceptional, implying that in case you’re propelling yourself appropriately, you’re likely going to be sore the following day.


Sandbag Training For Weight Loss and Toning

How Sandbag Training Can Help With Weight Loss and Muscle Toning

If you are working out at home and you want to add some variety or intensify your workout sandbags are a must.

Sandbags have turned out to be very powerful and effective to get your body in shape even at home. These have around us for around a hundred years and have been used by endurance athletes and wrestlers to get in the right shape for competition.

If you have been to your nearest gym, you must have seen people lifting or swing bags awkwardly or hugging some giants sacks of sand. Well, those were sandbags. These are very hard to ignore and so are the benefits they bring to your body.

Since that are sacks or bags filled with sand or even water, unlike gym machine, they actually are similar to items you move around in real life. This makes them also ideal for functional training.

In this post, we are going deep into understanding how sandbag training helps to get rid of that extra fat from your body to give you a lean and mean shape!

So, without any further ado, let’s get started.

Why Sandbag Training is great for Fat Loss?

  • Unstable Load Training

By unstable load training, we mean that the weight being lifted is not uniform throughout which can make your body constantly adjust to the changing dynamics of the load. Sandbags can be one of the most ‘uncooperative’ pieces of gym equipment you’ve ever come across. But, what this does is it makes your body more athletic and develops high functional strength.

  • Helps in Conditioning

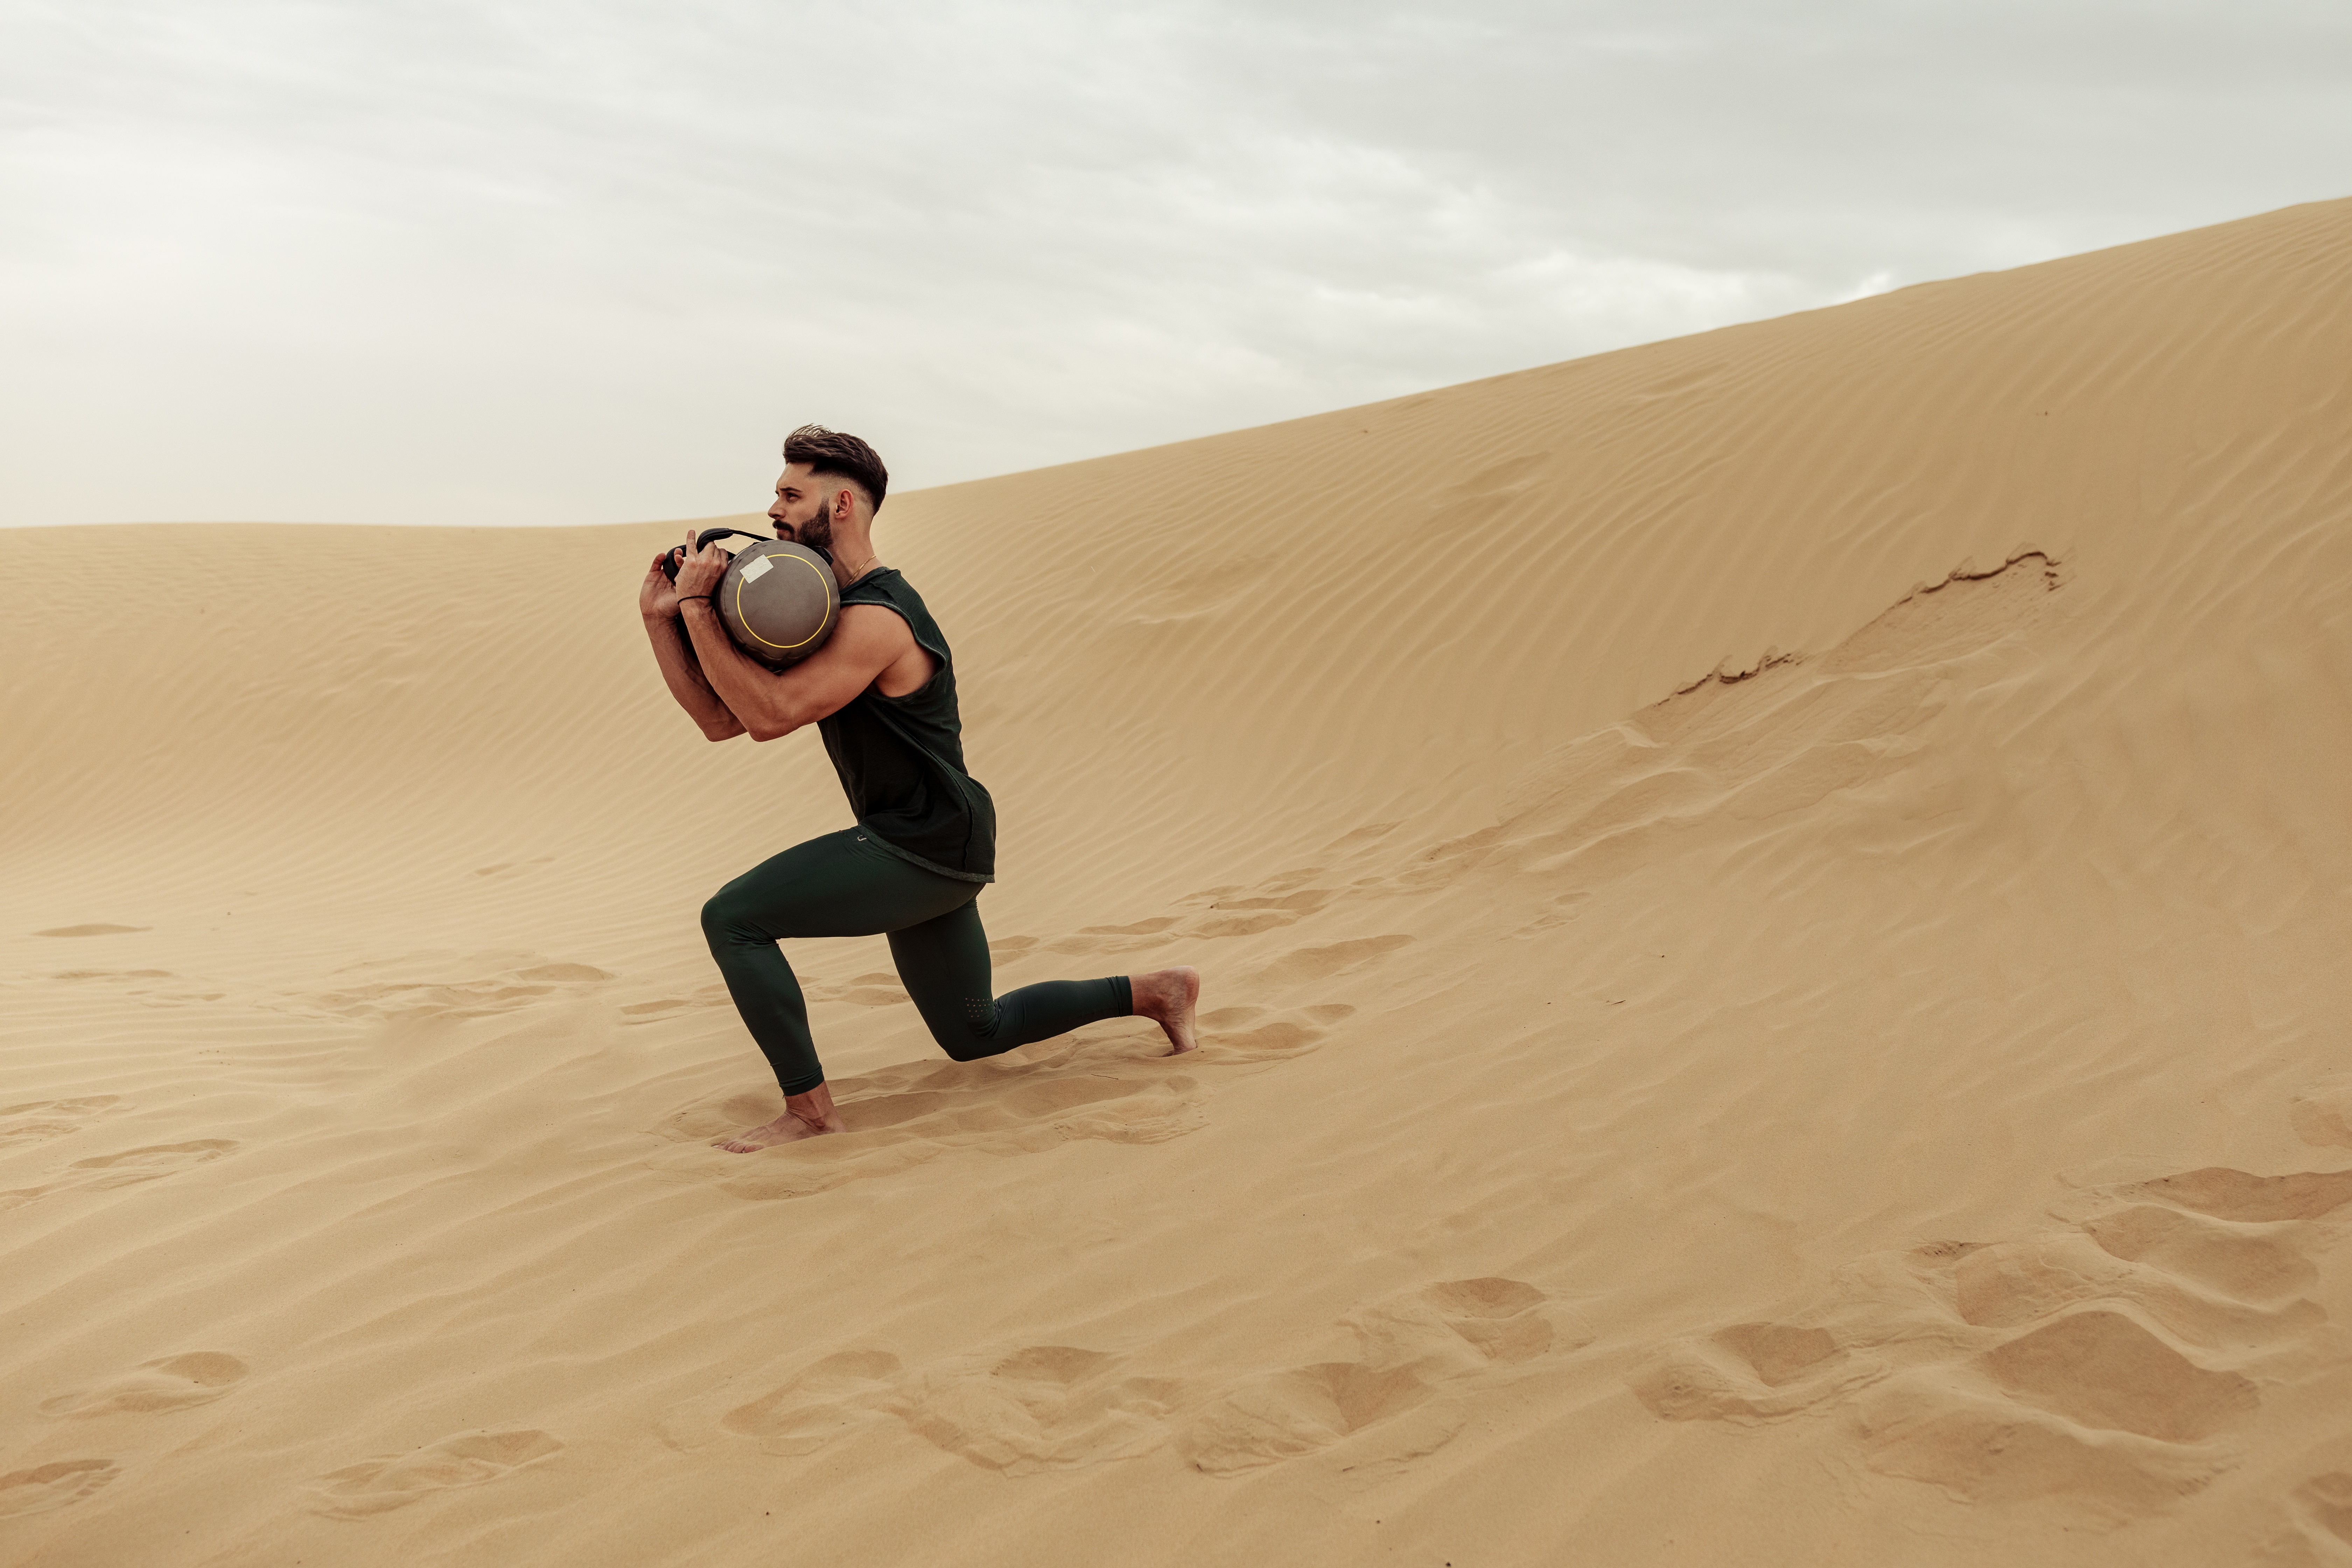
Weight loss is directly proportional to the heart rate and which is further directly proportional to metabolic rate. Sandbag training is something that can be carried almost anywhere and all it takes is just one piece of equipment. Performing simple sets of lunges with the sandbags can increase your heart rate quickly which will make your body require more energy and therefore, the metabolism of your body will improve. This will eventually help you lose a lot of that extra fat on your body.

  • Improved Grip Strength

One thing that should be noted when it comes to sandbag training is that no two motions can be done with the same grip. Since the weight distribution in the bag is not uniform, the possibility of having a uniform workout goes right of the window. The grip strength, therefore, improves substantially and will help you with other external weight-based workouts.

  • Inexpensive Way to Lose Fat

Well, this is a no brainer. We are talking about a one-time investment that will range between $80 and $100. You can buy a sandbag at almost any fitness store or buy them online. Sandbags can help you not just with weight loss, but also with strength training, weight training or even endurance training. The possibilities are infinite and we highly recommend you to give this workout style a chance.

Exercises That You Should Cover in Sandbag Training

  • Bear Hug Squat

This exercise can really pump up your workout and provide a significant boost to your core strength. All you have to do here is grab the sandbag and put it close to your chest in a way that looks like you are hugging the sandbag. Have an open stance and straight back as you sit back and down into a squat position. It’s important to keep your spine or back muscles uniform and actively engage the core throughout the exercise movement.

Muscles Involved: Gluteus, Quadriceps, and Hamstrings.

  • Push-up

Push-ups are great if you are looking to make your arms, shoulders, chest in the right shape. When coupled with sandbag, you will have a great foundation to execute the exercise. So, how to get the sandbag push-ups done the right way? First, set up for a strong push-up position. This can be done by putting your hands on a sandbag placed right underneath your shoulders as you lay down with your chest facing the ground. Now make sure you keep your feet together and maintain a straight posture from head-to-toe. Finally, with a controlled tempo, lower down and push up without letting your elbows flare out wide.

Muscles involved: Pectorals, Deltoids, Triceps, and Abdominal.

  • Rotational Lunge

Lunges are one of the best exercises that can help you build a strong lower body. These can boost the muscle strength in your legs which can go a long way in creating a body suitable for superior and demanding workouts you’d like to do in the future. But, it’s important to do the lunges the right way, especially if you are doing them holding a sandbag. Stand tall holding the sandbag in front of your thighs. Now, take your right leg back as you lower your body. Simultaneously, swing the sandbag around the left leg. Now come back to the original position and follow the same instructions with the other leg.

Muscles involved: Abs, Glutes, Hamstrings, and Obliques.

  • Bent-Over Row

This exercise might seem easy and simple to do but requires you to maintain a uniform body posture – something where most people go wrong. So, to get started with this exercise, you will need to set up the sandbag on the ground just in front of your toes. Now, slightly bend your knees as you try to reach for the sandbag with your arms. Bend down and pick up the sandbag while making sure you don’t lose your body posture. Now bring the sandbag down and pull it again – a motion that resembles rowing a boat.

Muscles involved: Latissimus Dorsi (Back), Rhomboids, Scapular Stabilizers, Biceps, Spinal Erectors, Hamstrings, and Glutes.

  • Shouldering

In this exercise, you are going to focus on your hips and leg muscles which will be the main driver to overcome the challenge of moving the sandbag. Begin with an open stance, keeping the sandbag on the ground, under your body and in between your legs. Now keeping the upper body straight, bend down and pick up the sandbag. Now, as you pull yourselves up, you have got to lift the sandbag quickly, swing it over your shoulders and drop it on the ground. Do this again with the other shoulder.

Muscles involved: Lower back, hips, hamstrings, forearms, biceps, upper back, pectorals, calves, and quads.

Circuit Training With Sanbags

We have come up with two 15-minute circuits that you can consider to begin your sandbag training in order to lose weight. Let’s discuss them in detail.

But, before heading onto the workout, it’s important to know the weight recommendations for your sandbag.

If you are a beginner, start with a 10-15 lbs sandbag. If this is not your first time working out, especially with weight training, then you can go ahead and use a sandbag with 30-40 lbs of sand. Finally, if the gym is your second home and you have been working out for quite a long time, you can go up to 60 lbs.

Also, before you get started with the workout, make sure you warm your body up for at least 5 to 10 minutes. This will help you increase body temperature, improve the range of motion of your muscles, and make your workout enjoyable.

Let’s understand the 15-minute workout circuits.

Circuit training is awesome because when done correctly it can increase your heart, build muscle endurance and tone your muscles all at the same time. To get the best result, you should move from exercise to the next without resting. You rest at the end of each circuit. If you are to check the intensity of your workout by using a fitness tracker or you see what I mean. Your heart rate will increase with circuit training which will be a good indication of how intense you are working out.

  • Circuit A

In this, you will be required to move from one exercise to another with a rest period of 2 minutes after each circuit.  The circuit needs to be performed 4 times. Each exercise should be done with the following number of repetitions:

  • Bear Hug Squat – 10 Reps
  • Push –up – 15 Reps
  • Rotational Lunge – 10 Reps for each side
  • Bent-over row – 15 Reps
  • Circuit B

This is particularly for performing the sandbag shouldering exercise. This should be performed for 8 times with 20 seconds reps and 10 seconds of rest between each rep.

How to Increase the Difficulty in Sandbag Training?

The difficulty of your workout can only be increased if you tweak different variables of your workout. These variables can be the weight of the sandbag in use, the frequency of the exercises, and the duration of each exercise that you perform.

You can effectively improve your metabolism and rate at which you lose fat by making your workout more challenging. It’s true that when you follow a routine for quite some time, the muscles tend to get used to the motion and challenges. And eventually, they stop growing anymore. The muscle memory, as experts claim, is very sharp and can get used to your workout routine faster than one can imagine.

This makes it important for you to increase the difficulty of your sandbag training and always challenge your body to overcome the obstacles you create by changing the weight, frequency, and duration of each of the workouts you perform.

But, while implementing this technique to your workout, it is very important to practice moderation. Proper proportioning should be maintained to let your body build and get used to the high difficulty. This is necessary so that you do not suffer from any injuries during workout.

Wrapping Up

There you have it. We have covered almost everything you need to get started with sandbag training that could help with weight loss. We highly recommend you to keep things simple in the beginning and let your body get used to the training. Introduce changes to your workout routine with time and you will start to see the desired results on your body.

We hope this piece of content brought great value to you. Since you are here, don’t forget to subscribe to our weekly newsletter as we bring all the latest news and updates from the world of health and fitness.

15 Minutes Sandbag Workout Routine For Beginners


Complete Sandbag Training Guide for Fitness Beginners

Looking for an unconventional way to build a better body?

Sandbag training can be just the right thing you need to shake or jolt your body out of boredom or monotony.

As we speak, sandbag training is getting great popularity as more and more people realize the benefits it has to offer to fitness enthusiasts at all levels. Even if you are just embarking on your fitness or wellness journey you will benefit from training with sandbags.

For optimal health and to decrease the risk of diabetes, high blood pressure, and some cancers the Center for Disease Control  recommends that you perform resistance or weight training exercises at least 2 days per week. You should workout each major muscle group at least twice per week.

You can  do upper body one day, lower body on another or  your entire body 2 times per week. Keep in mind that whichever routine you decide, you should not work the same muscle group on 2 consecutive days.  Your muscles should have a minimum of one whole day for rest and recovery.

Furthermore, so you don’t sustain any injury you should slowly increase the weight, duration, and frequency of your workout. Always start at the lowest weight. This should be a weight that you can lift about 15times without feeling like you are about to die.

You might not be sure where to start. Therefore, we decided to design a guide for you to help you get acquainted with resistance training using sandbags.

In this post, we are going to discuss the benefits of sandbag training, and also many other factors that to be considered when using sandbag as extensive workout equipment. But first you have to select the right bag for you.  We are here to help with the selection process.

So, without any further ado, let’s get started!

Top Benefits of Sandbag Training

  • Builds Stability

Working with a sandbag requires you to counter the changing center of mass at all times. This works really well if you are looking to build stability and strength. Not just that, it also helps you improve performance if you are into playing active sports.

Note: Training with unstable objects result in a unique set of skills that can help you manage your weight and posture brilliantly.

  • Provides Flexibility

One of the most important benefits of using sandbag as training equipment is that it can be taken anywhere and used in any situation. You can use it indoors, outdoors, in the gym or set it up in the garage! You can empty your sandbag when on a move and fill it up with sand wherever you want to use it. This will make portability convenient.

Note: We highly recommend you to get two or more sandbags with different weights and height to make the training more challenging.

  • Affordable

Using sandbag for training is very affordable. Doesn’t matter if you are going for a commercial model or homemade sandbag, the training itself requires minimum expenditure while providing maximum versatility. You really don’t need any extra machine or equipment. Just get a sandbag and a good pair of sports shoes and you’re set!

  • Full body muscle activation

One thing that you can be sure of when training with a sandbag is that the majority of the exercises you will do with it will activate nearly all the muscles in your body. The more muscles you activate, the higher will be the calories burned and higher will be your metabolic rate! This can help you quickly lose any excess fat.

  • Improves Your Core

A couple of weeks into sandbag training, you will start to feel excellent core strength benefits as well. When you train with a sandbag, your core muscles will contract and expand at a higher rate to help you maintain the body balance.

Note: Core activation can also be done by using barbell and dumbbell but sandbag training assures a higher overall activate rate.

  • Provides great cardiovascular workout

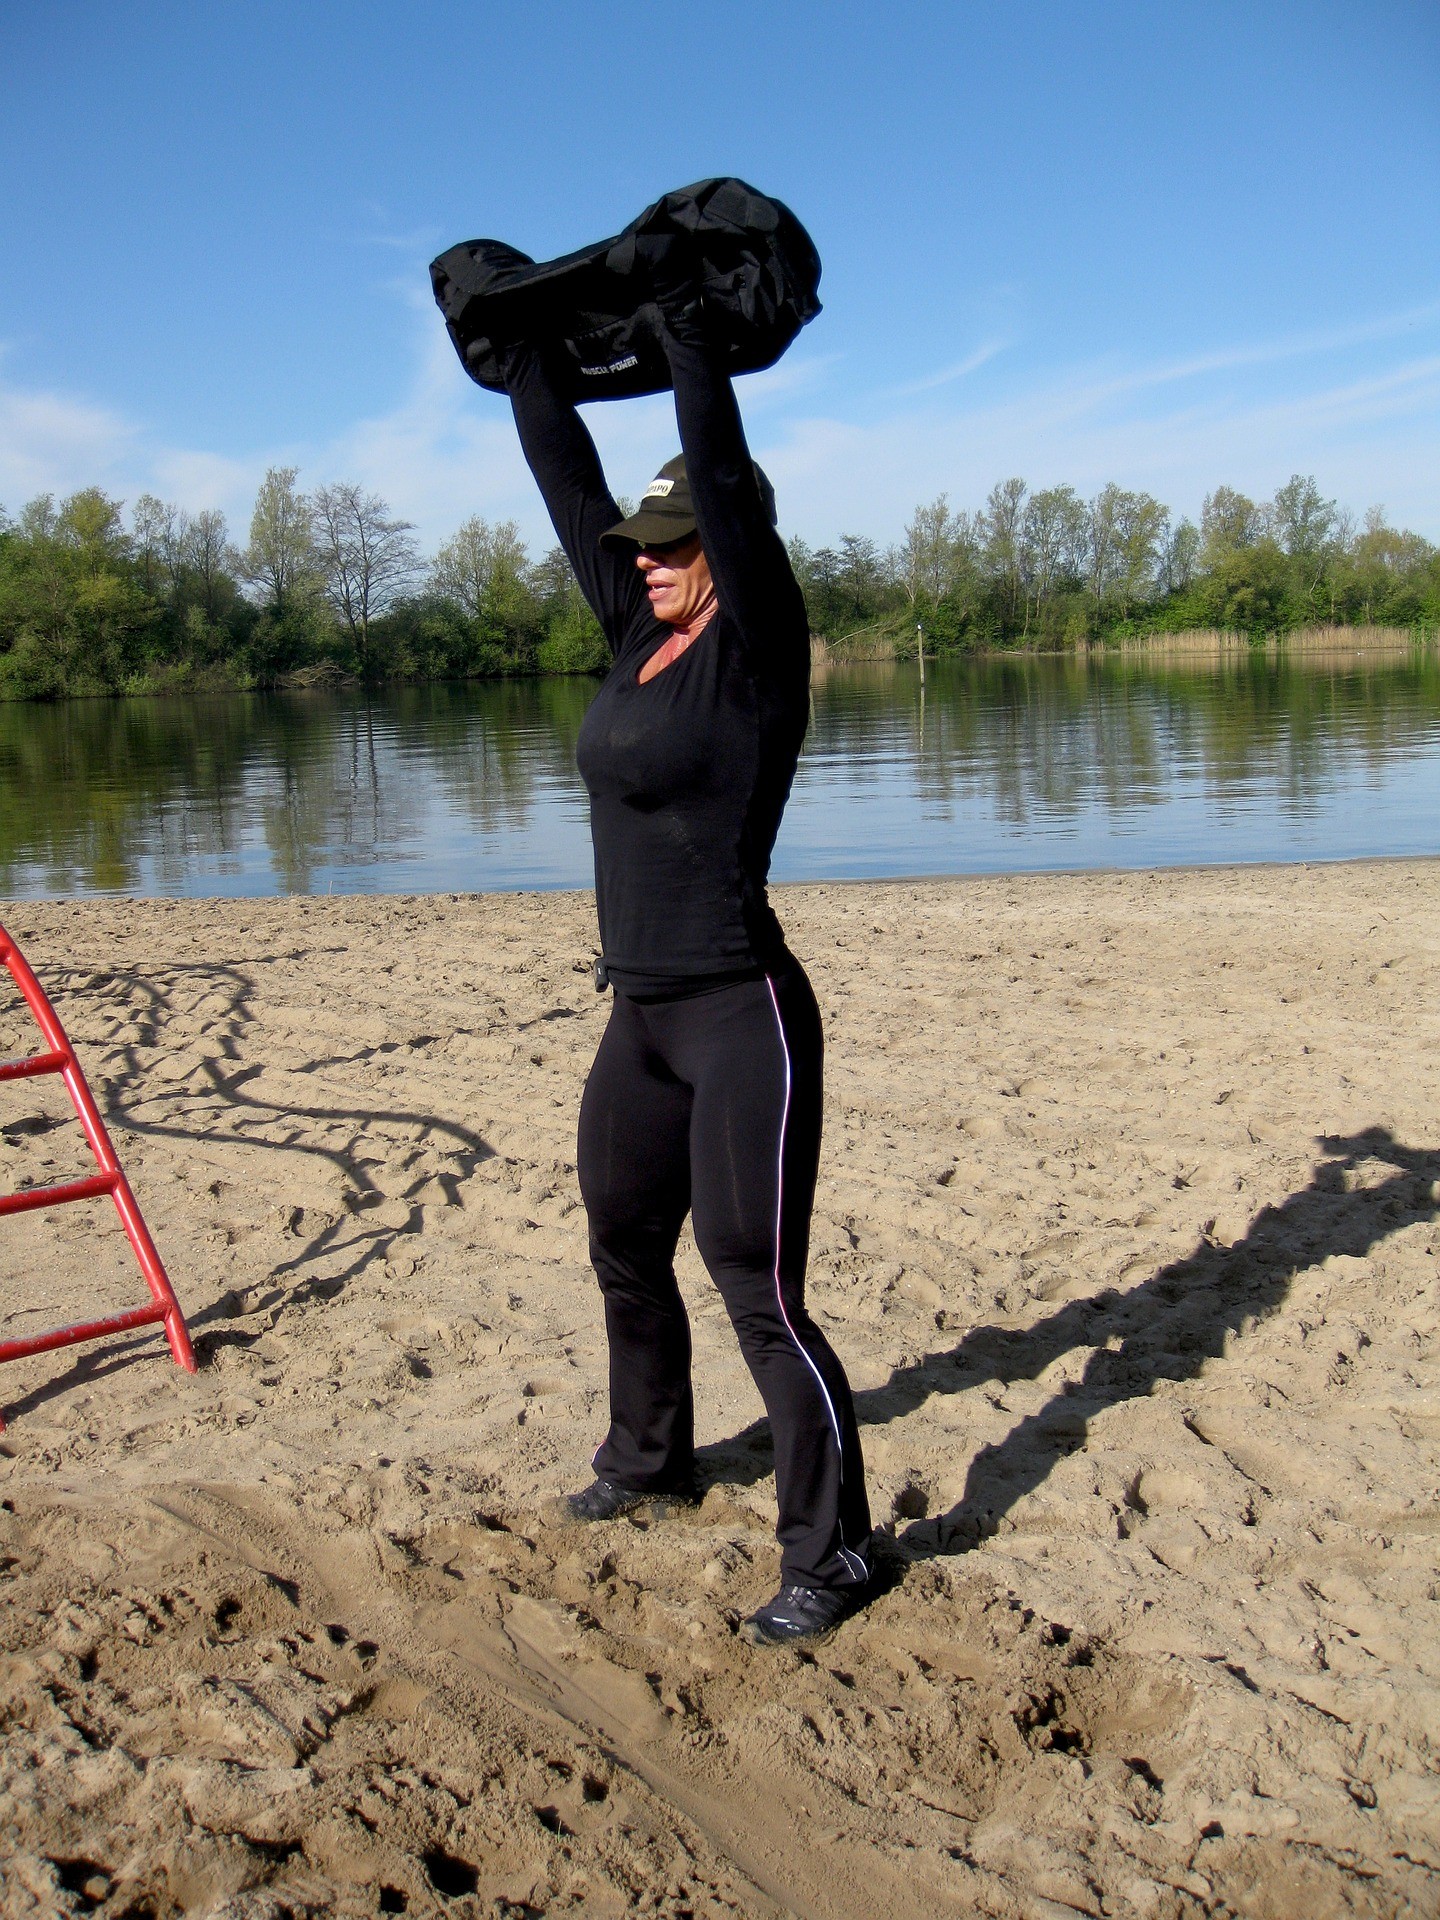
Sandbag training has been popular among fitness coaches when it comes to a cardiovascular workout. For instance, lifting the sandbag over your head with arms completely extended, you will see how fast your heart can go as you begin to perform a set of walking lunges. This can even result in an effective HIIT workout as well!

Note: Sandbags can be used to replace conventional cardio training.

  • Great for Conditioning and Strength Building

If you are looking for a workout that can help you build strength in a minimum amount of time, sand training is the way to go. Sandbag training makes this possible by working many muscle fibers at one time, helping you lift heavy things with ease. If you keep lifting heavier weights and track the fitness progress, your overall strength will improve. The instability factor of sandbag also has a lot to do with it.

  • Perfect for Improved Sports Performance

If you enter a gym, you will hardly find any equipment that provides the kind of challenge a sandbag pushes you to overcome. Well-designed and suited for unconventional workout routines, sandbag training can go a long way in improving an athlete’s sports performance. Sandbag training develops a strong back, legs, and shoulders.

Note: Sandbag training is great for the athlete’s performance with regards to throws, drags, sprints, and load carries.

Sand Refills vs Water Refills

This has been an age-old question which needs to be answered.

When it comes to filling the sandbag with a material, you will first have to make sure the material is available to you at all times. When you consider that, water comes up as a great resource for sandbag filler. There are bags that hold a little bit over 2 lb of water. Filling your sandbag is an economical affair but if you are looking to add a lot of weight to your sandbag, this might not be the right alternative for you.

If you are looking to fill your sandbag with sand, you will have to make sure it is available nearby. Dry sand is loose and the grains tend to move independently. That is very important to make your training effective. Wet sand will clump together and will not move or shift as you move the sandbag. You can add more weight to your sandbag if you go for a sand refill.

Top Compound Exercises with Sandbag

There are many sandbag exercises  that target multiple muscle groups and activate them while during your training session.

Working more than one muscle group at time is a fast and proven effective way to workout. In the fitness community, these are called compound exercise.

Here, we are going to discuss the compound exercises that can be done using a sandbag.

Note: Perform these exercises by adjusting the weight of your sandbag in a way that makes the exercises feel more challenging. Perform at least 15 to 25 reps on each exercise before switching onto the next one.

  • Forward Lunge combined with Wood Chop

Start with an open stance and hold the sandbag at chest level with the elbows bent. Now step the right foot forward as you lower your body into a lunge. Now use your arms to swing the sandbag from the outside of your right leg and bring the sandbag back to chest level as you return from the lunge to your standing position. Now do this with the left leg.

  • Reverse Lunge with Sandbag on the Back

Again, start with an open stance holding the sandbag behind your neck. Now move the right foot backward and go down for a lunge. Come back to the standing position and take a bow. Now repeat this on the left foot.

  • Side Lunge Combined with Front Raise

Hold the sandbag in front of your thighs and take a big step to the left and make a side lunge. Now come back to the original position and pull the sandbag overhead. Follow the same with the other leg.

  • Single-Leg Deadlift and Rowing

Stand tall with an open stance holding the bag by the side handles. Now send your right leg straight back as you bend your left knee a little. Your upper body will face the ground and be parallel to it. Now pull the sandbag up and release it a couple of times as if you are rowing a boat. Come back to the original position and follow the exercise with the other leg.

15-Minute Workout with Sandbag

If you

Weightlifting for many people is like a religion, isn’t it so?

But, is that the only way to build functional muscles and strength?

Sandbag training is a superior alternative to weightlifting as it involves multiple muscles and forces them to work together and maintain body balance.

If performed correctly, sandbag training can help you reap the above-mentioned benefits in just a 15-minute workout!

Note: The following exercises need to be performed in a circuit. To get most out of the exercises, you will need to do as many reps you can in 30 seconds before switching the exercise. You need to rest for 30 seconds between moves and have to complete the circuit at least 3 times a day.

So, let’s get into the 15-minute workout that you need to perform right from day one. If you only have 15mins to spare, this routine is where you should start. Repeat as much as time allows.

  • Side Lunge and Snatch

You will have to hold a sandbag in front of your thighs. Now lunge to the right, making sure you touch the sandbag to the floor. Now quickly stand up and flip the bag onto your forearms and press it overhead.

Quickly get back to the standing position and lunge to you right. Continue this exercise by alternating sides and always keep your weight on your heel.

This exercise effectively activates the hamstring and glute muscles and will strengthen your back muscles as well.

  • Pushup with Sandbag Drag

You need to place the sandbag on the floor and get to the pushup position making sure the bag is on your right.

Now grab the sandbag with your left hand and try dragging it from below your chest to the left side. Do a pushup.

Now reach to the sandbag with your right hand and do another pushup. Make sure you don’t rotate your body and keep still while pulling the sandbag.

  • Rotational Reverse Lunge and Balance

Just like exercise #1, hold the sandbag in front of your thighs. Step back with the left foot and swing the bag from the outside of the right thigh.

Now stand up and raise your left knee as you flip the sandbag over the forearms to catch it at chest level.

Pause for a couple of seconds and then return to the starting position. Now repeat the exercise by switching the leg.

To make this exercise more challenging, you can get to the next lunge without taking a pause.

  • Single-Leg Row

Hold the sandbag at arm’s length and raise the left leg behind you simultaneously as you lower your torso, making sure it is parallel to the floor.

Pull the bag to your chest and slowly lower it. Now hold for 15 seconds and switch legs.

You can follow this 15-minute workout routine and double, triple or quadruple the time for a more intense workout.

Over to You

There you have it. We hope this piece of content brought great value to you and your fitness endeavors.

Since you are here, don’t forget to subscribe to our weekly newsletter as we bring all the latest news and updates from the world of health and fitness.

Stay Fit!


Social Media Copy –

Looking for a complete guide on sandbag training? We have just the right piece of content for you. Get the best insights on sandbag training and know how to get started. Read now!


Type 2 Diabetes Exercise Guidelines

A diabetic young woman exercising

Exercise to Defeat Type 2 Diabetes

One of the best ways to control blood sugar, fight cardiovascular disease and improve general health is regular exercise. But that’s easier said than done in today’s world. Many jobs can now be done from an ergonomic chair, in front of a computer, so exercise can be hard to come by. Furthermore, people are busy working and caring for their families and cannot find the time to exercise. Life just get in the way of exercising.

How Much Exercise Do You Need?

Type 2 Diabetes exercise guidelines is similar to the one recommended to improve your overall health. If you have high blood pressure, high cholesterol or just want to improve your overall health, this means you do not have to do anything different. Experts say that 30 minutes of daily exercise is enough but only about 30% of the population in the United States is getting that minimum. In fact, 25% of the people are not exercising at all. This is an important reason why obesity has become an epidemic in this country. In turn, obesity is a major contributor to the increase in type 2 diabetes. That’s because inactivity increases insulin resistance which, in turn, causes diabetes. However, it’s never too late to start controlling your diabetes and exercise is the perfect place to start. By improving your sensitivity to insulin, you will also lower your risk for heart disease and, as a bonus, lose weight.

What is Type 2 Diabetes?

There is no question that diabetes is on the rise in the United States. In the last 20 years, the number of newly-diagnosed people with diabetes increased by 48%. Most of these cases were Type 2 Diabetes (Adult-Onset). This is the type that generally appears in middle age. The symptoms include increased appetite, thirst and need to urinate. They also include feeling nauseous, edgy and tired, and blurred vision. In addition, there is sometimes a loss of feeling in the feet and hands. Sometimes there is no symptoms until its severe. Many people show up to the Emergency Room after experiencing some of the above symptoms and their blood sugar is already 700mg/dl. This high usually doesn’t happen over night. It similar to gaining weight. It is a gradual process that occurs over years. The cumulative effect of insulin resistance builds up over time. Just like fat, when your body does not use it, it stores.

Not all the causes of Type 2 Diabetes are completely understood yet, but it has been proven that obesity is a major contributing factor. A second related factor is the trend toward sedentary work and an inactive lifestyle away from work. There is no question that this trend is causing diabetes for many people. So it’s time for everyone to start exercising. Exercising allows your muscle to use sugar for energy. Therefore, you wont have excess sugar to store and circulate around your body damaging your blood vessels.

How to Get Started

Whether you are already a diabetic or have just been inactive for a period of time, it is always best to check with your healthcare provider to make sure exercise will be good for you. If you have risks for heart disease, your doctor may want to do a stress test to see what level of exercise will be safe for you. If you have complications from diabetes, you may be restricted from certain exercises. For example, if you have diabetic retinopathy, weightlifting, high-impact aerobics and jogging may not be appropriate for you. This is because there is a risk for more damage to blood vessels and detachment of your retina, which is a very serious complication.

Even if you are currently actively participating in sports or working out regularly, you can still benefit from discussing your proposed routine with your doctor. For example, if you are injecting insulin, you will need to take precautions to keep from having sharp drops in blood sugar when you are working out. Be Sure to start slowly.

If you have Type 2 Diabetes, you will benefit from something as simple as a nice walk around the neighborhood after dinner. If you have not been active, be sure to start slowly and work your way up to more intense activity. Other great ways to exercise are walking the dog, raking leaves, using the stairs instead of the elevator and parking away from the market and walking back. It doesn’t take much to add up to enough exercise. With only 15 or 30 minutes of aerobic exercise daily, blood glucose control will be improved and risk of complications will be lowered. The best all-around exercise is walking and it can be done cheaply. Just be sure you have well-fitting, supportive shoes.

You don’t need expensive health club memberships or up-to-date exercise machines to start lowering your blood sugar. As long as you are determined to exercise, you will soon be controlling your blood sugar.

In summary, one of the best ways to manage Type 2 Diabetes is to exercise regularly. All you need is 30mins a day for 5 days per week of aerobic activity. Only 2 days per of strength training is necessary. You should train all your major muscle groups at least once per week. Never train the same muscle group 2 days in a row. As a bonus, one of the biggest benefits is that you will have more energy and start looking forward to exercising.

Beyond Wristbands and Smartwatches: Six Wearable Tech Devices to Help You Get Fit

Fitness-tracking wristbands and smartwatches have helped countless people improve their fitness with convenient electronic step counters and heart rate monitors. However, since these devices made their debut, wearable technology has improved dramatically, and there are devices that can do far more than count steps. If you are ready to move beyond a simple wristband, here are six wearable tech devices that can help you reach your fitness goals.

1. Hexoskin

Hexoskin is a tank-style shirt filled with sensors that track a wide range of data, including, running or exercise cadence, speed, calories burned, steps and even your sleep positions. It even measures biometric data such as heart rate and respiration, and its GPS capability lets personal trainers track their clients and create geographic waypoints. Thin and form-fitting, Hexoskin syncs with computers and mobile devices for convenient, comfortable, and sophisticated fitness tracking with no annoying straps or bands.

2. Jabra Earbuds

Jabra’s Elite Sport earbuds are comfortable and secure wireless earbuds that stay in place no matter how much you sweat. They also contain sensors that monitor your heart rate, number of reps you perform, and your oxygen utilization. The Jabra fitness app uses this data to calculate your fitness level and ideal pace and lets you know how long to rest between workouts or running sessions. These earbuds provide state-of-the-art sound clarity for music and phone calls as well as countdown and running time notifications from the app.

3. MoovNow Motion Tracker

MoovNow is a soft, flexible ankle band that goes beyond measuring your heart rate and speed – it analyzes the motions involved in running, swimming, cycling and high-intensity activities such as boxing and CrossFit and tells you how to move safely and more efficiently. The MoovNow app measures the impact of your movements and guides you through activities, helping you improve your times and warning you when you’re at risk of injury. As you improve, it adjusts the workouts to keep them challenging and keeps a record of your progress.

4. LumoRun

LumoRun by Lumo BodyTech is a tiny, lightweight sensor that you can clip to any piece of clothing, including a shoe. After you enter your height, weight, and body type, it measures stride, cadence, and a host of other running biomechanics such as pelvic angle, head carriage, and posture. This running aid provides audible feedback via headphones to coach you as you run and teaches you how to move more efficiently and correctly to avoid injuries. Whether you are a sprinter, training for a 5K or just a beginner trying to get some cardio in, LumoRun helps you get more out of each run and even suggests exercises based on your running style to help you develop better form and achieve faster times.

5. Gear IconX Earbuds

Gear IconX earbuds by Samsung have 4GB of memory to store music so they can work without a phone. They also have a tracking mode that measures your activity, distance, speed, and even calories burned. The companion app provides a coaching mode that leads you through your workouts and tracks your progress. Later generations of IconX earbuds dropped the heart rate monitor to add sound enhancements such as Bass Boost to synch your running pace and listening modes that adapt to indoor and outdoor environments, making them a budget-friendly way to get into wireless fitness tracking.

6. Beast Sensor

Beast is a magnetic sensor that can attach to your wrist, a body strap or to gym equipment to measure and track lifts and bodyweight exercises. It analyzes the dynamics and strength of each movement and provides a visual illustration of how your muscles work during lifts. Beast can also determine where your weaknesses are and provide suggestions on improving your technique based on your goals, for example, how to do deeper squats or how to structure workouts to bench press a target weight. The web portal lets users analyze what they do in the gym and suggests lifting routines that help athletes see results faster without over-training.

Fitness devices are no longer limited to step-counting wristbands. Today’s wearable technology features a wide range of sensors that can be incorporated into clothing, shoes, and even earbuds. These devices not only measure what you do, but in many cases provide real-time performance-enhancing feedback as well. Whether you are a seasoned athlete who wants to reach peak performance or a newbie who needs to improve your sedentary lifestyle, these six devices can help in your fitness journey.

Exercise In Your House: The Bed, Wall and Couch Method

Everybody wants to be a home body sometimes. You may be tired after a long week at work and don’t feel like leaving the house. Perhaps you can’t leave the house for one reason or another. Either way, this workout routine can help you get your body right without requiring you to leave your home. You can start off first thing in the morning without needing to leave your bed, then move to your wall and from there the couch. Doesn’t sound like very much work, does it? It may sound simple, but this routine will have you literally on your ass.

Bed Workouts

1. Legs Raises

To do this exercise, lie on the bed with your legs stretched straight out. To make it a bit easier, you can position yourself to where you can grab the corner of your mattress behind you with your arms. Then you want to simply raise your legs up and down. However, when you come down, do not touch the bed with your legs. If you want to make this more challenging, then have somebody push your legs down as they come up. This will make it much more difficult for you not to touch the bed. You can do this exercise with repetitions or timed, but beware that this is a difficult one.

2. Full Body Crunch

First you want to lie flat on your back on the bed and extend your arms all the way back. Then you want to crunch up. As you do bring your legs up to a right angle and hug them with your arms. After that, extend back out, and you have one rep. I would recommend doing this exercise in either sets of 10 or for 45 seconds. Whichever you feel more comfortable with starting off. This workout will do wonders for your abs.

3. Bicycles

For this exercise start off by sitting at the edge of your bed. Place your palms on the edge of the mattress and then slowly raise up your feet. Get your legs to a 90-degree angle and then keep it there. Then simply kick your feet out as if you were riding a bicycle. I recommend starting off with 30 seconds a set and working your way up. If you want to increase the intensity of this workout, then put your palms on the back of your head and touch your left elbow with your right knee when it comes towards you; and vice versa. This exercise is great for working out your abs, legs and thighs.

4. Leg Lifts

To do this exercise, start off flat on your back with your arms at your side. If you want to make it more challenging, put your hands under your butt, so that you cannot depend on them for support. Now, lift your legs slightly off of the bed. After that, lift on leg straight up, followed by the opposite leg. Then when they are both in the up position, lower one leg down to the beginning position and then follow it with the other leg. Be sure not to touch the bed when lowering your legs. Then raise up again, one leg at a time. I recommend doing this exercise for about 30 seconds per set to start off. This is another excellent ab workout.

5. Frog Pumps

Start off on your back, with your knees facing the ceiling, just like the previous exercise. Put your feet about hip-width apart and place your extended arms to your side with your palms turned to the bed. Gently press your hips upward by squeezing your gluts. Continue to push upwards until your legs and hips are straight; and torso and legs are aligned. Now, slowly lower back down to your starting position and you have one rep. I would recommend doing these in sets of 15 to start out. This exercise is great for developing your hip, leg and thigh muscles.

Wall Workouts

1. Wall Squats

For this exercise you need to find a nice and sturdy wall and put your back up against it (who hasn’t had their back against the wall at some point). Go down to about a 90-degree angle, so that your knees are out, and your back is straight. Squeeze your inner thigh in slightly and hold this position for about 30 seconds to 1 minute. This exercise works out your gluts, hips, legs and thighs.

The second method to do a wall squat, is more of a traditional squat, which makes it a bit more difficult. Face the wall and stand about a foot away, then you need to raise your arms up. Make sure that your feet are slightly wider than hip-width and your toes are faced outward. Now, lower your hips down to where they are about parallel to the ground. Try not to allow yourself to move forward while lowering. Make sure that you maintain your back, chest and head positions; and extend your hips and knees by pushing your feet into the floor.  Keep going until you reach your starting position and then you have achieved a rep. If possible, place a ball of some sort behind you. It doesn’t need to be a workout ball; it is just to help you reference how far down you are squatting, without breaking position. Once mastered this exercise is great for your abs, butt, hips, legs, calves, shins and thighs.

2. Wall Push-Ups

There are a few different methods to do wall push-ups. Depending on your level of expertise, some may prove more difficult than others. In order to execute the first method, stand facing the wall at a distance to where you are able to fully extend your arms in front of you. Align your arms with your shoulders and keep your feet slightly apart. Also, keep your head in a straight forward position and bend your elbows to bring your chest as close to the wall as possible without touching it. Push back until you are in your starting position, and then you have done one rep. This exercise will benefit your chest and triceps.

The next form of the wall push up is a bit more difficult, but more similar to a standard push-up. Start in a kneeling position, with the wall behind your feet. Slowly place your right foot on to the wall and then your left. After that slowly extend to where you have no bending of the hips or knees. Align your head with your spine and make sure your feet are close together against the wall, but not quite touching. Now, while maintaining a straight body; do a downward phase (like a normal push-up) and then an upward phase. This may be difficult to do at first but start with lower reps and you will get the hang of it. This exercise works out your arms, chest, shoulders and core.

The final form of the wall push up that we will be discussing is the most difficult of all. For this method, you need to get into a handstand position, with the back of your feet against the wall. this alone can be difficult for most. Then you simply pump up and down, while maintaining that position. This method does require a certain amount of balance, but if mastered it will benefit your triceps, shoulders and chest.

3. Wall Plank

There are several different ways to do planks in general and a couple of those ways involve a wall. The first of these methods that we will be discussing is called the rotational wall plank. In order to do this plank, you must first stand in front of the wall with your feet about shoulder length apart. Then lean against the wall on your forearms and make sure your body is straight. Now, rotate to the to the right with your left forearm still up against the wall; remaining in perfect position the entire time. Then come back to the front and switch arms rotating to the left, with your right forearm on the wall. Be sure to keep your core strong during all of this and it will improve exponentially. This form of plank is perfect for beginners and will help you master more difficult methods in the future.

To do the second method of wall planks you will need to get on your hands and knees with the wall behind your feet. Stretch your arms out and then place them slightly in front of your shoulders. After that place your right foot on the wall, followed by your left foot. Then make sure you are completely straight and parallel to the floor. Now depending on your stamina hold that position for about 45 seconds to 1 minute. Finally, after the time is up; slowly decrease one leg onto the ground and then the other. This plank will work out your abs, back and arms; as well as improve your overall flexibility and posture.

4. Abductor Lifts

To do the abductor lift, you must stand with one of your shoulders towards the wall. Let’s start with your right. Then extend your arm out and place it against the wall. Now, lift up your right leg, putting all of the weight on your left leg. After that take the right leg and lift it across the front of your body past your left leg. Slowly bring your leg back to the beginning position and there you have a rep. After you have completed your desired reputations on that side, turn to where your left shoulder is beside the wall and repeat the steps. This exercise is primarily to improve abductor strength as well as your core.

5. Glut Bridges

For this exercise you may want to grab a mat or a soft towel because you will be on your back. Lie with your feet facing the wall and then lift them up and put them flat on the wall. Your legs should be at about a 90-degree angle. Now, push your feet against the wall, while simultaneously lifting your pelvis. Keep your head, shoulders and arms on the ground. Hold for 5 to 10 seconds and then decrease. Do this for as many reps as you feel comfortable. If you want to step this exercise up a notch, then lift one leg straight into the air while you do your reps. This exercise great for improving your gluts, abs and your hamstrings.

Couch Workouts

1. Couch Squats

This exercise is pretty self-explanatory, but very useful. To start, you will stand with your couch behind you and your legs about hip-width apart. Now, simply sit down and get back up. Make sure that you are squeezing your gluts and your core in order to get the best results. I would recommend doing this exercise for about 1 minute a set. These are almost like beginner squats, but if you want to make them a little more challenging; try sitting down and standing up on one leg at a time. This exercise benefit your abs, butt, legs, hips, calves, shins and thighs.

2. Couch Push-Ups

To do this exercise, place your arms on top of the couch and enter the couch plank position. Extend your legs out behind you or kneel if you are a beginner. Then simply do a push-up. This exercise is best done in reps. There is also another kind of push-up that you can do with the couch. For this one, place your feet on top of the couch and get into a plank position with your hands on the ground. This is version is much more difficult than the previous kind. If you still want to step it up a bit, raise one of your legs in the air while doing the reps. This exercise will benefit your arms, chest and shoulders.

3. Triceps Dips

To do this exercise sit on the couch and place your palms at the corner of the cushion, with your fingers pointing down. Start off with bent knees if you are just beginning and then advance to keeping your legs straight out. Lift your butt off of the couch and then dip your body towards the ground, but don’t quite touch it. You want your elbows to be at about a 90-degree angle. After that extend your arms back to their normal position and then you have one rep. I recommend doing this exercise in sets of about 10 to start off. This exercise is primarily beneficial to your triceps.

4. Couch Mountain Climbers

To do this exercise, start with kneeling in front of the couch. Position your knees and feet, hip-width apart. Now, place your palms on top of the couch. After that extend both of your legs out behind you into a high plank position. Finally, bring your left knee up to your chest and as you are extending it back; bring your right knee up to your chest. I recommend doing this for intervals of 30 seconds. This exercise benefits nearly your entire body, but specifically targets your butt, hips, legs and thighs.

5. Couch Lunges

For this exercise, begin by bending down in front of your couch. Stretch your arms out onto the couch and then extend your left leg back, and then bring it forward. Focus all your weight onto the balls of your feet. Make sure your feet are about hip-width apart and your body is straight the entire time. Do this for about 30 seconds on each leg; one at a time. This exercise is beneficial to your butt, quads and thighs.

These are just a few of the possibilities that you have when working out at home. Tools like dumbbells or resistant bands, can enhance these exercises, so feel free to add them. Nonetheless, enjoy your day off and a great workout.

Too Busy To Workout? How To Free Up 15mins For A Quickie

With only 24 hours in a day, it may seem impossible to balance fitness with the rest of your life responsibilities. However, there are plenty of quick exercises that you can do throughout the day to help maintain  balance.  In fact, a quickie workout can give that boost of energy, second wind or get you in a good mood resulting in a productive day. Check out some of our other articles for some of these methods.

Exercise can be done almost anywhere, and you don’t have to dedicate hours a day to the cause either. A quick 15 minutes a day can do wonders for your body. We doesn’t want that?  You may be saying to yourself, no way I don’t even have that time. Well we have provided you with some tips on how you can free up 15-minute time slot to get quickie in.

1. Learn to say “No”

Some say 24 hours is simply not enough time in the day to everything that they need to. However, we beg to differ. The problem is committing to every single task or activity that comes your way. We like to think we can do it all, but it just isn’t possible. Saying no to something of little to no value gives you power over your own life. Most people will say yes to something that they don’t even want to do, just to please the person that asked. If you start saying no to these non-urgent tasks, you will quickly see a freeing up of your time.

2. Good enough is good enough

Stop going back and forth, second guessing work that you have already done. That is a quick way to get burnt out, instead of burning calories. You don’t need to wash your car three times a week. One will do just fine.

3. Record Your Television Shows

Everybody has a set of shows that they cannot live without and if we are assuming, they are not on Netflix, the next best thing is to record them. This way you aren’t on the television networks time, but on your own time. You can free up time easily by saving your shows until the end of the day. However, if you just can’t wait. We have a few articles with home work out techniques that you can complete, while catching up on your favorite shows.

4. Be Proactive

We have all been guilty of tossing mail or paperwork into a pile and having to go through a large stack sometime in the future. Stop doing this. Not only is cluster stressful to deal with, it is also extremely distracting. Instead, try opening that mail as soon as you get it. You’ll love yourself in the future.

5. Phone Calls over Text

Texting can be awesome. It is a great way to send a quick message to somebody without making demands on their time. You can respond when you have a moment and it shouldn’t be an inconvenience, yet somehow it is. Why spend several minutes in a

50-message text conversation, when you can make a call and have the same conversation in 50 seconds? You tell me what makes more sense.

6. Stop Multitasking

A lot of us believe that we are the best multitaskers, but multitasking isn’t as efficient as it seems in theory. When doing several things at once, our attention is split, and we don’t perform at 100% on any of them. In fact, we move slower because we are trying to do the most. Make a to do list and complete the task one by one. You will start to finish your task quicker and more efficiently. Then afterwards you will have plenty of time to exercise.

7. Get Up Earlier

I know this one is going to sound absurd to a lot of people, but I can only imagine how many times they hit the snooze button in the morning. If you just cut back on two snoozes, that is an extra 20 minutes. Even if you don’t pop up and get to working out, you can get to work and try to leave 20 minutes early. This way you can exercise when you get back home.

8. Use a Timer

Another strategy you can use is keeping yourself on a tight schedule by setting a timer of some sort. This can be an egg timer or simply the clock app on your smartphone. Either way, this will help you not to get off task for long periods of time. Who hasn’t gotten lost on a shopping website that they had no intentions of getting on in the first place? The timer will serve as a wake-up call to you throughout the day.

9. Buy Some Time

They say that no amount of money can ever buy a second of time, but it depends how you look at it. You can buy more hours in the day by purchasing help. Outsourcing is the key to saving you time. These are easy tasks that anyone can do but are time consuming. If you were to get a cleaning service that would save you time from having to wash dishes or fold laundry. Take some money out of your entertainment fund and put it towards a maid service. There are plenty of inexpensive services if you look into it. This will give you plenty of extra time to focus on your physical fitness. You don’t have to have them at your home every day. Once or twice a week should do for most.

10. Know what you want

Many people are indecisive about irrelevant things, like what they are going to eat or what shirt they will buy online. This can be extremely time consuming. If you are going to order food or trying to decide on a movie. Don’t hesitate, just do it. Weigh out the pros and cons, then get it done. The time wasted on these decisions can easily be spent getting in shape. In fact, working out should boost your appetite, so just go ahead and get the bigger meal.

11. Know your peak moments

There is a certain time of the day for everyone that is ideal for certain activities. Some perform better working out first thing in the morning, while others prefer it being the last thing they do before bed. This applies to every activity you do in life. There is no wrong way. Just find out when your peak moments are for exercise and then get to work. You may find that an exercise routine that would normally take you 30 minutes in the morning, takes you 15 at night. Find your peaks and adjust your schedule accordingly.

12. Put it in the calendar

No body dares to not complete tasks on the calendar. Do you want a red star or a gold star? All jokes aside, the calendar demands attention and what better way to commit to exercising than placing it on something that you can’t ignore. Put your workouts in your calendar, like you would a doctor’s appointment. You wouldn’t miss a doctor’s appointment, would you?

13. Put things where they belong

Keys, wallet, glasses; who hasn’t misplaced one of these items before. We’ve all wasted far more time than 15 minutes in a single instance looking for one or all of these items. We buy hooks and baskets and still lazily put them in the wrong places. If you put your items in the correct places every day, then you will save tons of time for exercise.

14. Set out your stuff in advance

Mark Zuckerberg wears the same outfit days in a row, so that he does not have to waste time and brain power deciding what to wear. Set out your workout clothes the night before, as well as your work clothes. Iron them and hang them up. This way the process of getting up to exercise and then work afterwards, is much less of a tedious process. This will also save you massive amounts of time. This applies to meals as well. If you start a meal plan, you will have extra time not only to work out but to relax as well.

15. Stay off Social Media

The last tip may be the most valuable of them all. The new screen time application on the iPhone should have a lot of people ashamed, but sadly no one seems to care. You don’t need to cut off social media for good, but you need to set parameters and limitations. Most people spend more than 15 minutes a day on Instagram alone. Unless you’re using it for business purposes, it shouldn’t be in constant use. Get off social media and get on a treadmill.

These are just a few helpful tips designed to give you more free time to get in shape. I hope none of them are taken the wrong way, because we all could improve on at least a few of these. Time is what you make it and we should make it work for us. So there you have it, 15 ways to save 15 minutes for exercise.

Chair Exercise Routines For The Chair Bound

Group Of Seniors Enjoying Fitness Class In Retirement Home

Everybody loves to sit, especially after a long day at work or school. If you are like me, you feel bad sitting down without having hit the gym first. No matter how rough the day was, but what if I told you that you could do both. We are going to introduce you to some exercise techniques that you can do on a variety of chairs. Whether you are stuck in the office or you need to catch up on your favorite television program, these will be perfect for you. No gym membership, no problem. We will start with a few stretches, then move on to exercises done on a traditional chair, after that are office chair exercises and then finally exercises for people in a wheelchair. We have a little something for everybody, so let’s get you into proper shape.

Stretches

1. Chest Stretch

This is a pretty basic stretch to warm up. To do this stretch, lean back and open up your chest. Raise your arms up and out to the side, fully extended. Hold this position for about 15 seconds.

2. Twist Side Stretch

For this stretch, take your right palm and place it on your left knee. Now, push down with your right hand and look behind you to the left. Hold this position for about 10seconds and then do the same on your right side.

3. Arm Crosses

For this stretch, grab your right elbow with your left hand, and push your elbow to where your right arm is stretched across your chest. Hold this position for about 10 seconds and do some deep breathing, while you are there. Then you want to switch sides and do the same thing with your left arm.

4. Shoulder Shrugs

For this stretch, shrug your shoulders up and down. You want to be sure that your arms are extended straight down to the side of your chair as you do this. I recommend doing this stretch for about 15 seconds.

5. Downward Reach

For this stretch, make sure you’re are in a straight up position in your chair. Now, simply reach down towards the ground, with one arm after the other. Do this for about 20 seconds as quickly as you can.

Chair Exercises

1. The Running Man

We are going to use this exercise as a warm up to get things started. Sit in the chair towards the edge with your knees in a right angle. Put your elbows in a right as well. After that start with a nice jog, while still in sitting position. Then start to speed up into a sitting sprint. Do this for about 20 seconds to start off your workout. This is mainly a cardio exercise to get your heart rate going.

2. Flutter Kicks

To do this exercise continue sitting on the edge of the chair. Then place your palms on the front corner of the chair to help you balance. Then lift your legs up and lean back. Now just flutter kick in the air up and down, but not too wide. Do this for about 30 seconds and that should do the trick. If you want to make it a bit more challenging, then lift your arms straight into the air during the set. This exercise is very beneficial to your core.

3. Chair Jumping Jacks

To begin this exercise, get to the edge of the chair and then push your legs out to the side. Once you get a good rhythm then add your arms, rising them up. Then simply coordinate your jumping jacks. As well as elevating your heart rate, there is a variation that is great for your obliques. Just be sure to touch your elbows to your knees as you do each rep.The alternate technique are known as wacky jacks.

4. Triceps Dips

To do this exercise sit on the chair and place your palms at the edge of it, with your fingers pointing down. Start off with bent knees if you are just beginning and then advance to keeping your legs straight out. Lift your butt off of the chair and then dip your body towards the ground, but don’t quite touch it. You want your elbows to be at about a 90-degree angle. After that extend your arms back to their normal position and then you have one rep. I recommend doing this exercise in sets of about 10 to start off. This exercise is primarily beneficial to your triceps and boy can it be a killer.

5. Incline Push-Ups

To do this exercise, place your feet on top of the chair and get into a plank position with your hands on the ground. Now simply do push-ups. This version is much more difficult than a traditional push up, but also much more rewarding. If you still want to step it up a bit, raise one of your legs in the air while doing the reps. I would recommend starting out with sets of 10 in this exercise and then work your way up. This exercise will benefit your arms, chest and shoulders.

Office Chair Exercises

1. Chair Squats

To start this exercise, you will stand with your chair behind you and your legs about hip-width apart. Now, simply sit down and get back up. Make sure that you are squeezing your gluts and your core in order to get the best results. I would recommend doing this exercise for about 1 minute a set. These are almost like beginner squats, but if you want to make them a little more challenging; try adding weights of some sort or getting rid of the chair. This exercise benefit your abs, butt, legs, hips, calves, shins and thighs.

2. Leg & Arm Crosses

To start this exercise, begin at the edge of the chair with your knees in a right angle. Put your elbows in a right as well. Now stretch your right arm out diagonally upward and your left leg diagonally downward. Then you bring both the leg and arm back in the middle to meet your elbows and knees. Now you have achieved one set. Do about 10 of those and then switch over to the opposite sides. This exercise is really great for improving your core.

3. Lateral Raises

To start this exercise, hold your arms down at your side. Then lift them up and out to the side of your body with your forearms pointing forward and your elbow at a 90-degree angle. Make sure that you are at about shoulder level. After that lift your arms up and down at your side. This exercise is great for deltoids, which are at the top of your shoulder. I would do this exercise in 20 second intervals.

4. Bicycles

For this exercise start off sitting on the chair. Place your palms on the edge of the chair and then slowly raise up your feet. Get your legs to a 90-degree angle and then keep it there. Then simply kick your feet out as if you were riding a bicycle. I recommend starting off with 30 seconds a set and working your way up. If you want to increase the intensity, then put your palms on the back of your head and touch your left elbow with your right knee when it comes towards you; and vice versa. This exercise is great for working on your core.

5. Shoulder Press

To do this exercise, start off by having your arms out to the side at about a 90-degree angle, with your fist facing up. Now, raise your arms up over your head towards each other. After that you simply want to pump your arms up and down; each time you come down coming back to the 90-degree angle. If you are able, then you can add dumbbells or resistance bands to this exercise. I recommend starting off with reps of 10 in this work out technique.

Wheelchair Exercises

1. Touch the Sky

For this exercise, you are going to raise your arms up on both sides as if you were trying to touch the sky. You want to inhale as you are going up and exhale as you are coming down. Continue to do this for about 15 seconds.

2. Cross Punches

To begin this exercise, get your arms up, keep your elbows bent and your hands right under your chin. Then use your left hand to do a jab right in front of you at about shoulder height. After that, immediately do a right punch across to your left side. Then use your left hand to do the same thing and punch towards your right side. Continue doing this for about 30 seconds and you will be good to go. This exercise benefits your heart rate as well as your abs and obliques.

3. Wheelchair Push-Ups

To do this exercise, place your arms to the side and your hands on either your wheel or your arm rest. Double check that your wheels are locked by the way. Now, slowly push up, raising your butt off of the chair and sit there for a few seconds. Go back down to the sitting position and then do it again. I recommend doing this exercise 10 reps per set. You may need to start a little bit lower at first.

4. Arm Circles

To do this exercise, begin by reaching down with your right arm. Then just move it around in a circle, while leaning to your right side. Then stop and begin doing circles again, but this time counterclockwise. Do not overdo it, lean as far as you can. Do this for about 10 seconds on each side.

5. Forward Reach

For this exercise, stretch out your right arm as if you were reaching for something. Reach out as far as you can, then quickly switch to your left. Now, you want to go back and forth between arms as fast as you can. Do this exercise for about 20 seconds in order to really feel it.

With this variety of exercises, whether you have a home office or just don’t feel like leaving today; you can still get in a good workout. I hope we proved to you that chairs are not just for relaxing. Now cheers to a great workout!