Are Resistance Bands a Good Alternative to Weights?

Resistance bands might look too lightweight to offer lots of benefits, but don’t let the looks deceive you. Research shows you can increase strength and muscle size with resistance bands alone. In fact, resistance bands have benefits that dumbbells and barbells lack.

When you use barbells and dumbbells, part of the resistance comes from gravity. So, the force your muscles work against varies over the course of the movement. At the top of the movement, the force becomes negligible. This isn’t the case with resistance bands. Because resistance bands are made of a stretchy material, they generate tension throughout the entire movement. The further you stretch the bands, the more the force increases. So, your muscles work hard throughout the entirety of an exercise.

Are Resistance Bands as Effective for Building Muscle as Weights?

Because of the resistance elastic bands offer, you can build strength and hypertrophy, or enlarge the size, of a muscle by training with them. But, are they as effective as working with weights? Studies confirm that you can build strength and size as effectively with resistance bands as with dumbbells or barbells for most exercises. One study found muscle activation was a bit lower for certain exercises, particularly squats and stiff-legged deadlifts.

One downside of weights is it’s easy to cheat by using momentum during an exercise. For example, at the bottom of a movement, you “toss” the weight a bit to make it easier to lift back up. Using momentum makes the exercise easier and reduces the potential benefits you get. You can’t cheat with resistance bands. The elastic nature of the bands means you must maintain muscle tension throughout the movement. Since muscle tension is a factor in muscle growth, resistance bands are quite effective for building muscle size.

In addition, resistance bands are joint friendly. Because they’re not gravity dependent, movements using resistance bands subject the joints to less compression over time. Joint compression is what damages the cartilage in joints and leads to joint degeneration and arthritis. For some people, resistance bands may be a safer option.

Types of Resistance Bands

Resistance bands come in a variety of styles and resistances. To make life easier, they’re color-coded based on their tension. You can choose from bands with light, medium, heavy, or very heavy resistance. It makes sense to choose several bands of varying resistance since you’ll need heavier resistance for your upper body than your lower body. Many people start with a light, medium, and heavy band. You can also find various styles of bands, including circular bands and double bands, and purchase interchangeable handles. In the beginning, stick to single, long bands with basic handles at the end since they’re easier to manage. No need to complicate things when you first start out. Keep it simple.

How to Use Resistance Bands to Gain Muscle

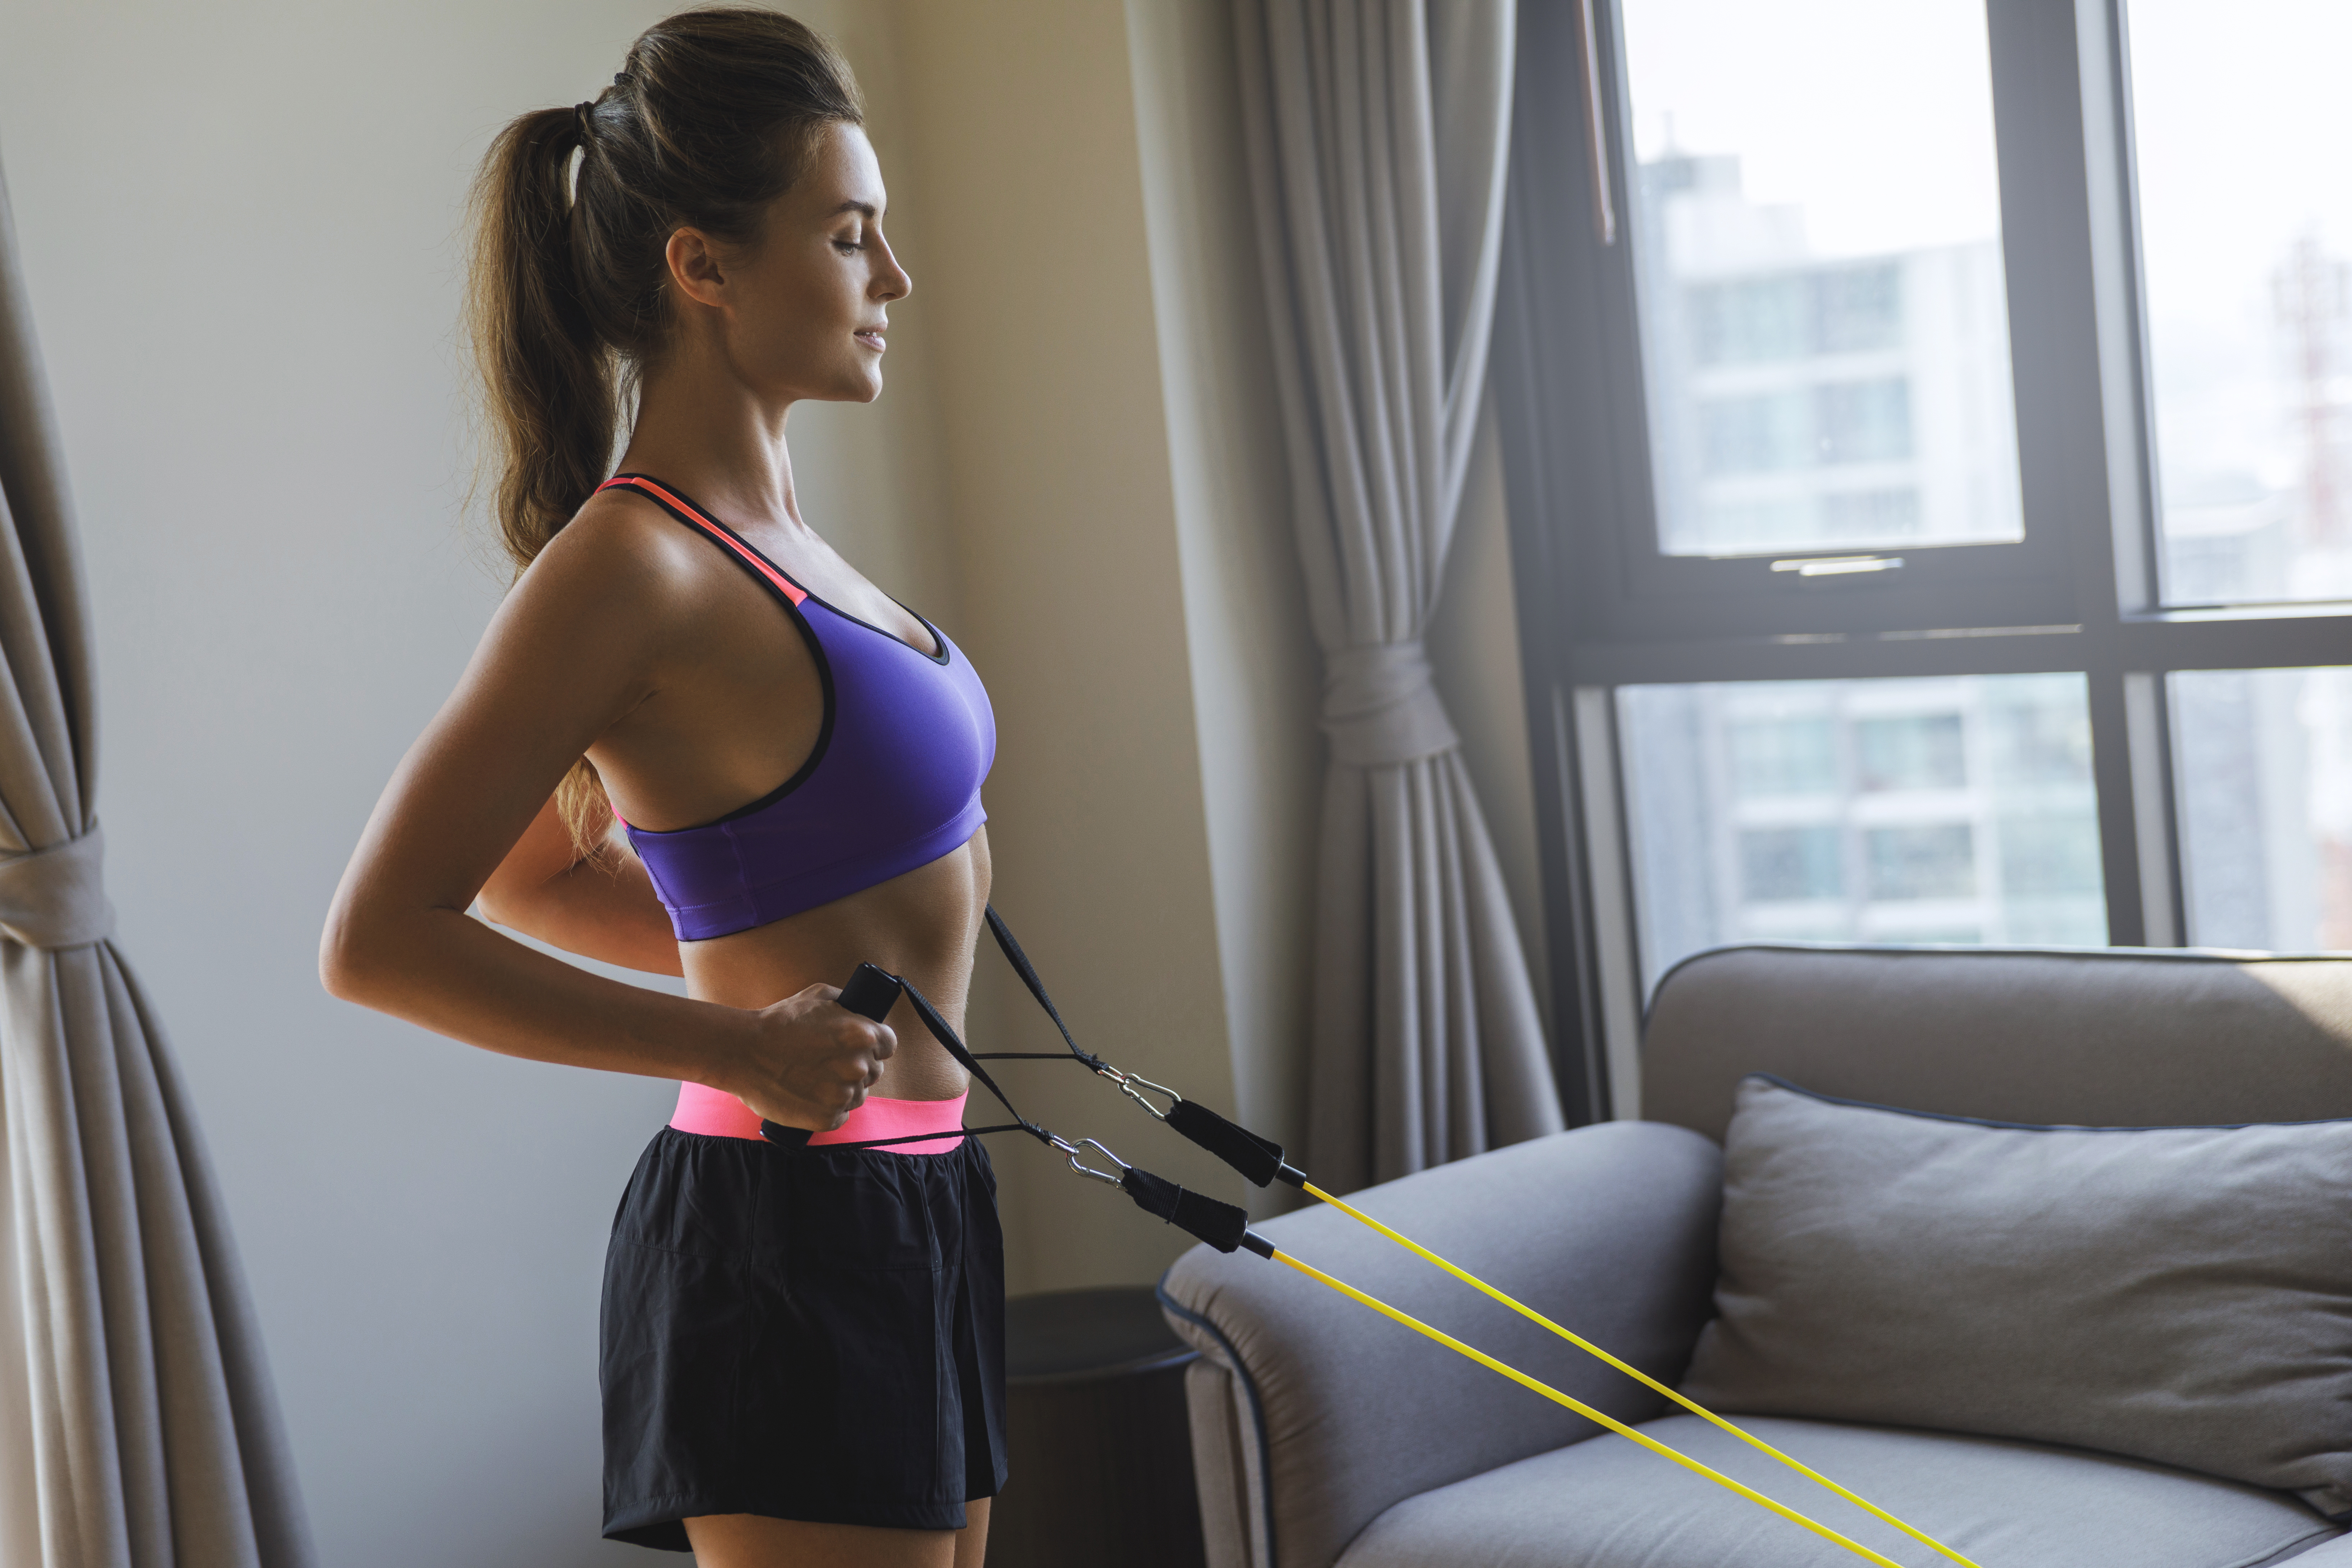
You can adapt many exercises you do with weights to resistance bands. For some exercises, like biceps curls, you stand on the bands to anchor them to the floor and provide the resistance needed to curl in the traditional manner You can do a variety of other exercises while standing on the bands, including bent-over rows, upright rows, and squats.

For other resistance training movements, you’ll need to attach the resistance bands to something. For movements like chest presses and lateral pulldowns, secure the bands to a sturdy pole or anchor overhead. Also available are accessories that help you anchor the bands securely. You’ll quickly find that most of the exercises you do with weights can be adapted to resistance bands.

How to Use Resistance Bands to Gain Flexibility

The best way to gain flexibility is to elongate your muscles after a workout by stretching. Resistance bands can help you stretch more effectively too. A good basic stretch for the upper back that feels delightful after a workout is to:

• Sit on a mat with your back straight and legs extended out in front of you.

• Place the resistance band against the bottom of your feet.

• Cross the band and grab each side close to your feet

• Slowly curl your back toward the wall as you pull back on the bands. Feel the stretch.

• Hold for 10 to 15 seconds.

Now, stretch your chest:

• Sit on a mat with your legs crossed.

• Hold the resistance band in front of your chest and grab the band with each hand so that your hands are a few inches apart.

• Slowly move your arms apart while holding each end of the band.

• Feel the resistance that the band provides and the stretch in your chest.

You can do other post-workout stretches using resistance bands. For example, place the resistance band around your foot while holding the other end in each hand. Then, pull your leg toward the ceiling to stretch your hamstrings. Switch legs and repeat.

This only touches the surface of the many stretches you can do with resistance bands.

Are Resistance Bands Safe?

Resistance bands are safe if you use them correctly. The biggest risk would be releasing a band while it’s stretched. The danger is the band will snack back and hit you or someone else and cause an injury. For safety, check your resistance bands each time before using them. Make sure they don’t look damaged or overstretched. Replace them every 4 to 6 months, especially if you use them frequently. Some people even wear eye protection when they work with them. Also, be slow and methodical with your movements. Don’t jerk the bands and avoid overstretching it. The general rule is you shouldn’t stretch a resistance band beyond 2.5 times its length.

Conclusion

Resistance bands are lightweight, portable, and easy to work with. You can do a variation of every strength-training exercise using resistance bands. They’re as effective at building muscle as dumbbells and barbells but the way you work with them is easier on the joints. With advantages like that it’s hard to imagine why you wouldn’t want to work with them!

References:

European Journal of Sport Science Volume 17, 2017 – Issue 8.


Are Deep Squats More Effective than Regular Squats?

When you squat, how deep do you go? Does it even matter? When you first start squatting, doing a full squat might seem difficult. You might not even be able to complete a full squat on your first few attempts.

The formula for doing a standard squat is to lower your body to 90 degrees, where your thighs are parallel to the floor. Anything less than this is a partial squat. Once you lower your body below parallel, it’s technically a deep squat. It’s a bit harder to squat deeply, especially if you lack good hip mobility. But are there advantages to doing so?

The squat, whether it’s a full squat or a deep squat, is a compound exercise, a movement involves the action of more than one joint and more than one muscle group simultaneously. The advantage of doing compound exercises is they burn more calories because you’re using more muscle groups at the same time. Plus, they improve functionality by training muscles and joints how to work well together. This is in contrast to isolation exercises where you only work a single muscle group at a time. A classic example is biceps curls.

Squats primarily target the quadriceps, the muscles in the front of your thighs, but this exercise also works the muscles that make up the posterior chain, including your hamstrings and glutes. No wonder the squat is often referred to as the “king of exercises,” especially for working the lower body. When you go deep into a squat, you activate the muscles in the posterior chain more than when you do a partial or parallel squat.

This means you’ll target your hamstrings and glutes more. Hitting the hamstrings is important because many people, particularly females, have stronger quads than hamstrings and need more hamstring and glute strengthening. Going deeper shifts the focus toward the hamstrings and glutes for better muscle balance. When the quads are stronger than the hamstrings, research shows the risk of knee injury goes up.

Another benefit to deepening your squat is it may boost your ability to jump vertically. In one study, subjects who focused on deep squats using a barbell for resistance improved their vertical jump height by 13 percent. Those who didn’t go as deep boosted vertical jump height only 7 percent.

How to Increase Your Squat Depth

When you first try a deep squat, you may find it difficult. If so, work on improving the mobility in your hips and ankles. When you don’t have good mobility in these joints, it’s hard to do a deep squat. There are a variety of mobility drills you can do to boost hip and ankle mobility. Some simple ones you can do for your hips include hip circles and leg swings.

For your ankles, range-of-motion exercises and drawing circles with your toes with your ankles raised off the floor help boost ankle range-of-motion. These are movements you can add to the beginning or end of your routine to gradually build greater mobility in these joints.

Also, experiment with foot placement when you squat. Some people are anatomically more capable of doing a deep squat, but changing your foot placement can make it easier or harder for depending on how you’re built. Experiment with placing your feet closer together and further apart. Try turning your toes slightly outward and see if it makes it easier to go deep.

Take your time and increase your squat depth a little at a time. Keep working on improving the mobility of your ankles and hips. Also, stretch your calves regularly. Tight calves make it harder to descend into a deep squat.

Of course, always work on deep squats initially without any weight. Get the movement down before adding resistance. Many people add weights too quickly before they’ve mastered good squat form.

What about Your Knees?

There’s a common misconception that deep squats are inherently bad for your knees. The reality is deep squats aren’t harmful to healthy knees as long as they’re carried out using good form. If you use bad form, any squat places excessive forces on the knee joint.

When you descend into a deep squat, the compressive forces on your knee joint increase, but the shearing forces actually decrease as you squat below parallel. Shearing forces are “sliding” forces or the tendency of one part of the knee slides forward or backward. Compressive forces are those that push down. For example, when you squat, the femur bone in your thigh pushes down on the tibia, a bone in your lower leg.

Despite an increase in compression, studies show that healthy knees can handle this force as long as you use good form when you squat. Also, some studies show that the additional muscle activation you get with a deep squat is protective of the knee. Going deeper actually improves knee stability.

Conclusion

Learning to squat deeply helps you better target your glutes and hamstrings. Plus, going deeper will improve your functionality even more. However, don’t go deep until you’ve mastered a parallel squat and you’ve spent a few weeks working on ankle and hip mobility.

You don’t have to go deep into a squat every time you train. In fact, you should deep squat more than once a week. Do parallel squats the rest of the time. Also, don’t force yourself to deep squat until you’re ready. Good form is always more important than squat depth.

Keep in mind, this information applies to healthy knees. If you have a history of knee injury or knee arthritis, talk to a sports medicine physician before tackling deep squats. Also, regardless of knee health, don’t do a high volume of deep squats. Give your knees a chance to recover between intense squatting sessions.

References:

J Strength Cond Res. 2013 Jul; 27(7): 1765-1774.

Poloquin. “Don’t Be Afraid to Squat Low: 7 Reasons to Deep Squat”

Chiropractic Sports Medicine 6: 105-105, 1992.

Deep Squats and Knee Health: A Scientific Review. Tony Ciccone, Kyle Davis, Dr. Jimmy Bagley, & Dr. Andy Galpin. Center for Sport Performance, California State University, Fullerton

What Are the Pros and Cons of Suspension Training?


Suspension training is a training method that uses gravity suspension and an individual’s own body weight to build strength and improve balance. This mode of training was popularized by the Navy SEALs and has become well-known in the fitness community as a way to get a dynamic and challenging workout without using weights. The system consists of straps or slings that are securely attached to metal bars or another strong support. You can put your feet or hands in the attached stirrups and dangle in the air. From this position, you can do a variety of exercises that work every muscle in your body.

For those who aren’t comfortable with the idea of hanging from a bar, there is a tamer approach. You can grab on to the straps attached bar and angle your body back as you hold the straps. This can serve as a starting point for doing a variety of exercises. This approach, where your feet are firmly on the floor, is more popular with beginners for obvious reasons. By switching the angle of your body when you lead back, you can place more or less emphasis on certain muscle groups. You can also adjust the height of the handles, hand position, and the height of your feet to change how a muscle is targeted and the intensity.

The Benefits of Suspension Training

One of the biggest advantages of suspension training is the ability to work your body in multiple planes of motion. The problem with some strength-training exercises that use dumbbells and barbells is you’re working in only one or two planes. Plus, suspension training is strongly suited to working the core muscles. That’s important for reducing the risk of injury. Suspension training also offers incredible diversity. You can do hundreds of different exercises using suspension equipment, many of which target the core muscles along with muscles in the upper and lower body.

Research shows suspension training is highly effective at targeting muscles in the core, including the abdominal muscles. This includes the transversus abdominis, a deep abdominal muscle that is difficult to activate with conventional strength training exercises. The transverse abdominis helps support the lower back and pulls in the abdominal region like a girdle. Suspension movements also effectively target the muscles that support the spine. Therefore, research suggests this form of training may be beneficial for adults with lower back pain. Studies also show even older adults can safely use the straps or slings to perform a variety of exercises that improve strength and balance.

Another advantage of suspension training is it builds functional strength. Functional exercises are those that emulate the movements we do in daily life, like picking up heavy objects, stretching overhead to pick up an item off a shelf, or carrying an object down a flight of stairs. Functional training reinforces movement patterns that help us stay strong in a functional way. It’s not just for building big biceps or six-pack abs, it’s about being functionally fit.

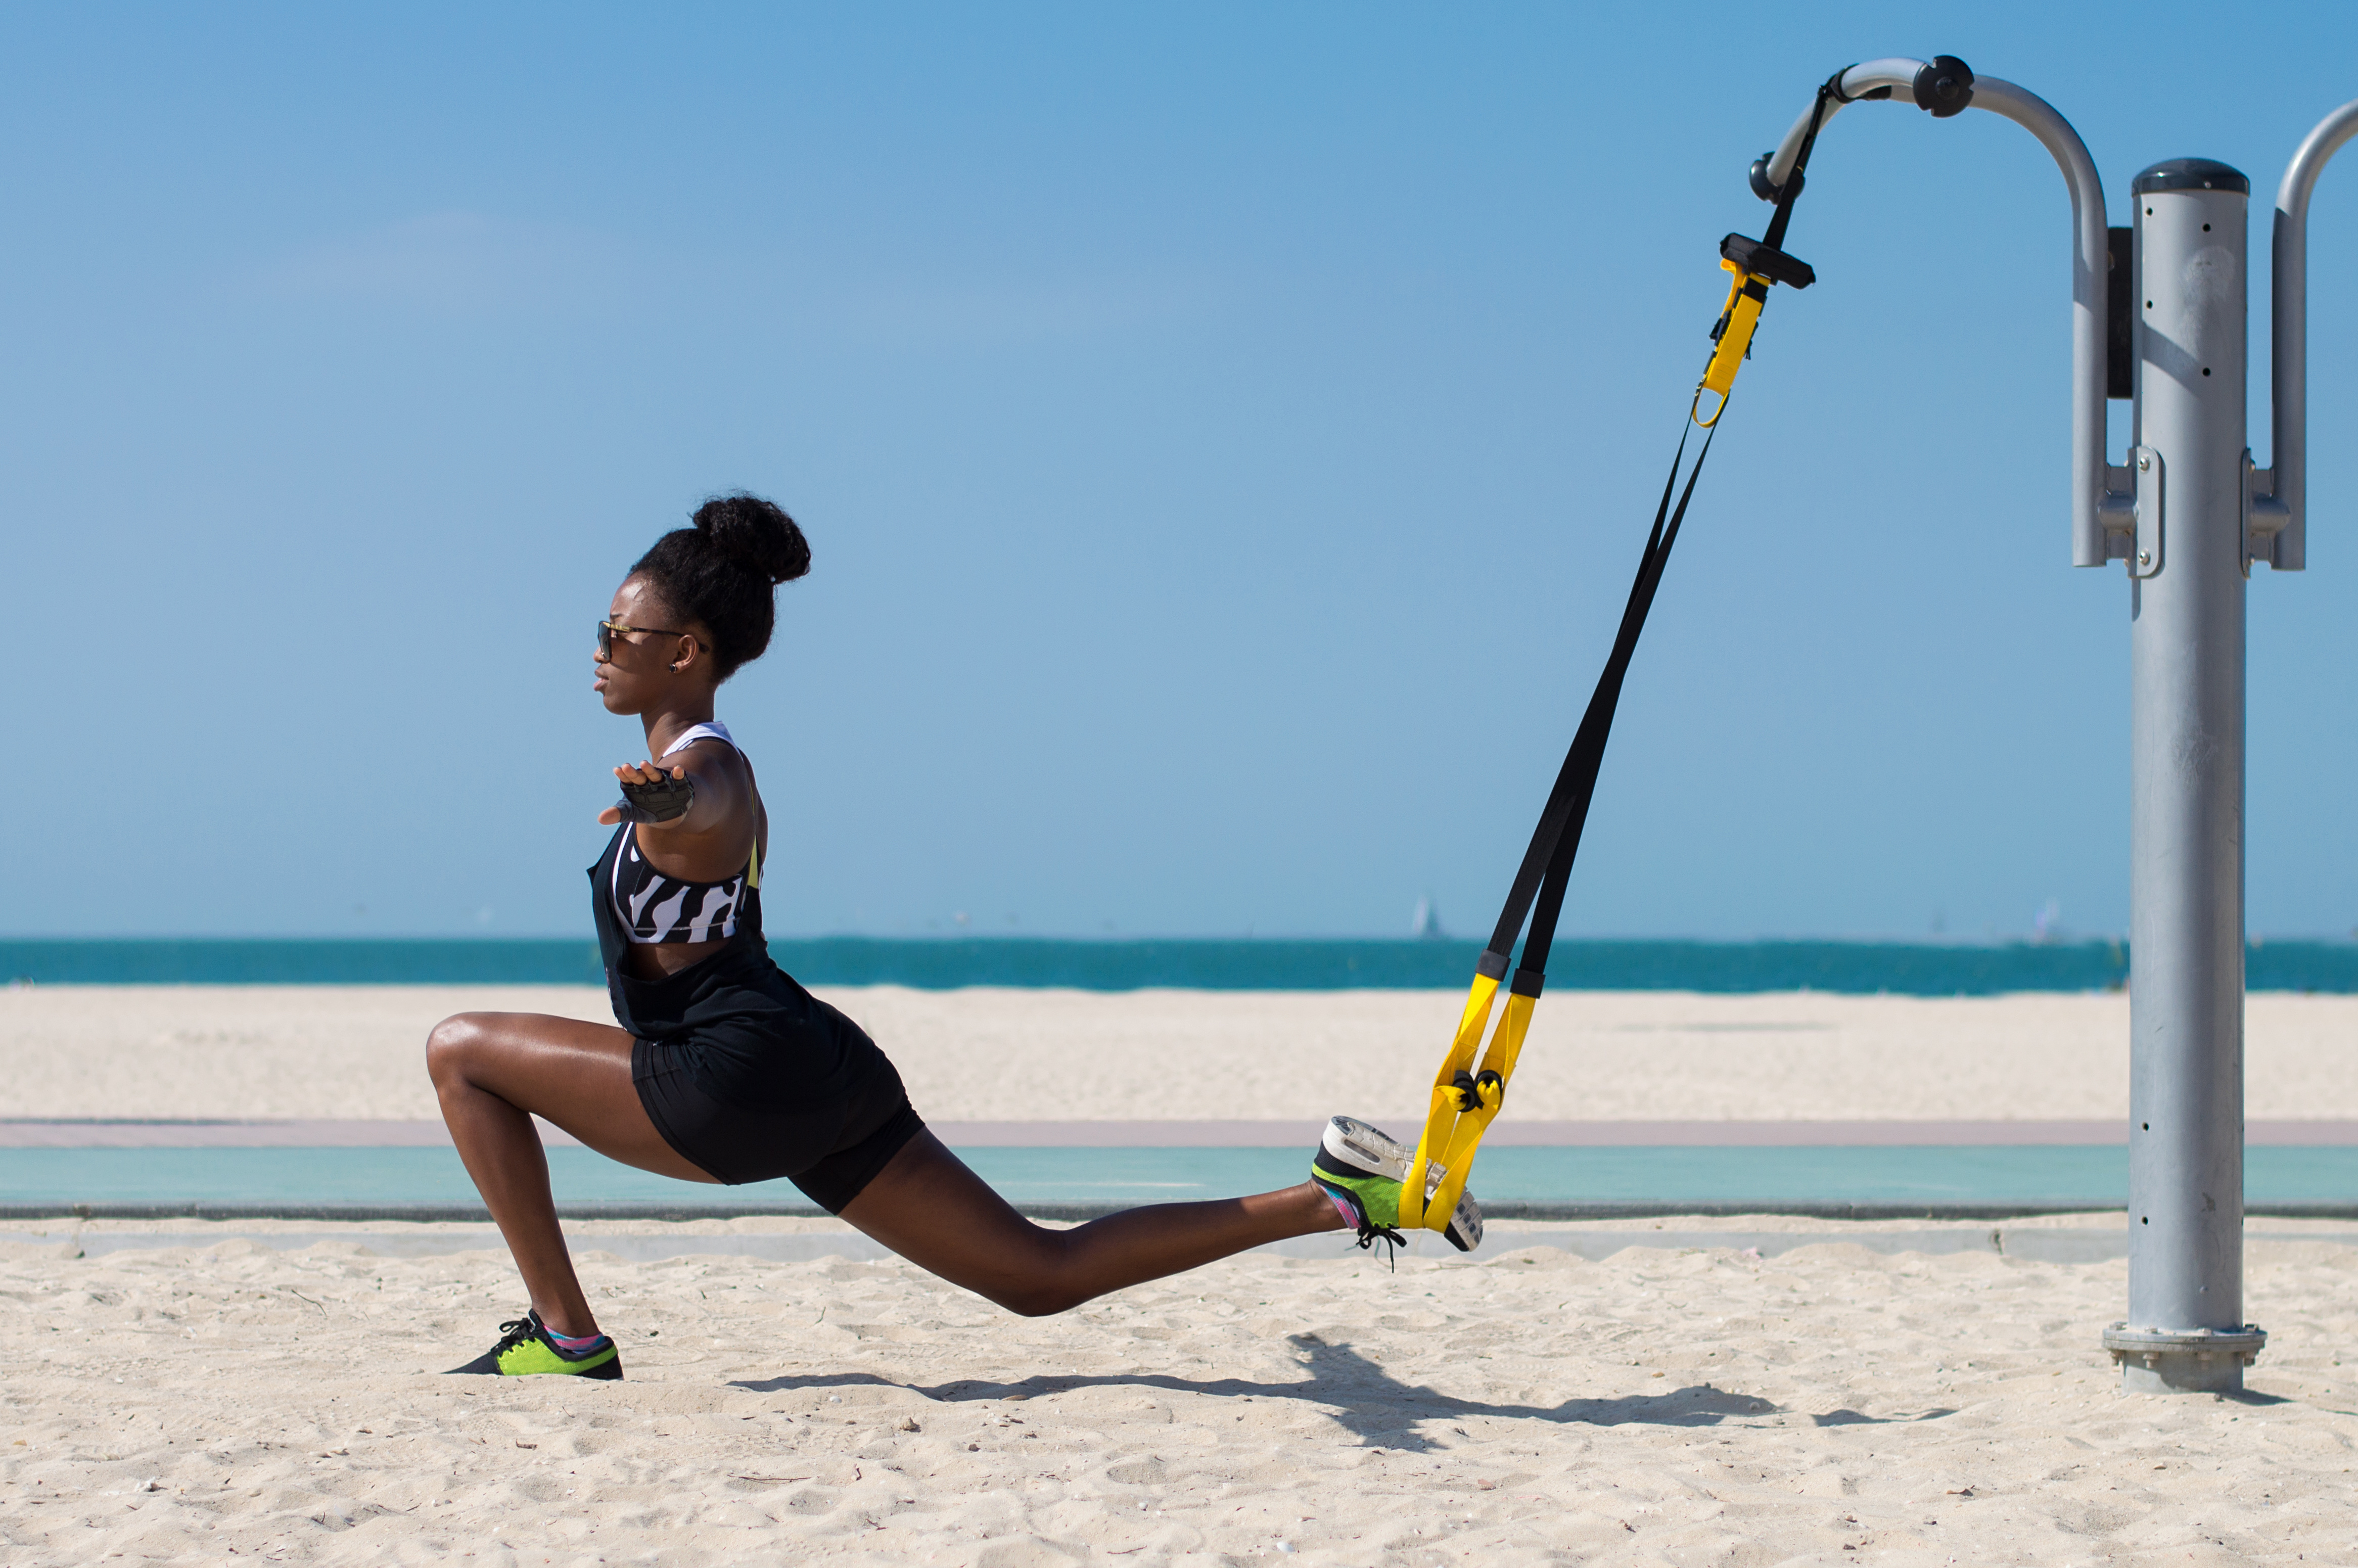
Suspension systems are also portable. The straps are so light you can easily carry them with you when you travel. All you need is a sturdy object to attach them to. You can take it you the park, beach and even workout it your hotel room.


Are There Disadvantages of Suspension Training?

One concern about suspension training is the potential risk of injury for those who are new to this type of training. Obviously, the risk of injuring yourself is higher if you dangle your feet from a strap as opposed to grabbing the straps with your arms leaning your body back and working with the system with your feet planted on the ground. But, training on a suspension system takes a certain amount of stability and core strength. One concern is that less fit people who lack core strength could injure themselves with such core-intensive workouts. One way to lower the risk is to develop a baseline level of core strength before attempting suspension training.

How to Anchor the Straps

Suspension training systems consist of long straps with a handle at one end. The other end is attached to a sturdy object. People use a variety of objects to attach the straps to. For example, you can adapt a door frame or hook one to a pull-up bar. You can purchase single or dual mount systems. Single mounts have both straps attached to a single point while dual mounts have straps that anchor independently of each other. With dual mount system, you can adjust the width between the straps. People often prefer the more natural movements that the dual mount systems allow. That’s something to think about before purchasing a system.

What Exercises Can You Do with a Suspension Trainer?

When you use a suspension training system, you can suspend a body part above the ground to do exercises or you can angle your body away from the straps to add natural resistance. The types of exercises you can do with this system are almost endless.

For example, place your feet in the straps when you do push-ups. This will make the exercise more challenging as your feet are in an unstable position. You can also switch the position by positioning your arms in the straps when you do a push-up. Since you’re in a less stable position, the stabilizing muscles in your core will have to work harder. One study found that the core muscles are activated more with push-ups performed on a suspension trainer than on flat ground. Reverse ab curls and pikes are other exercises that specifically target the abs that you can do on a suspension trainer.

Suspension trainers add a different dimension to lower body training as well. You can do variations on squats and lunges, including single-leg lunges, as well as glute and hamstring scorchers, like hip bridges. Your upper body won’t be left out either. With suspension training, you can variations on rows and presses as well as old favorites, like biceps curls and triceps extensions, all while using the straps.

Conclusion

Suspension training adds a new dimension to strength training. Because you’re doing exercises partially suspended or at an angle, it creates more instability and that helps strengthen your core muscles more than weight training on a stable surface. Plus, it adds a balance challenge. However, beginners should build up a baseline level of core strength and fitness first.

References:

Int J Exerc Sci. 2015; 8(3): 224-233.

Journal of Strength and Conditioning Research: November 2014 – Volume 28 – Issue 11 – p 3049-3055


​​Power Up Your Workouts with a Jump Rope

​What’s a cheap piece of exercise equipment you can carry anywhere, even on vacation, and will power up your workouts? It’s a jump rope! Jumping rope offers an intense workout that can get you in shape quickly.

That’s why it’s so popular among boxers. You might not even be aware of all the benefits that jumping rope offers. Let’s look at why jumping rope belongs in your fitness routine. A word of warning: Jumping rope isn’t child’s play, although it does have an element of fun. Let’s look at some benefits of grabbing a jump rope.

Jumping Rope Is a Calorie Scorcher

How many calories you burn when you jump rope depends on how quickly you turn the rope and how high you jump, but even at a moderate pace, jumping rope burns around 300 calories in 30 minutes. That’s significant!

Of course, you can always pick up the speed to the point that you’re turning the rope two times with each jump, but that’s a more advanced move. Stick to the basics in the beginning. Start with basic rope jumping at a moderate pace at first. Do this by jumping once each time you turn the rope.

It’s a Good “Filler” between Strength-Training Moves

When you’re short on time, you can use a jump as part of a circuit workout that includes strength training. After warming up, do a strength training movement, like push-ups. Then, do 30 seconds of jump rope to boost your heart rate.

Then, proceed to the next strength move followed by 30 seconds of rope jumping. Keep alternating back and forth. With a workout this intense, you only need 20 minutes to get fitness benefits.

Jumping Rope Improves Aerobic Capacity

Aerobic capacity refers to aerobic fitness and the ability to sustain exercise at a sub-maximal level. To improve your aerobic capacity and boost your cardiovascular fitness, jump at an intensity equal to 50 percent to 80 percent of your maximum heart rate.

Use an online calculator to determine your own maximum heart rate based on age. You can check your heart rate by checking your pulse for 10 seconds and multiplying by 10. Gradually increase the intensity over time as you get better conditioned.

It Supports Bone Health

Since jumping rope is a high-impact exercise, doing it regularly stimulates bone tissue. In response, bone precursor cells called osteoblasts lay down new bone tissue. That’s beneficial for bone health.

Women, in particular, have to worry about bone loss as they age. Osteoporosis is one of the most common health problems in women over the age of 60. In fact, a study published in the journal Bone found that guys who jumped several times per week developed an increase in bone density.

Jumping Rope Develops Coordination and Agility

Jumping rope is an excellent way to improve hand, arm, and eye coordination. That’s why so many couches have athletes grab a jump rope and go to work! When you twirl a rope over your head and jump, your brain and nervous system are forced to learn new movement patterns.

Jumping over the rope will become easier with time. The coordination and agility you gain from jumping rope can help if you play sports too. Jumping rope can also boost your running speed.

Jump Rope Can Be a Warm-Up Move Too

Never start a workout with cold muscles. Lightly jumping rope for five minutes is a good way to warm up your entire body before your official workout. Be sure to keep the intensity low if you’re warming up. The idea is to warm up all the muscles you’ll be working in a manner that doesn’t create too much fatigue. No point in getting winded before you begin your workout!

How to Get Started

First, you’ll need a jump rope. You can buy weighted jump ropes, but there’s no need for that in the beginning. Choose one that’s appropriate for your height. The best way to determine this is to:

Hold the two handles of a jump rope while standing in the middle.

Pull the handles up on each side until there’s no slack.

The top of the handles should come rise to just under the top of the armpits.

Always wear a sturdy pair of athletic shoes, one that offers good ankle and arch support and has enough cushioning on the mid-sole. Fitness experts often recommend cross-trainers as they tend to offer good foot and ankle support. Choosing the right shoe will lower your risk of injury and reduce repetitive trauma on the joints in your feet and knees.

Remember, jumping rope is a high-impact exercise. Once you’re into it, it may bring back happy memories from childhood! No need to overdo it in the beginning. Stick to 5 or 10 minutes and gradually increase the time. You’ll be able to jump rope longer as your endurance increases. Don’t forget to do a cool-down afterward and stretch your quads, hamstrings, and calves.

Keep at It!

Now that you’ve gotten the hang of it, keep going! Since jumping rope is an intense exercise, don’t do it every day. Your body needs a break after high-impact exercise. Instead, jump rope 1 or 2 times per week as a substitute for some other aerobic activity. Give yourself a day or two of rest between jump roping sessions. Also, if you have joint problems, talk to your physician before making rope jumping part of your training.

Now, you know how to get in shape, lose weight, improve your stamina and aerobic capacity, and boost your coordination, all while reliving your childhood! Jumping rope adds an element of fun to exercise. Enjoy!

References:

Bone. 2015 Oct; 79: 203-212.

University of Notre Dame Performance. “Self-limiting Exercise: Jumping Rope”

5 Ways to Prevent Back Injuries While Working Out

3 Strength training and exercise, in general, has so many health and fitness benefits. But, you have to do it safely. Fortunately, resistance training, by strengthening the muscles that support your back and spine, lowers your risk of being sidelined by a back injury or chronic back pain.

Research even shows weight training and body weight strength exercises help people who already suffer from lower back pain. Contrary to popular belief, movement rather than inactivity is what helps an achy back feel better. Otherwise, the muscles stiffen and the pain worsens.

Numerous studies show exercise is good for back pain and back pain prevention. One study found 16 weeks of training with free weights improved functionality and reduced pain in lower back pain sufferers. But, doing exercises incorrectly or advancing your training too quickly can place excessive strain on your back and increase the risk of injury. Here are ways to protect your back and spine when you fitness train.

Strengthen Your Core

How strong is your core? It matters! Your core is made up of a number of stabilizing muscles that support your spine. When these muscles are strong, your risk of back injury and pain is lower.

One muscle, in particular, plays a key role in protecting your back and spine. It’s called the multifidus. One of the best ways to target this deep, stabilizing muscle is to do exercises that involve back extension, such as “super mans.” This is an exercise where you lie face down on a mat. Once situated, lift your chest, along with your legs and arms, off the floor and hold the position for 2 to 5 seconds. This is an isometric hold that helps strengthen the multifidus muscle. If you have active back pain, don’t do this exercise until talking to your physician.

Planks and their many variations are other exercises that strengthen the muscles in the core. They also work the abdominal muscles without flexing the spine. If you have a history of back pain, it’s best to limit abdominal exercises, like crunches, that require spinal flexion and focus more on planks.

Work on Your Posture

Many of the problems people have with back pain come from poor posture. Bad posture is an epidemic as people spend more time sitting at a desk. How do you sit in a chair? If your head and shoulders fall forward, you’re placing added stress on your upper back. Make sure you have a work chair that supports your upper back. Then, train yourself to be aware of your head and neck positioning and make adjustments.

Correct posture in your daily life will take the strain off your back and reduce your risk of back pain. Back injuries don’t just happen when you train, they’re often due to chronic, low-grade stress from the activities you do every day, like lifting incorrectly and standing and sitting with poor posture.

Stop Rounding Your Back

One of the biggest mistakes people make when they do bodyweight exercises or train with weights is they round their back when they do certain exercises. One of the riskiest exercises to do with a rounded back is a deadlift, especially if you’re using heavy weights. When you round your back while deadlifting, it often means your spinal erectors are falling down on the job and your spine is forced to do additional work.

This usually happens when your spinal erectors are weak. Ideally, you want your spine to be in a neutral position when you do most exercises. It takes practice to get the form right, especially for a complicated move like a deadlift but it’s worth it. To get the form down, start without using weight. Watch your form in the mirror or have someone critique it. Then, progress to using a light weight. Don’t try to do too much too quickly. It’s not worth it if it leads to an injury.

Don’t Go Overboard with the High-Impact Exercise

High-impact exercises are movements where both of your feet leave the floor at the same time. Examples are movements that require jumping, such as jumping rope, plyometrics, and running. These exercises place added stress on your spine and the effects may be cumulative.

If you’re otherwise healthy, there’s no reason not to do high-impact training but don’t do it every day. Alternate high-impact exercises with low-impact ones, like cycling, swimming, walking, or rowing. Keep your workouts balanced! Change the activities you do to avoid stressing the same muscles, including the ones in your back, repetitively.

Get Back to Basics

Don’t jump into a workout without warming up first! Cold muscles don’t perform as well and may be more prone to injury. Light cardio, such as leg swings, butt kicks, high knees, and arm swings, will warm up the muscles you’re working safely.  It’s controversial whether a warm-up prevents injuries, yet there are few benefits to launching into a workout with cold muscles. Plus, a warm-up gets your nervous system primed to work too.

After a workout, do a 5-minute cool down. It should consist of similar exercise as you did during the warm-up but with gradually decreasing intensity. Follow up with some static stretches with a focus on the hamstring muscles in the back of your thighs. Tight hamstrings increase the risk of lower back pain and injuries. Be sure to stretch your hamstrings regularly to keep them from becoming overly tight.

Conclusion

Hopefully, you’ll never have to take a long break from training due to a back injury, but be proactive. Take these steps to keep your back healthy and fully functional when you train.

References:

Spine-Health.com. “Weight Training Effectively Relieves Back Pain”

BMJ Open Sport Exerc Med. 2015 Nov 9;1(1):e000050. eCollection 2015.

Core Concepts. “Multifidus – Smallest Yet Most Powerful Muscle”

Can Melatonin Lower High Blood Pressure?

Hypertension is one of the most common age-related health problems and one that raises the risk of a number of serious health problems, including cardiovascular disease and stroke. In fact, high blood pressure can damage every organ in the human body by injuring the blood vessels that carry nutrient and oxygen to them. There’s no shortage of prescription medications that lower blood pressure, but most have side effects. What if there were a natural solution for lowering high blood pressure?

What Is Melatonin?

Melatonin is a hormone released by the pineal gland, a tiny gland located in the brain. The main function of melatonin is to regulate the sleep-wake cycle. Because of its role in regulating sleep, a growing number of people take a melatonin supplement as a sleep aid and to prevent jet lag. Melatonin is also a powerful antioxidant that helps neutralize free radicals, a common cause of cell damage. Melatonin production goes up in the evening and peaks between 2:00 a.m and 4:00 a.m.

Sleeping in a completely dark room is important as exposing your eyes to light at night can shut down melatonin production. Some studies link working night shifts with a higher risk of developing some forms of cancer. The theory is that working at night under artificial light lowers the body’s level of melatonin. Since melatonin regulates a variety of hormones that impact human health, this disruption may increase the risk of some forms of cancer.

Melatonin and Blood Pressure

Can melatonin lower blood pressure too? In one study carried out by Harvard Medical School, men who took a low-dose melatonin supplement before bedtime experienced a significant reduction in nighttime blood pressure.  The drop in blood pressure was an average of 6 mm Hg diastolic (pressure in the blood vessel wall when the heart is relaxing) and 4 mm Hg systolic (pressure in the blood vessel wall when the heart is beating). For people with mild hypertension, this decrease in pressure may be enough to avoid prescription medications.

One caveat is the study looked at nighttime blood pressure. It’s not clear whether a lower blood pressure is sustained throughout the day. The study showed that melatonin supplements may be beneficial for people who experience nocturnal hypertension, a nighttime rise in blood pressure. Another benefit is melatonin helps some people sleep more soundly and this could help people with insomnia better control their blood pressure.

The blood pressure lowering effects of melatonin may extend to women too. In one small study, researchers gave 9 women a 3 milligrams melatonin supplement before they went to sleep. They also experienced a reduction in blood pressure.

How Does Melatonin Lower Blood Pressure?

The mechanism by which melatonin causes a drop in nighttime blood pressure isn’t clear. One possibility is the antioxidant effect of melatonin. We now know that oxidative damage and inflammation plays a role in the development of cardiovascular disease. Ongoing inflammation can also damage blood vessels and lead to abnormal endothelial function.

The endothelium is the lining of the blood vessel. It produces a variety of chemicals that cause blood vessels to relax or constrict as well as chemicals that impact blood clotting. Melatonin, by reigning in oxidative stress and inflammation, may improve how blood vessels function by causing the blood vessel to relax. This, in turn, would lower blood pressure.

Are Melatonin Supplements Safe?

As with any medication or supplement, it’s best to consult a physician before taking melatonin. However, it appears to be safe for most people. Side effects are typically mild. Some people experience fatigue or brain fog the morning after taking melatonin, especially if they haven’t taken it before. Supplements also vary in their purity and the quantity of melatonin they contain.

When independent testing firms analyzed a variety of commonly available supplements, they found some were formulated with more or less of the ingredients listed on the bottle. Surprisingly, analysis of some herbal supplements showed they contained none of the active ingredients. Supplements aren’t regulated in the same way medications are, so it’s buyer beware. Do your research!

Conclusion

Melatonin shows potential promise for lowering nighttime blood pressure, but more research is needed. If melatonin can help control nocturnal hypertension, it may help lower mortality, as people who experience a nighttime rise in blood pressure are at higher risk of cardiovascular events and premature death.

Interestingly, more recent research suggests melatonin may play a role in the prevention of cardiovascular disease, independent of its impact on blood pressure. In fact, there’s a clinical trial going on now to look more closely at the impact of melatonin supplements on blood pressure and other functions such as platelet activity and insulin response.

Melatonin supplements have other potential benefits as well, particularly for people who suffer from insomnia. Some people fall asleep more quickly and sleep more soundly when they take a melatonin supplement. That’s important since inadequate sleep and poor sleep quality are linked with a higher risk of a variety of health problems, including cardiovascular disease, obesity, and type 2 diabetes.

But, as always, consult with your physician. Supplements, including melatonin, can interact with medications and with other supplements as well. Whatever you do, keep monitoring your blood pressure. High blood pressure is strongly linked with increased mortality and it’s a health condition that can respond to lifestyle changes, although medications are sometimes needed.

References:

The American Journal of Medicine. Volume 119, Issue 10, October 2006, Pages 898-902.

Curr Opin Lipidol. 2016 Aug; 27(4): 408-413.

ClinicalTrials.gov. “Effects and Mechanisms of Melatonin on Blood Pressure, Insulin Resistance, and Platelets”

National Institutes of Health. “How is the body affected by sleep deprivation?”

ConsumerLab.com. “Testimony of Tod Cooperman, MD, President, ConsumerLab.com to Senate Special Committee on Aging – Subcommittee on Dietary Supplements”

Scoliosis. 2007; 2: 6. Published online 2007 Apr 4. doi: 10.1186/1748-7161-2-6.

American Association for Cancer Research. “Linking Night Shift Work to Cancer Risk”

​Page 1 of 1

Why Agility Matters and How to Improve Your Agility Skills

.

Speed is important if you play certain sports, but there’s another fitness attribute you hear less about – agility. Contrary to popular belief, speed and agility are not the same things. Speed is the ability to accelerate at a rapid rate in one direction. Think of a sprinter sprinting in a straight line.

In contrast, agility encompasses speed, but it also encompasses the ability to quickly change direction and accelerate in a different direction. A person who’s agile is “light on their feet” and quick to react. Agility is a trait that comes in handy when you play a variety of sports. Being agile is also important for reacting to things we encounter in the environment and adjusting quickly to them to avoid a fall or injury.

Unfortunately, agility training doesn’t get enough emphasis. The reality is we all need it. The good news is there are exercises you can do at home to boost your agility skills. Let’s look at some of them.

Plyometric Exercises for Boosting Agility

Plyometrics are exercises that involve stretching a muscle and then shortening it quickly. Plyo moves, as they’re called, are a good way to develop explosive power and improve vertical jump height. But certain plyometric exercises can also boost agility skills. Here are some of the best exercises that develop agility. You can do these exercises with little or no equipment. A good starting point for building agility is lateral jumps. Here’s how to do them:

Lateral Jumps

•​Place a piece of tape about 3 feet long on the floor.

•​Stand on one side of the tape and lower your body into a shallow squat.

•​Jump laterally over the tape to the other side, landing in a squat position.

•​Keep jumping laterally back and forth across the tape.

•​Start with 30 seconds of alternating jumps and build up to a full minute.

Skaters

•​Use the same piece of tape as a marker.

•​Stand on the left side of the tape.

•​Jump your right foot to the other side of the tape and cross your left foot behind the right as you descend dynamically into a lunge.

•​Jump your left foot back over the line and bring your right foot behind your left.

•​Keep jumping back and forth across the line in this manner.

•​Move as quickly as possible and try to improve your speed over time.

This movement vaguely mimics the moves skaters do when they accelerate. Over time, this exercise will help you develop greater agility and balance.

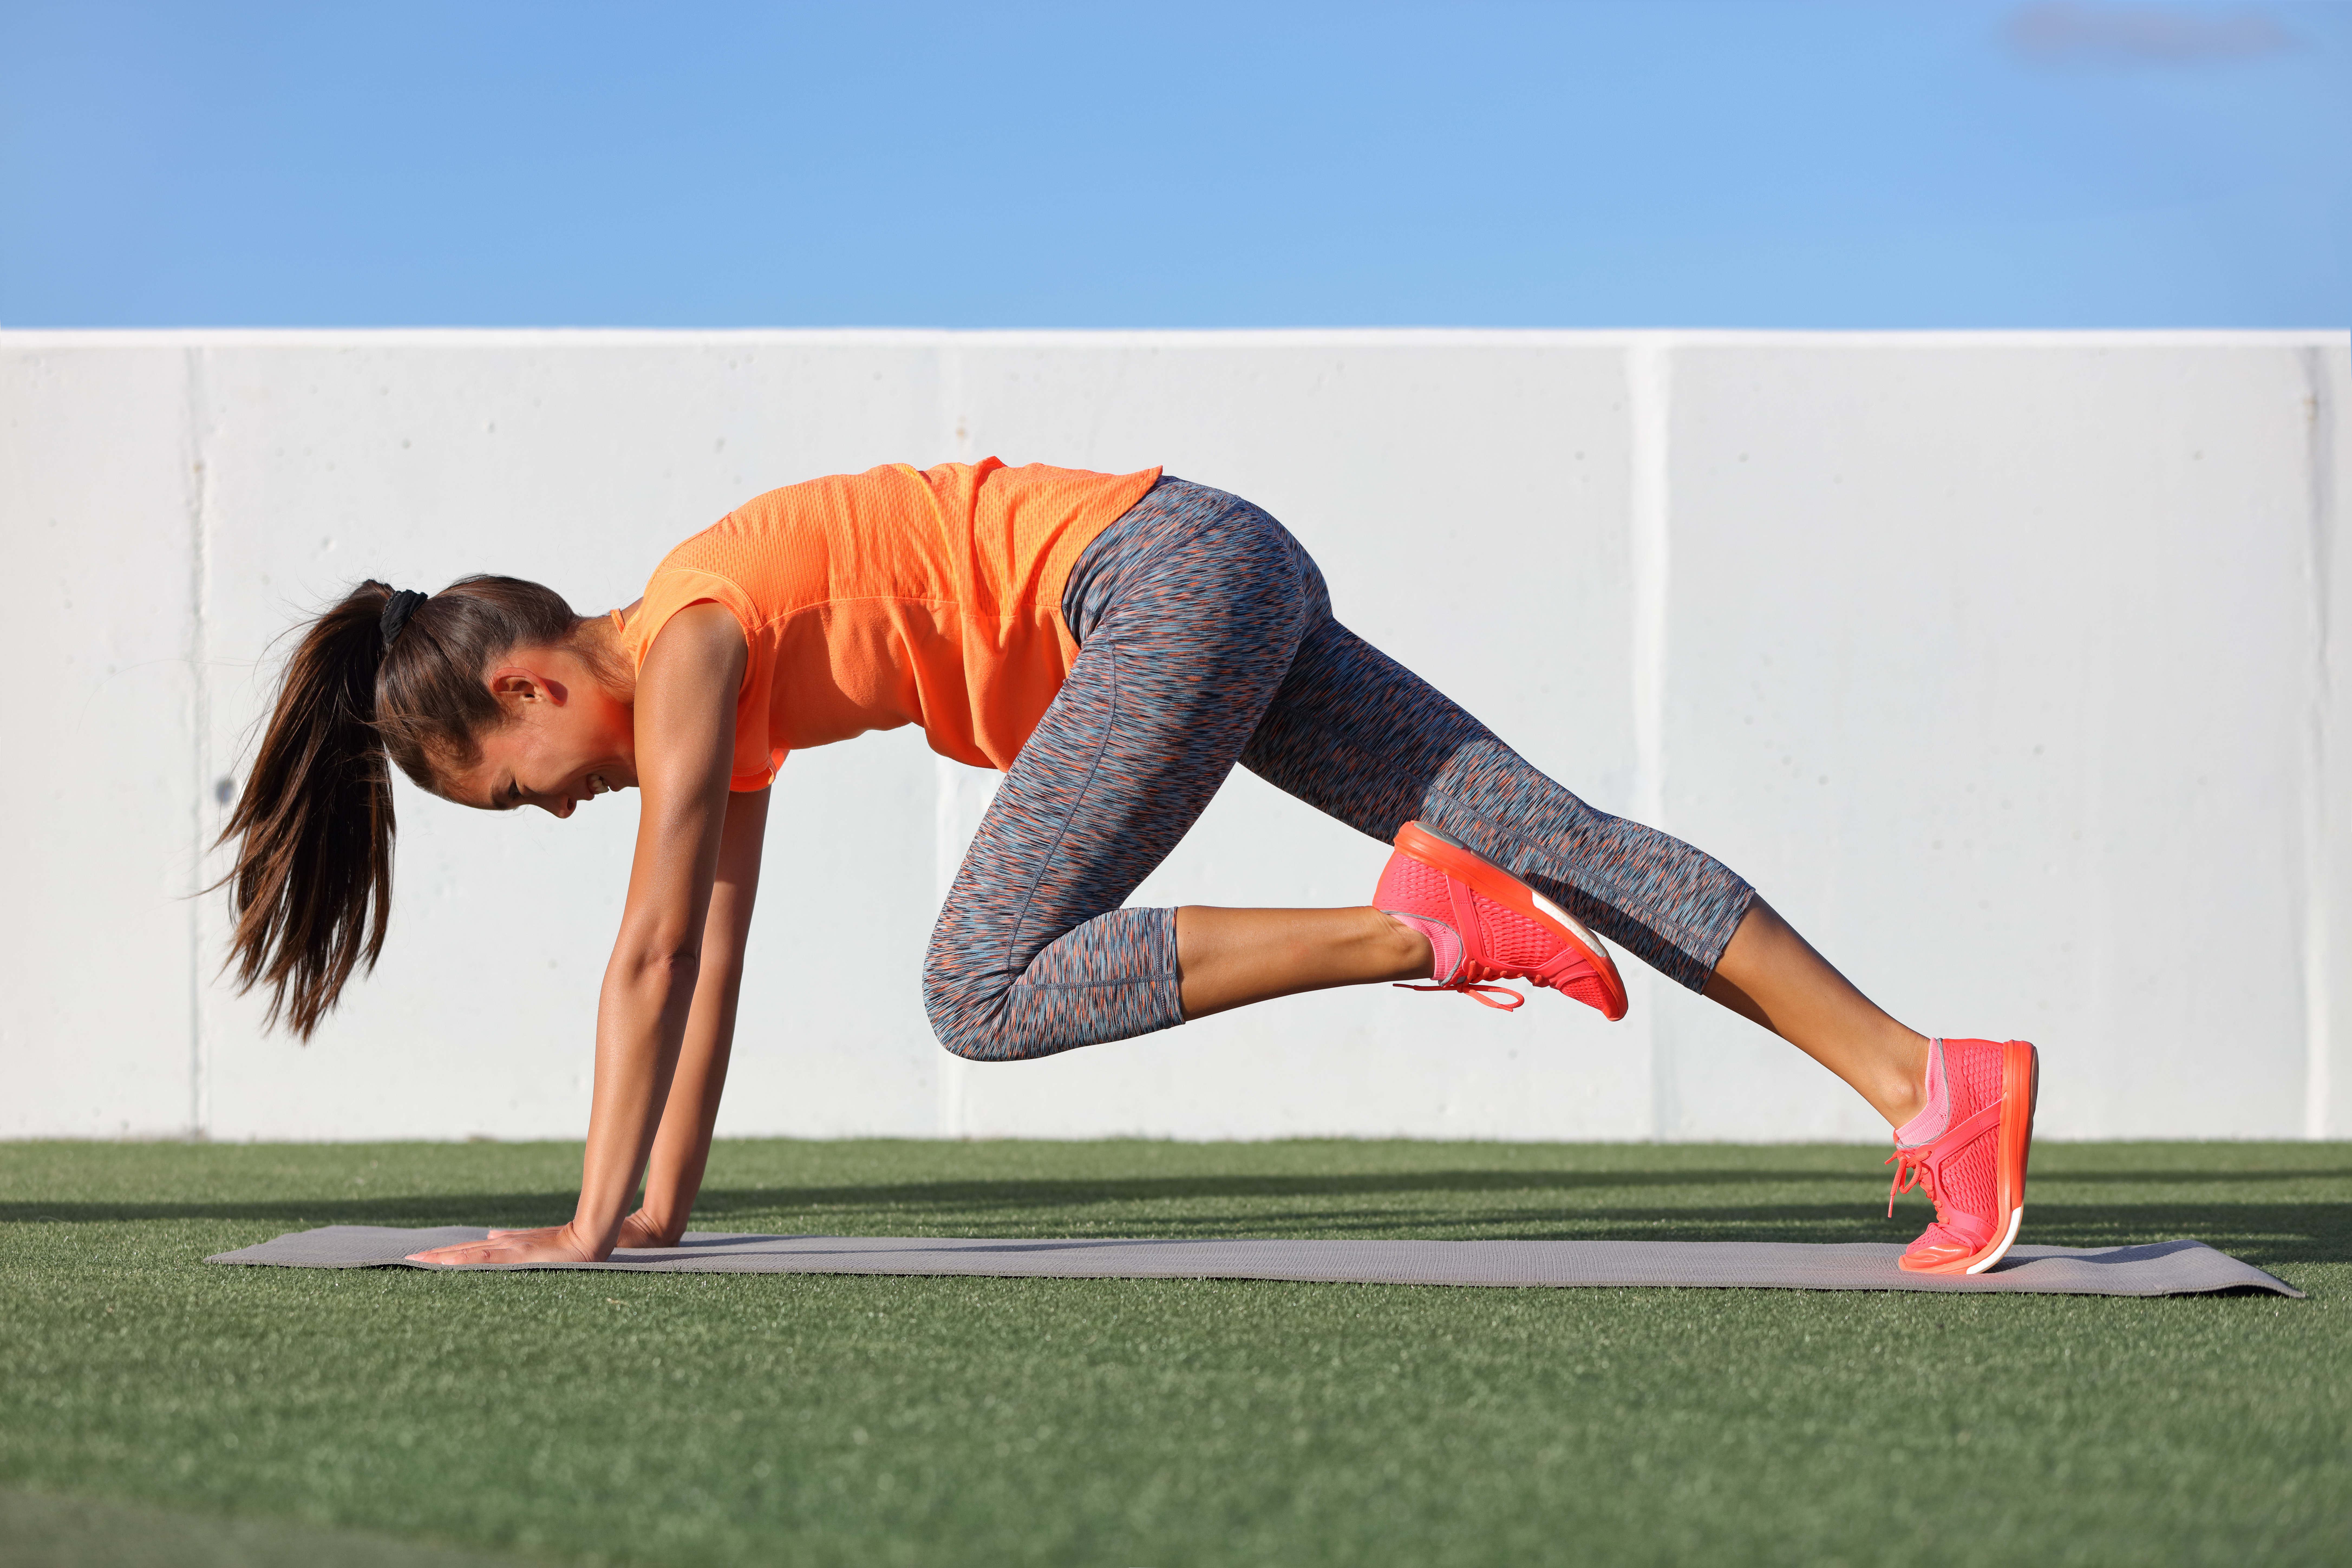
Mountain Climbers

The mountain climber is a versatile exercise that will help you build speed and agility, and it requires little space and no equipment.

•​Get into a facedown position on an exercise mat with your feet about hip-width apart. Place both hands on the mat just above your shoulders. Your body should be in a straight line, similar to a plank position.

•​Flex your right hip as you raise your right thigh toward your chest. Keep your abs engaged.

•​Bring your right thigh back to the starting position as you quickly bring your left thigh toward your chest in a similar manner.

•​Keep switching back and forth between legs as you increase the tempo to a pace that feels like a slow run. If you’re switching legs quickly enough, both feet should leave the floor at the same time.

Medicine Ball Tosses

You will need a medicine ball for this drill, but it’s an excellent exercise to build agility in your upper body.

•​Stand about 3 feet from a sturdy wall.

•​Hold the medicine ball at chest level and push your arms forward to propel the ball against the wall.

•​As the ball moves toward the wall, move your body laterally about 15 feet.

•​When the ball comes back to you, propel it back towards the wall in the same manner.

•​Keep moving back and forth between the two positions as you propel the ball towards the wall.

Shuttle Runs

Shuttle runs develop speed and agility. You can even do them in your front yard.

•​Place an object you can easily pick up at a designated point on the ground.

•​Place another object about 30 feet away from the first.

•​Start where you placed the first object and run to the second object. Pick the object up and run back to the first object.

•​Drop the second object and pick up the first one.

•​Keep running back and forth as you switch objects.

•​Work on improving your speed and accuracy.

Conclusion

Don’t neglect agility. It’s important for more than sports performance. We tend to lose agility as we age and doing these drills can help you preserve your body’s ability to react quickly and change directions. The ability to react quickly can save you from an injury.

Do these drills at least two times per week. You can save them for the end of a workout or even devote an entire session to agility exercises. Since these are dynamic exercises, you’ll also elevate your heart rate and build greater explosive power as well. As the exercises become easier, increase the length of time you do each one for greater cardiovascular benefits. Whatever you do, don’t neglect agility training!

References:

American Council on Exercise. “Mountain Climbers”

SportsRec.com. “How to Do Shuttle Runs”


Caffeine and Exercise: Should You Have a Cup of Coffee Before a Workout?

​​

A cup of coffee in the morning is a daily ritual for many. Starbucks lovers raise your hands! The benefits extend beyond enjoying the taste of a hot cup of Java. Caffeine is a stimulant that increases alertness. Therefore, it is not surprising that it might be beneficial for exercise performance. Most research suggests that it can give exercise performance a boost, but the benefits are greatest for certain types of exercise.

First, caffeine boosts alertness by blocking adenosine receptors in the brain. Adenosine is a chemical that has a relaxing effect on the body. Blocking these receptors reduces the relaxation response and increases alertness. Caffeine also has a mood-elevating effect and some people feel more creative after they drink it. How many good ideas have been dreamed up over a cup of coffee?

But what about exercise performance? Caffeine has the biggest benefits for endurance exercise, exercise where you work out at a moderate pace for long periods of time. If you jog, walk, or cycle, caffeine may give your workout a boost and improve how you perform. It also appears to reduce the sensation of how hard you’re working. An endurance workout feels easier when you have caffeine on board. Therefore, you may sustain your work a little longer and, potentially, get more benefits.

It doesn’t take a lot of caffeine to get benefits either. Research shows as little as 3 milligrams of caffeine per kilogram of body weight boosts exercise performance. That’s the equivalent of two cups of coffee for a person of average weight,  an amount of coffee most people can comfortably drink. However, in studies, researchers typically use a caffeine supplement to standardize the dose.

What about High-Intensity Exercise?

If you do high-intensity interval training, you might wonder whether caffeine will help you get more out of your sweat session. In one meta-analysis, 17 of 28 studies showed that consuming caffeine before a vigorous workout was linked with improvements in high-intensity exercise performance. That caffeine improves exercise performance for high-intensity exercise is less firmly established, but it does appear to have benefits.

One downside of drinking coffee to improve exercise performance is the benefits may be reduced if you’re a regular consumer of caffeine. Some research suggests that athletes who regularly drink caffeinated coffee are tolerant to the exercise-enhancing effects. However, some studies suggest that caffeine enhances performance even in people who regularly use caffeine.

Why Does Caffeine Improve Exercise Performance?

Caffeine may boost exercise performance in several ways. One theory is caffeinated beverages have an impact on energy usage during exercise. Caffeine increases the breakdown of fatty acids and makes them more available as a fuel source. This preserves glycogen, thereby increasing energy reserves. More glycogen means that you can maintain exercise longer without exhaustion. However, some studies suggest this isn’t the primary mechanism. In fact, the exact mechanism is still unclear.

Another Benefit of Caffeine Before Exercise

Research also shows that caffeine consumption reduces delayed onset muscle soreness, the achy, stiff muscles you get 24 to 48 hours after a workout your body isn’t accustomed to. In one small study, men who consumed caffeine (5 milligrams of caffeine per kilogram of body weight) an hour before a biceps workout experienced less delayed onset muscle soreness. The muscle pain and stiffness was significantly reduced on days 2 and 3 relative to those who consumed a placebo. They were also able to complete more repetitions of biceps curls with caffeine on board.

One caveat is that people metabolize caffeine at varying rates. Some people are genetically fast caffeine metabolizers. These folks clear caffeine from their system quickly. Slow caffeine metabolizers don’t break down and eliminate caffeine from the body as quickly. In fact, studies show slow caffeine metabolizers are at higher risk of adverse effects from drinking more than two cups of coffee daily. These include a greater risk of irregular heart rhythms, anxiety, and a higher risk of developing a heart attack or stroke. A simple genetic test can tell you whether you’re a slow metabolizer of caffeine.

Conclusion

Caffeine really can boost exercise performance for moderate-intensity, sub-maximal exercise and, possibly, high-intensity exercise. It may also help reduce the severity of delayed onset muscle soreness for those training sessions where you push your body harder than its accustomed to. If you’re a healthy coffee lover who tolerates caffeine well, there’s no reason not to have a few cups of coffee before a workout.

References

Institute for Scientific Information on Coffee. “Coffee and Health”

J Exerc Rehabil. 2014 Dec; 10(6): 349-356.

J Strength Cond Res. 2009 Jan;23(1):315-24.

Science Daily. “Caffeine Reduces Pain during Exercise, Study Shows”

Astorino T.A. et al. (2009), J. Efficacy of Acute Caffeine Ingestion for short-term high-intensity exercise performance: A Systematic Review. Strength and Conditioning Research.


What Are Isometric Exercises and Can They Help You Build Strength?

​​

There’s more than one way to increase muscle endurance and build strength. One type of exercise you might be less familiar with are isometric exercises. These are movements where the targeted muscles are placed under tension but they don’t change in length. Instead, the muscle holds tension at a fixed length. This is in contrast to isotonic exercises where the muscle actively contracts and relaxes. When a muscle contracts it’s called a concentric contraction. When it lengthens, an eccentric contraction. With isometric exercises, the muscle holds tension but doesn’t move.


Many isometric exercises require no equipment. All you need is an exercise mat. Examples of isometric exercises include planks, wall sits, and glute bridges. These exercises are certainly convenient, but how effective are they for building muscle strength?

Isometric Exercises for Strength Building

Previous research suggested that isometric exercises only build strength at the angle which you hold the joint, give or take 10 degrees. For example, if you hold a muscle at 90 degrees, the muscle will become stronger at that angle. It may also become stronger at 80 degrees and 100 degrees but won’t gain strength at other angles.

However, a study published in the Scandinavian Journal of Medicine and Science in Sports showed that isometric exercises may also improve strength at angles that come before 90 degrees too. So, an exercise, where you isometrically hold a muscle at 90 degrees can potentially strengthen the muscle at angles between 0 degrees and 90 degrees, and even up to 100 degrees. So, isometric exercises may build strength at more angles than originally thought.

Despite the fact that you don’t build strength at every angle when you do isometric exercises, isometric exercises offer benefits. For one they improve muscle endurance and stimulate your muscles in a way that isotonic contractions do not. Here are some of the best:

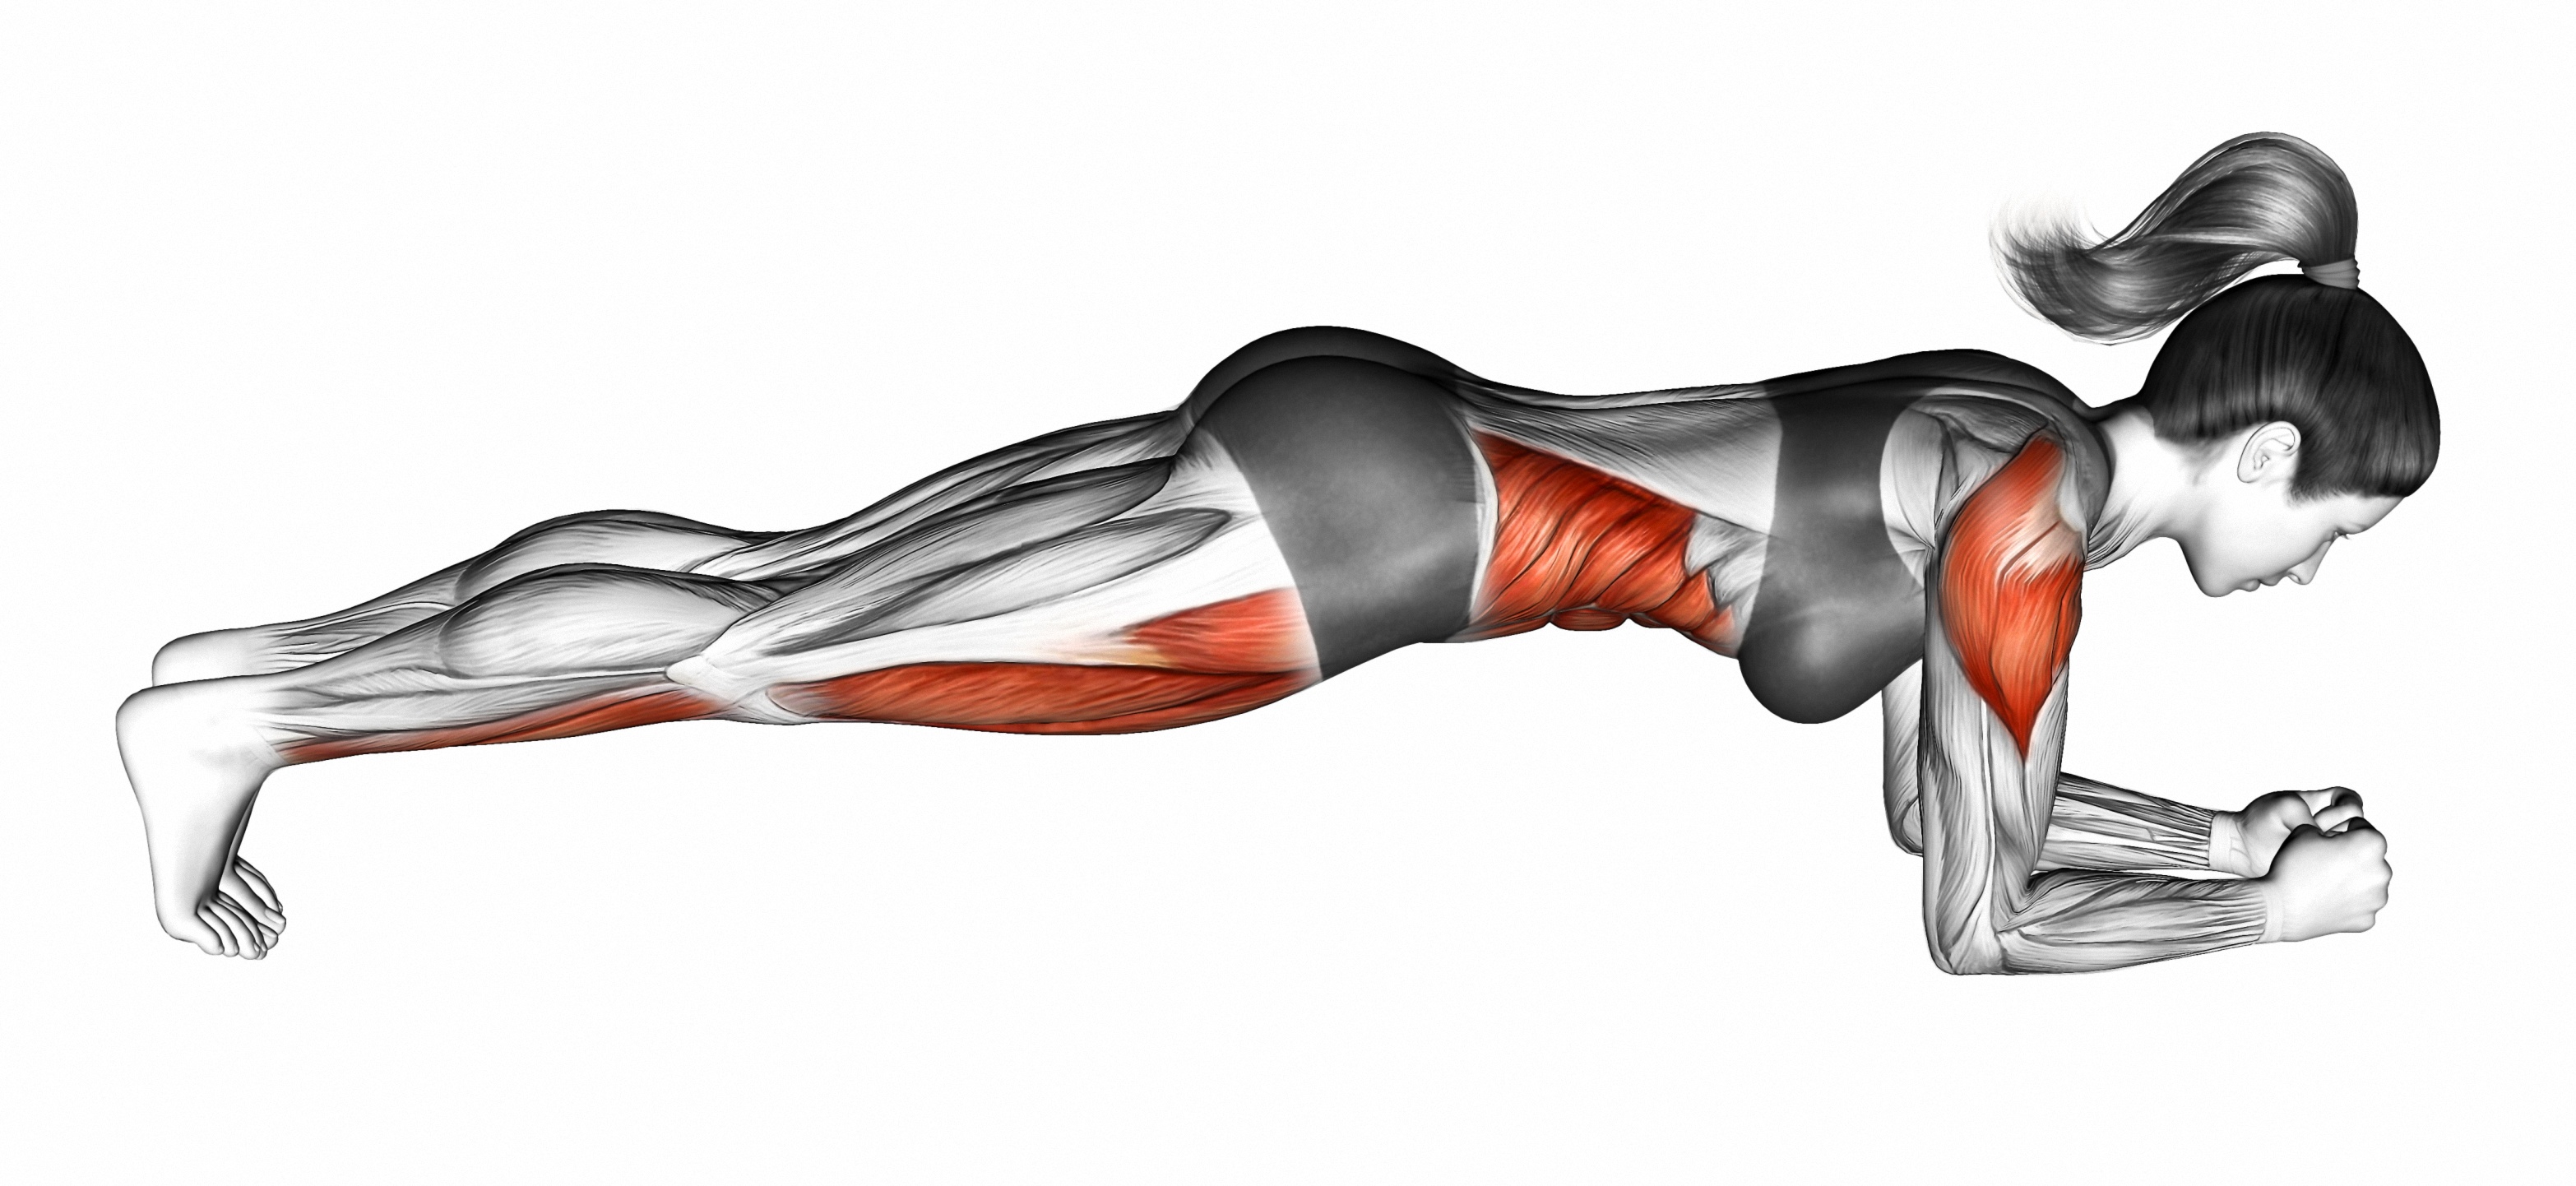
Planks

Planks are an isometric exercise designed primarily to work the muscles in your core. Holding a plank builds muscle endurance in your arms and shoulders as well. Many fitness trainers believe planks are safer for the back than crunches as you aren’t flexing your pelvis. Plus, you can also do a variety of plank variations that are more challenging. Be sure to keep your abs tight and your body in a straight line. No sagging hips! That’s cheating.

To do one:

•​Get on your hands and knees on a mat.

•​Place your elbows on the mat with your hands and elbows about shoulder-width apart.

•​Step your feet back until your entire body is in a straight line, your weight is on your toes,  and you’re looking down at the mat.

•​Hold this position for 30 seconds while keeping your abs and back tight.

Supermans

Supermans is an isometric back extension exercise that you may not be familiar with. This appropriately named exercise strengthens the muscles in the lower back as well as the glutes. Doing them also helps maintain muscle balance, as most people spend too much training time on their abs and don’t give their back enough attention.

To do one:

•​Lie face down on a mat with your arms extended above your head on the mat.

•​Lift your legs, arms, head, and neck off the mat, so that your body forms a shallow “U.”

•​Hold the position for 4 seconds before releasing. Gradually increase the time that you hold the superman pose as the exercise becomes easier.

Walls Sits

Walls sits are an ideal exercise for strengthening the quads, the muscles in the front of your thighs.

To do one:

•​Place your back and arms against a wall with your feet shoulder-width apart.

•​Lower your body into a squat position while holding your back against the wall.

•​Stop when your knees are at a 90-degree angle.

•​Hold this position for 20 seconds. Add more time as you gain muscle endurance.

Glute Bridges

Glute bridges, as you might have guessed, work the glutes, a muscle that needs to be strong as it’s a major power generator. Glute bridges also work the rectus abdominis, the biggest muscle in your abs, obliques, and spinal muscles.

To do one:

•​Lie on a mat with your knees bent and arms flat on the mat by your sides.

•​Thrust your hips up toward the ceiling while keeping your weight in your heels.

•​Hold for 10 seconds.

•​Lower your body back to the floor.

•​Repeat

Holds

You can also add an isometric component to other exercises, including bodyweight exercises. This will increase the time the muscle is under tension. For example, when you do a push-up, lower your body close to the mat and hold for as long as you can before coming back up.

Conclusion

Hopefully, you now have a better idea of how isometric exercises work and how to add them to your routine. You’ll be glad you did!


​​ 5 Best Exercises for Developing Power and Strength

Power and strength are not the same things. You can be strong but still not be powerful. How do the two differ? You measure strength using a one-rep max test. With the help of a trainer, you determine the maximum amount of weight you can lift for one full rep using good form. Power, however, has a time component; it refers to how quickly you can move a weight or other object through space.

Power is what helps you push yourself out of a chair or, in sports terms, or slam a tennis ball across the court with great speed. Like strength, power depends on fast-twitch muscle fibers as opposed to the slow-twitch fibers that play a dominant role in sub-maximal, endurance exercise, like running at a moderate pace or walking briskly.

Fortunately, like strength, you can develop the ability to generate greater power through training. One of the simplest ways is to do the exercises you already do in an explosive manner. For example, for upper body power, push your chest off the floor quickly, almost explosively, when you do push-ups. When you do squats, rise up from the squat at a rapid, almost explosive tempo. Also, if you have kettlebells at home, kettlebell swings are an excellent movement for increasing your power capabilities. Let’s look at a few more drills you can use to boost your body’s ability to generate power.

Squat Jumps

Squat jumps are a type of plyometric drill and plyometric exercises are excellent for building power. They also give your cardiovascular system a workout. Try doing twenty squat jumps in a row and see if you aren’t huffing and puffing! Here’s how to do one:

•​Stand on the floor with your feet about shoulder-width apart.

•​Descend into a squat to the level that your legs are parallel with the ground.

•​Quickly propel your body into the air in an explosive manner.

•​Land back in a squat position.

•​Repeat.

•​Start with 3 sets of 5 reps and work up to 10 reps.

Tuck Jumps

Tuck jumps are a more advanced form of squat jumps. It’s an intense exercise, so master squat jumps first and don’t tackle tuck jumps until you can do at least ten squat jumps in a row using good form. Here’s how to do one:

•​Stand on a stable surface with feet shoulder-width apart and hands by your side.

•​Lower your body into a half squat.

•​Use your feet and arms to drive your body off the floor and into the air as you drive your knees up toward your chest.

•​Land with your knees bent on the floor.

•​Repeat.

•​Start with 2 sets of 5 reps and work up to 10 reps.

The difference between a squat jump and a tuck jump is with the tuck jump you drive your knees up toward your chest. But, be careful! Always land with your knees bent and as lightly as possible.

Plyo Push-Ups

We mentioned plyo push-ups as an effective exercise for boosting power in the upper body. Here’s how to do one:

•​Get into a push-up position.

•​Lower your body into a push-up as you would normally.

•​When you reach the bottom of the movement, push up explosively off the floor until your hands rise up off the floor.

•​Land back in a push-up position.

•​Repeat.

This is a difficult exercise, and you should be able to do 20 standard push-ups easily before trying this move. To make it easier, place your hands on a table or high bench as opposed to the floor. You may only be able to do a few initially, but keep at it!

Medicine Ball Throws

Medicine ball throws are another upper body power exercise, but they also work your hamstrings and glutes as your glutes generate some of the power that allows you to thrust the ball overhead. Here’s how to do one:

•​Stand on a stable surface with feet shoulder-width apart. Hold the medicine ball in front of you between your two hands with elbows bent.

•​While holding the underside of the ball in your hands, bend your knees and push your hips back into a quarter squat as you explosively toss the ball overhead.

•​The ball will land behind your body.

•​Pick up the ball and repeat.

It’s best to do this exercise outdoors so you don’t have to worry about hitting the ceiling. This is also an excellent drill if you play a variety of sports, particularly basketball or volleyball. If you do this exercise consistently, you’ll likely find your performance on upper body strength exercises, like push-ups too.

Hurdle Hops

Hurdle hops is a good exercise for improving lower body power and the ability to move your body laterally.

•​Place a marker several inches long on the floor. You can use a piece of tape or a rolled-up towel.

•​Lower your body into a quarter squat and jump both feet over the marker as you swing your arms upward.

•​Land in a quarter squat on the other side of the marker.

•​Repeat the movement to get back to the other side.

•​Alternate back and forth.

•​Start with 3 sets of 10 hops and work up to 20.

A harder variation is to hop over the marker on one foot. Doing this will improve your sense of dynamic balance too. But don’t try it until you’re comfortable with a basic hurdle hop.

Conclusion

You can include these drills at the beginning or end of a workout or do an entire circuit of power drills by alternating between these exercises. Be sure to warm up beforehand. You can even use time rather than repetitions. For example, do the first exercise for 30 seconds. Switch to the second exercise for 30 seconds and keep cycling between exercises. You’ll find your power performance will improve quickly using these drills!

References:

J Sports Sci Med. 2017 Dec; 16(4): 527-535.

European Journal of Experimental Biology, 2012, 2 (4):1124-1128.


.